Cloud storage destinations marked in green are supported.
Cloud storage destinations marked in green are supported.
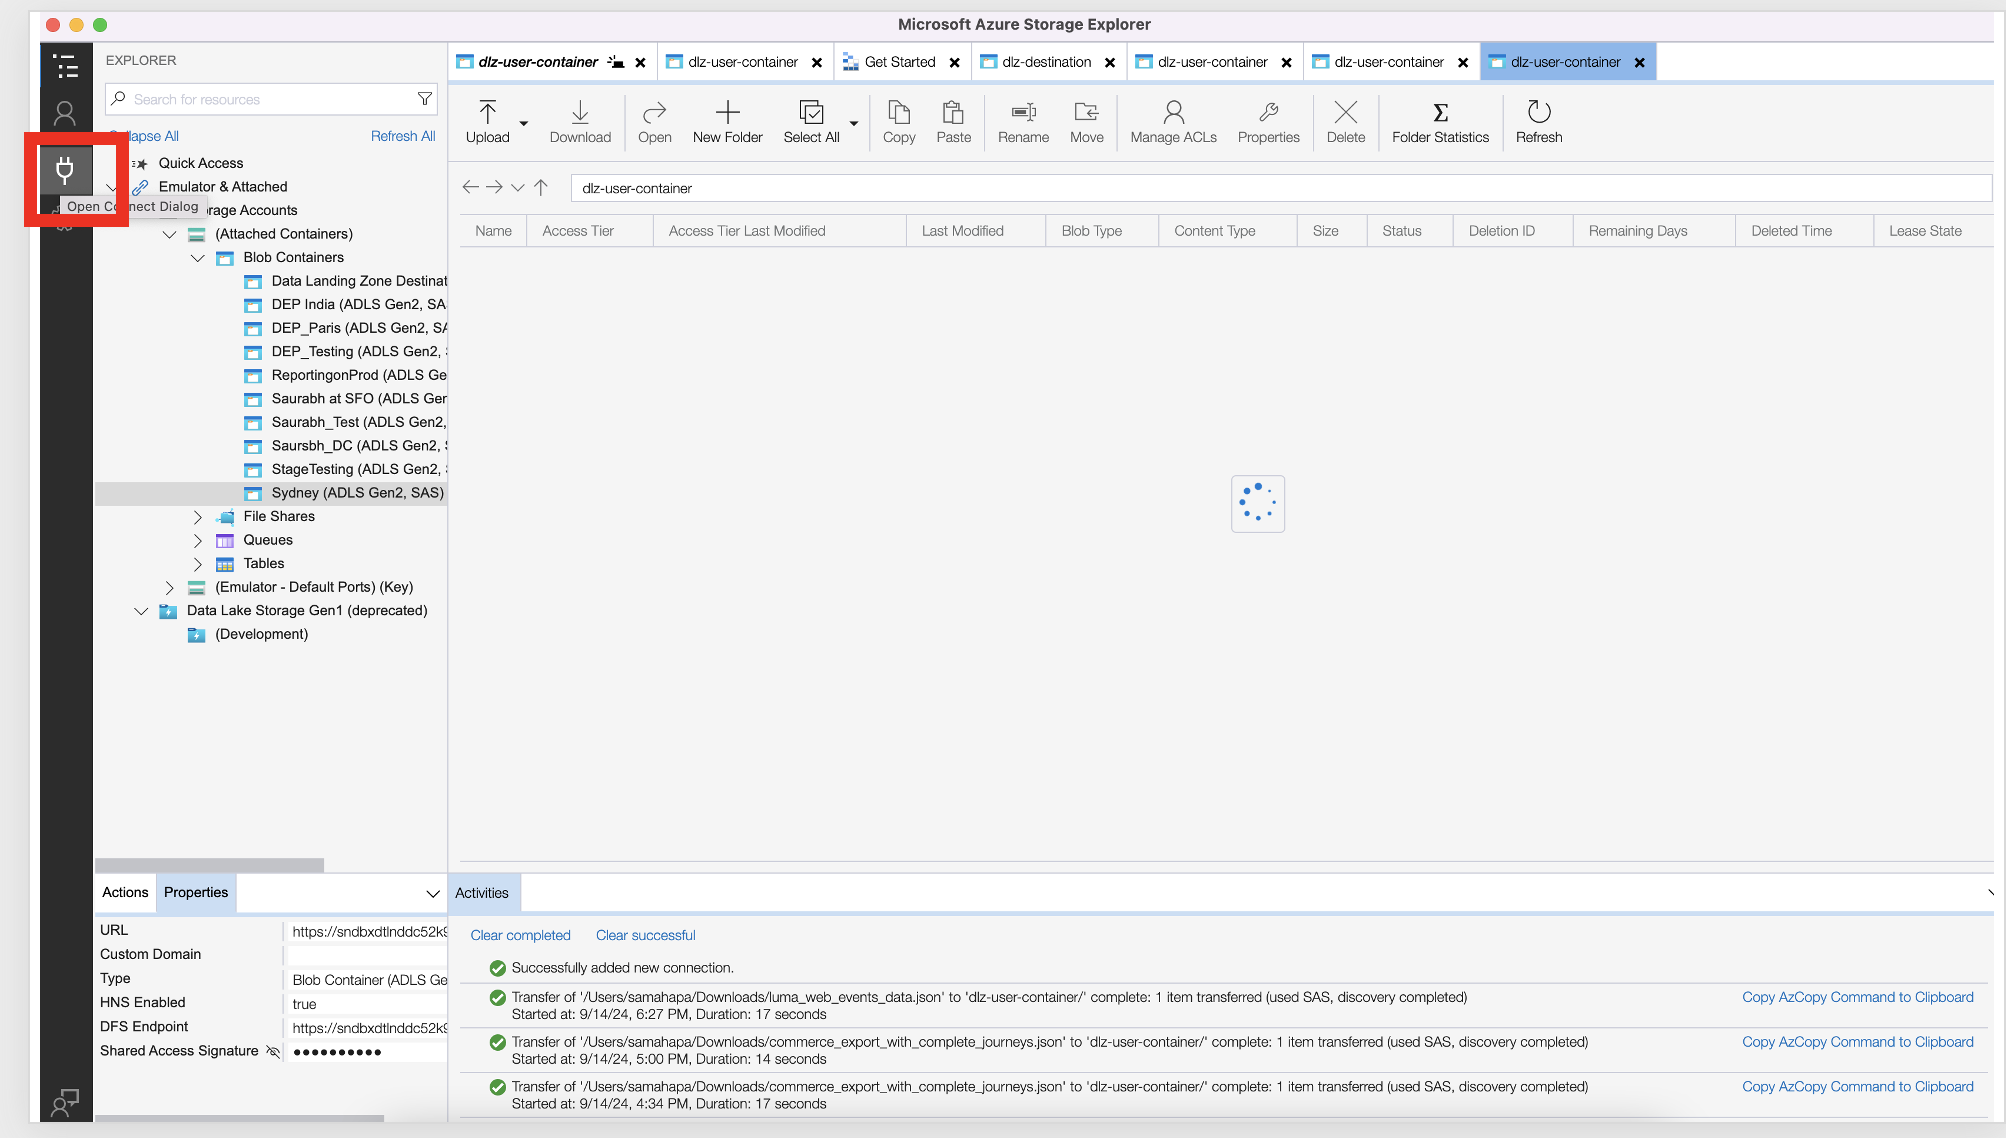
Click on the plug icon

Click on ADLS Gen2 container or directory
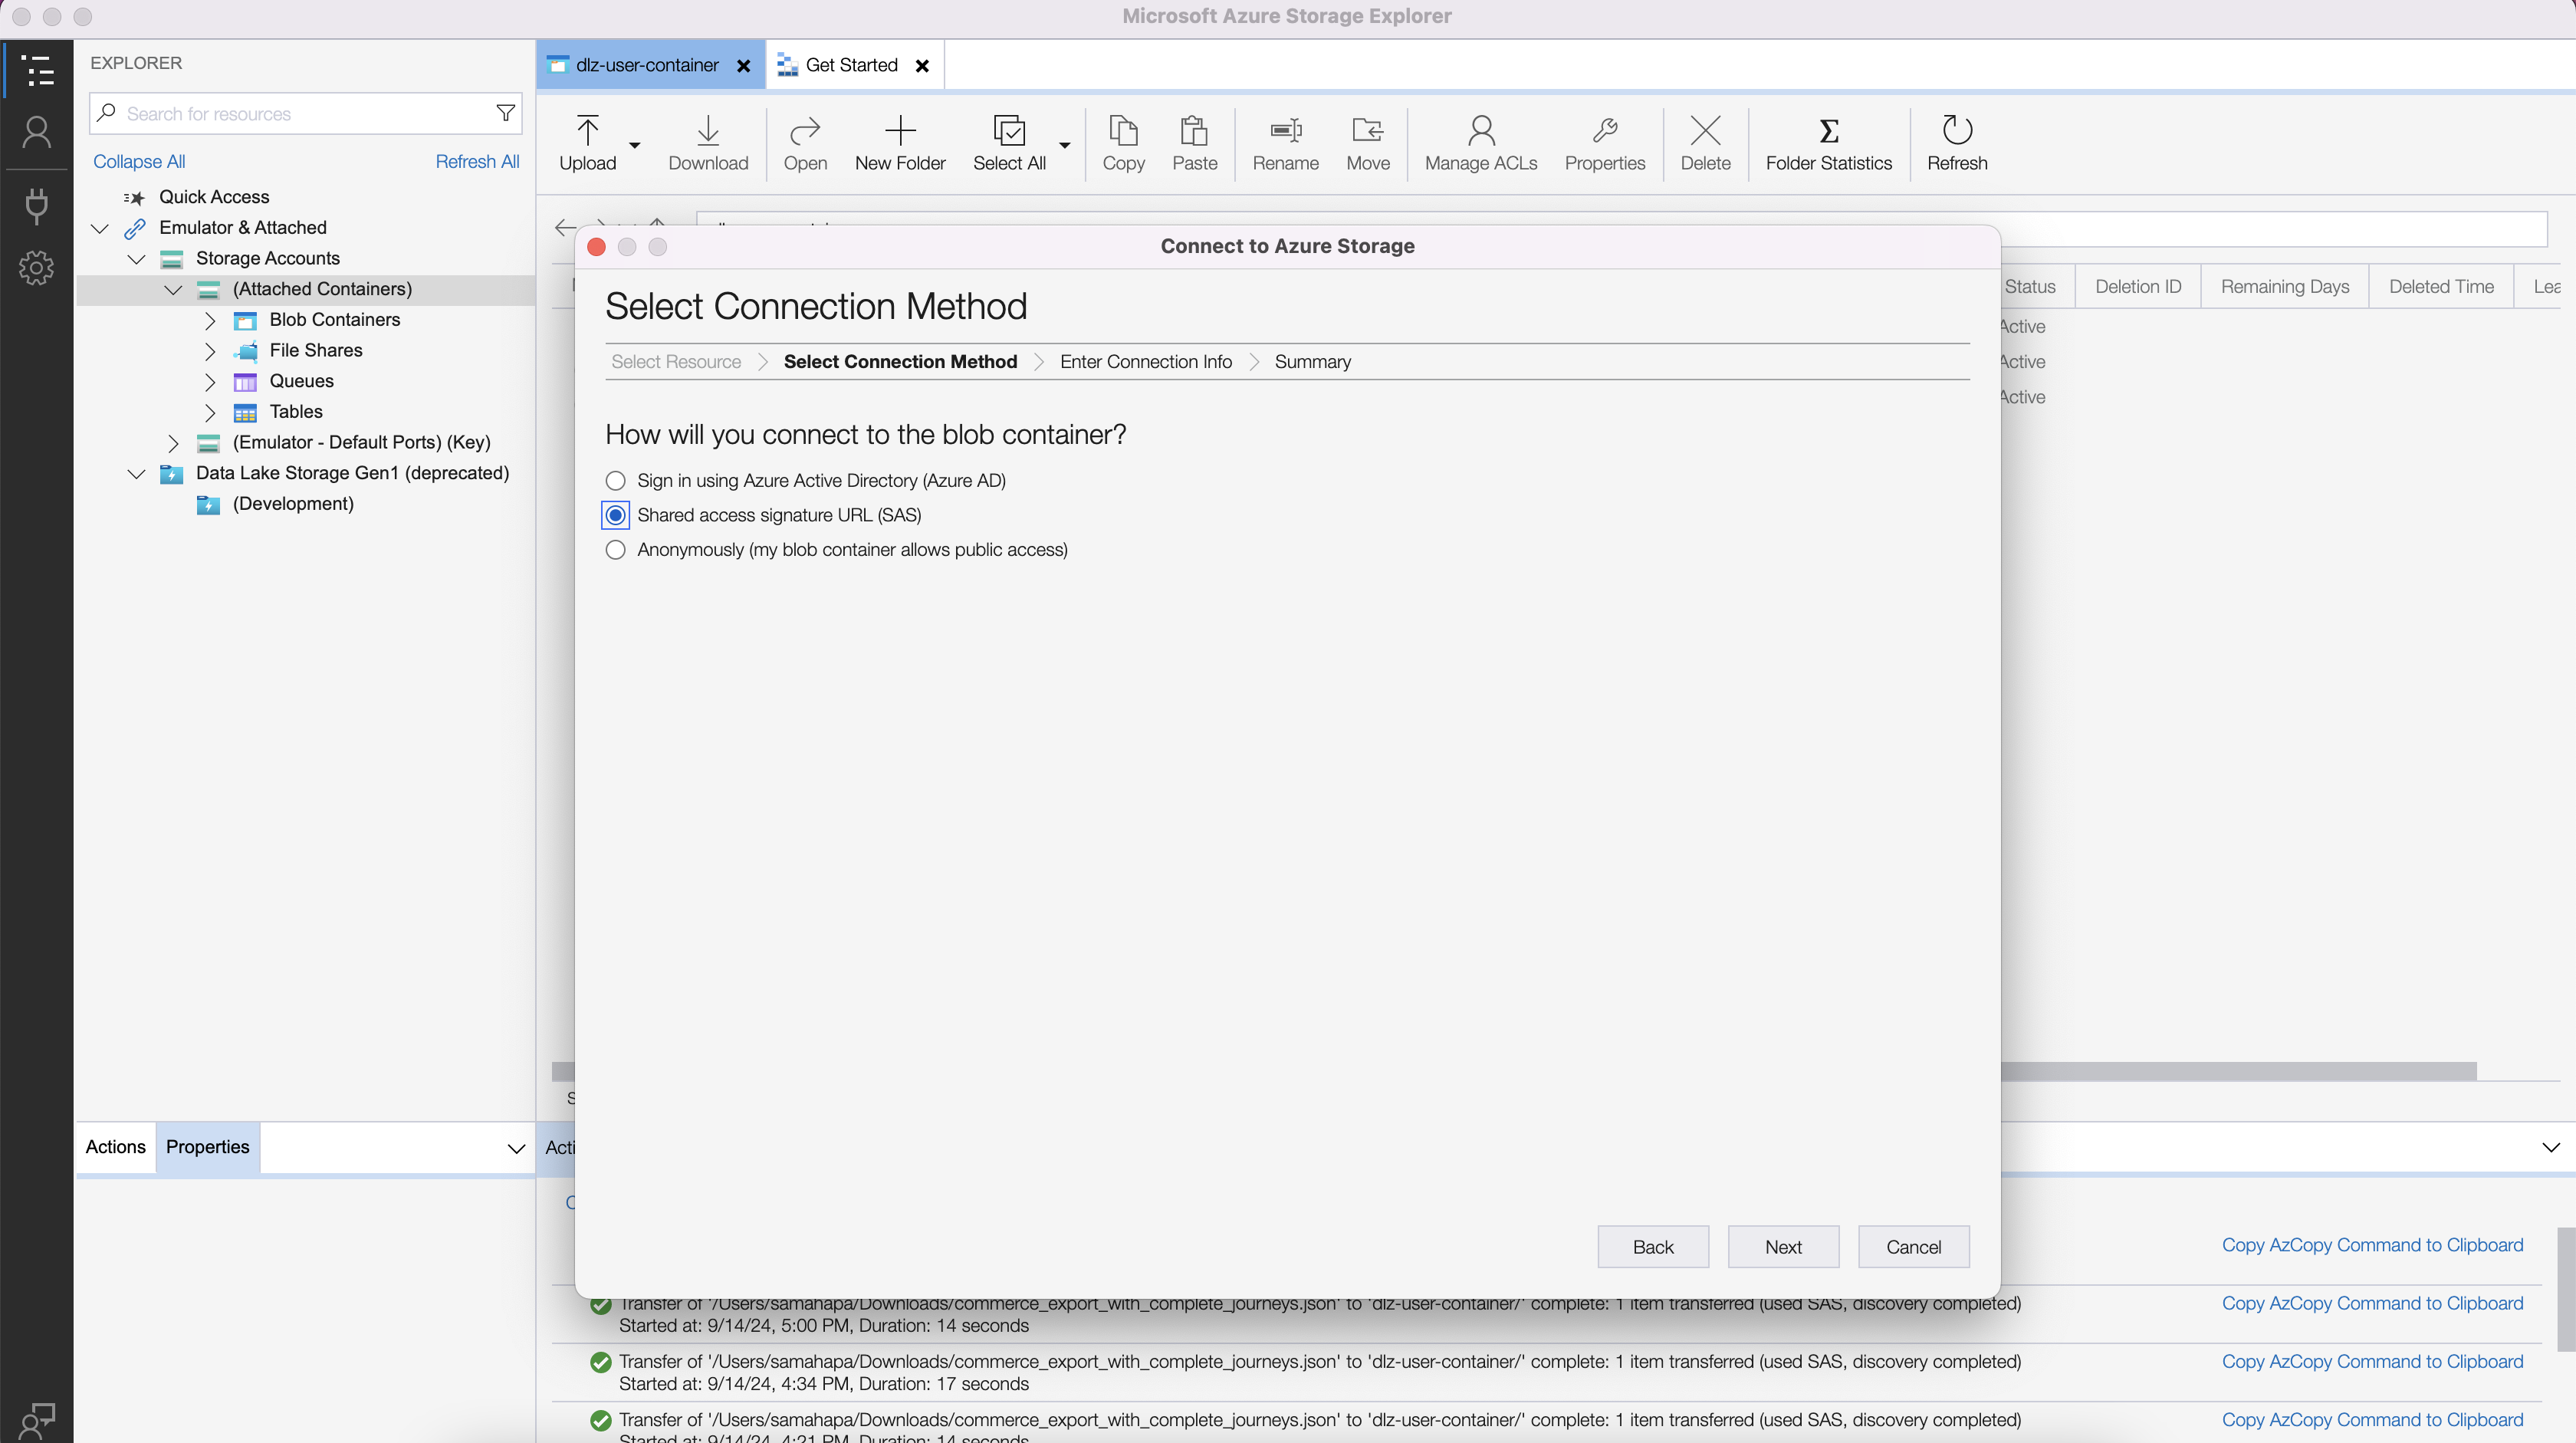
Choose SAS URI option
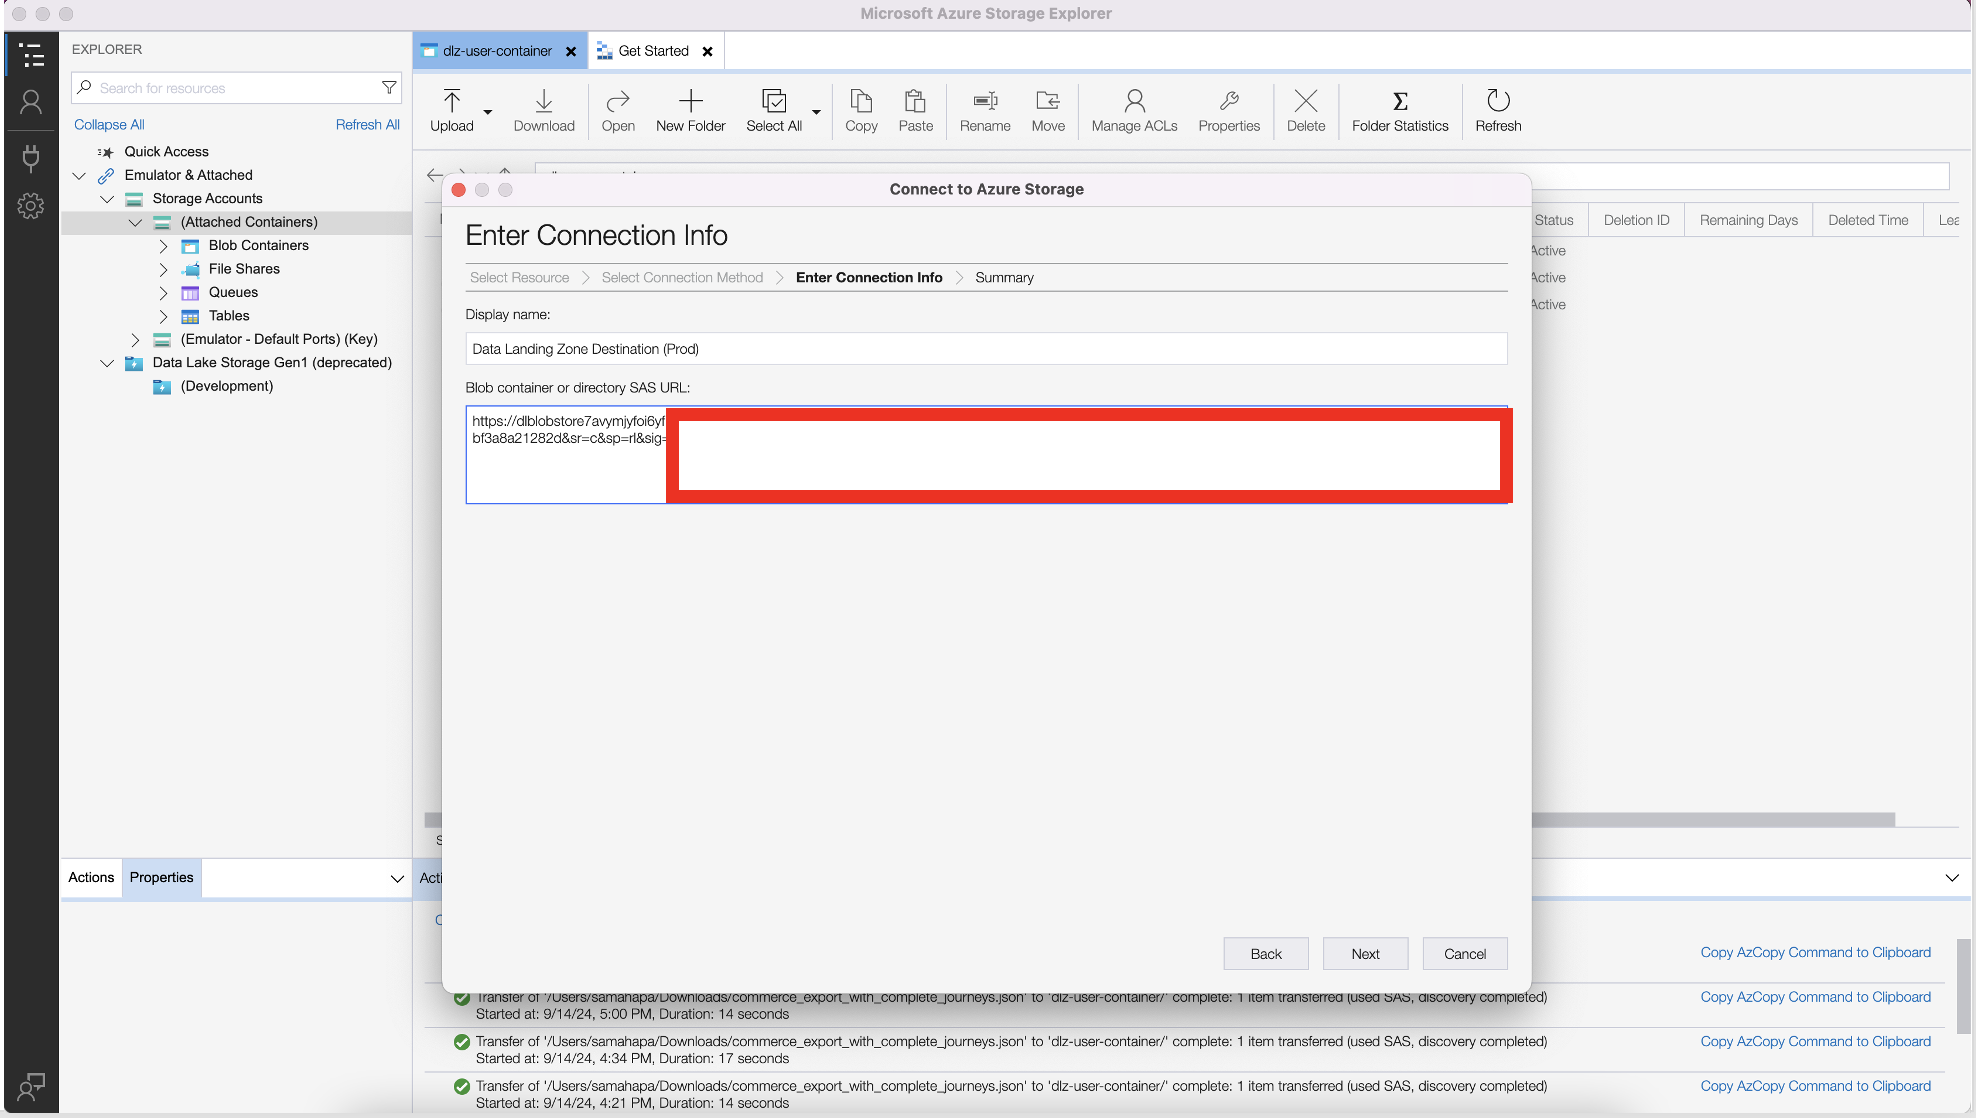
Copy the SAS URI and choose a name for the DLZ container. Note that the SAS URI is copied from the results of the execution of the Python code above.
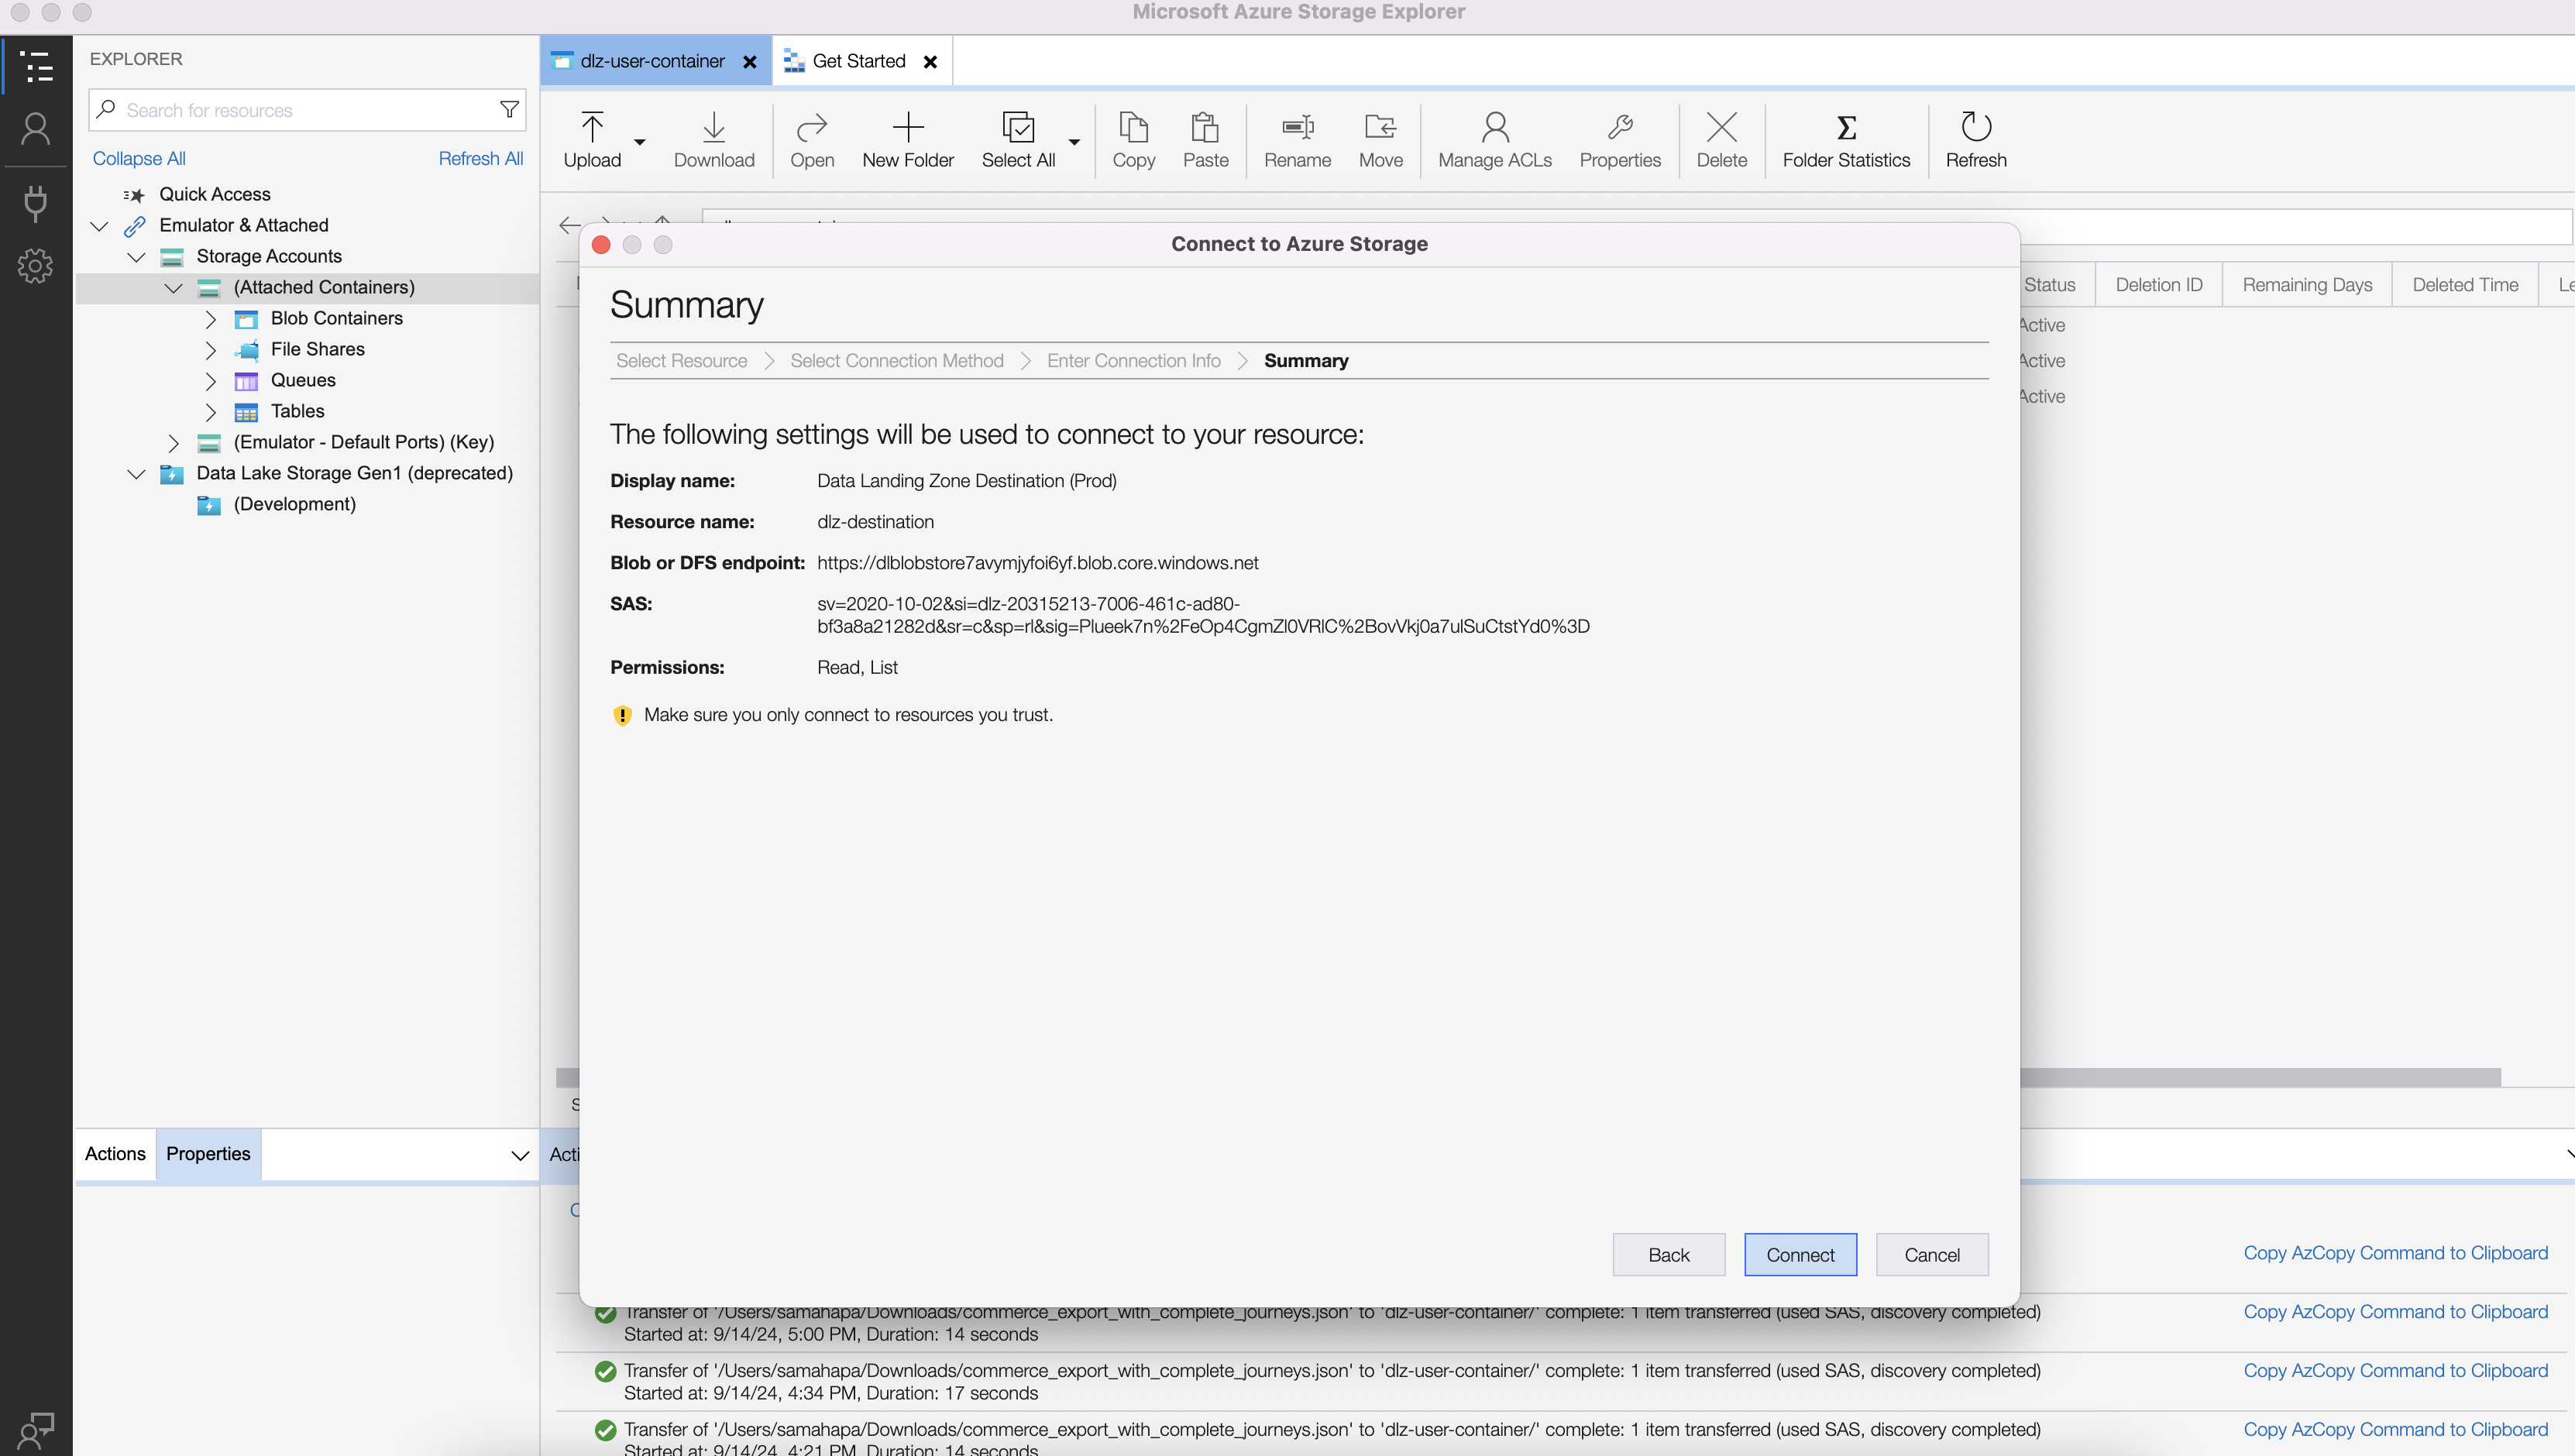
Click on Connect
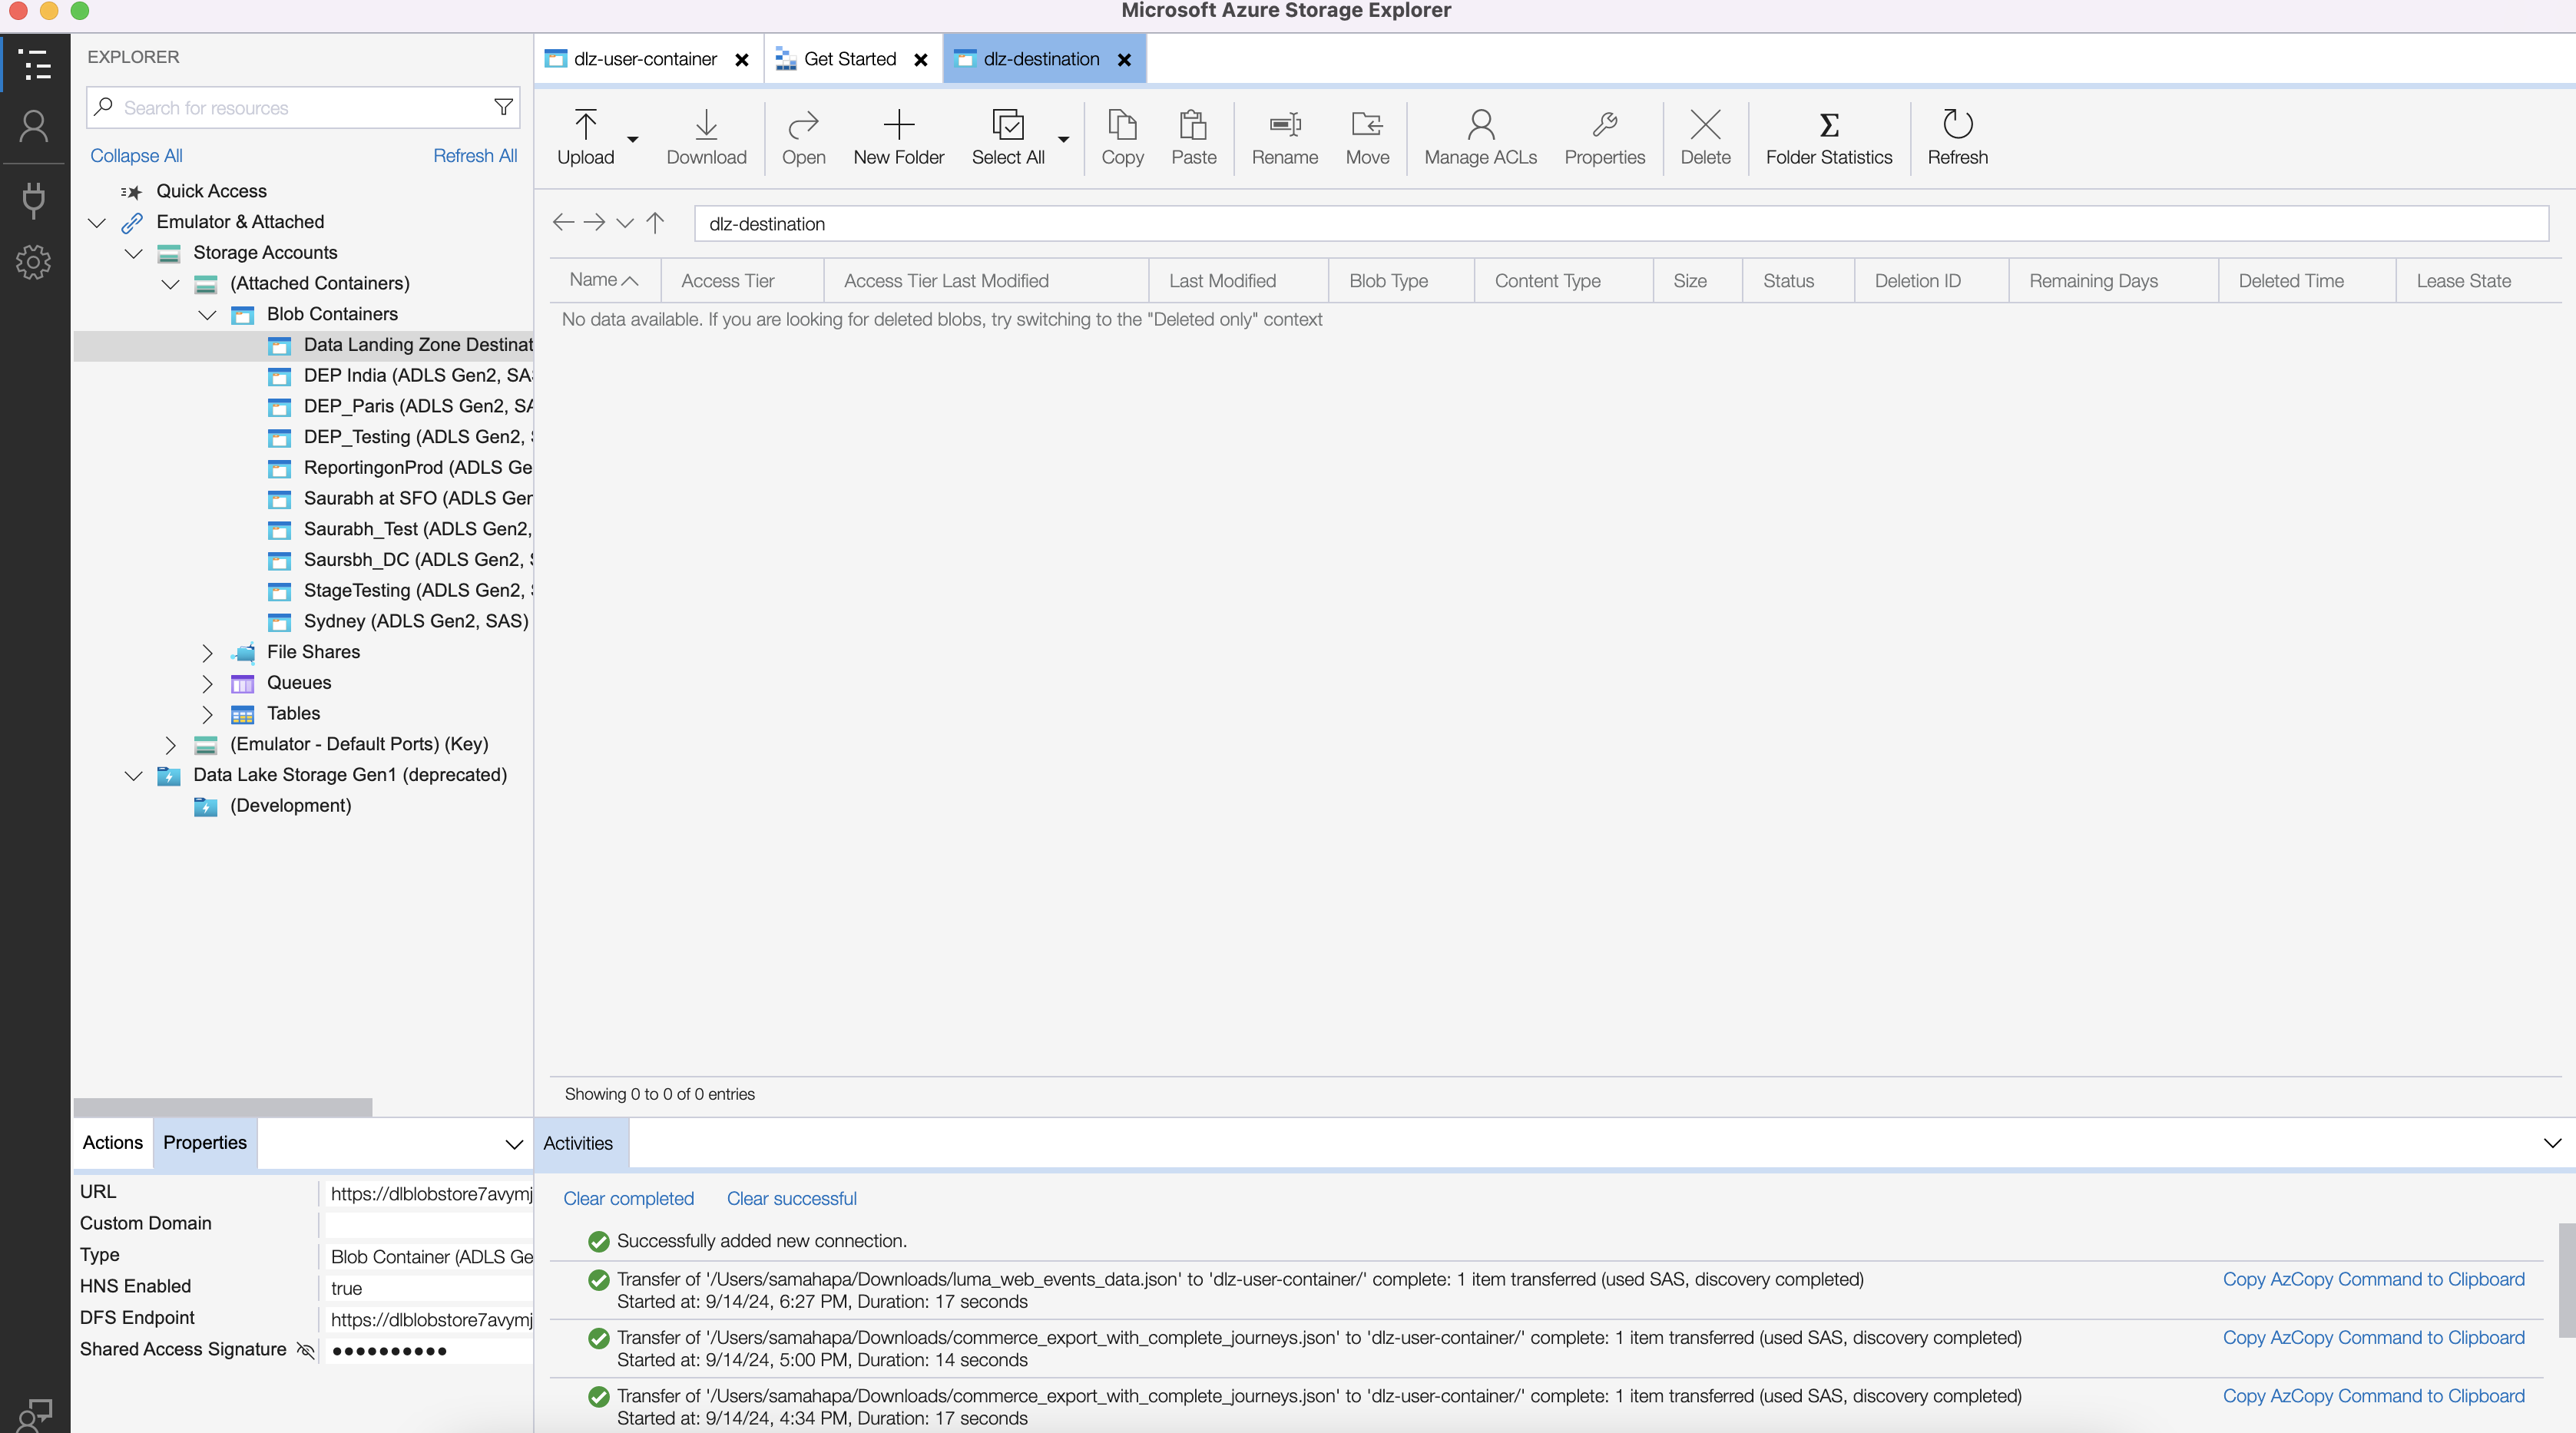
Connection is complete. You should see the files exported here,
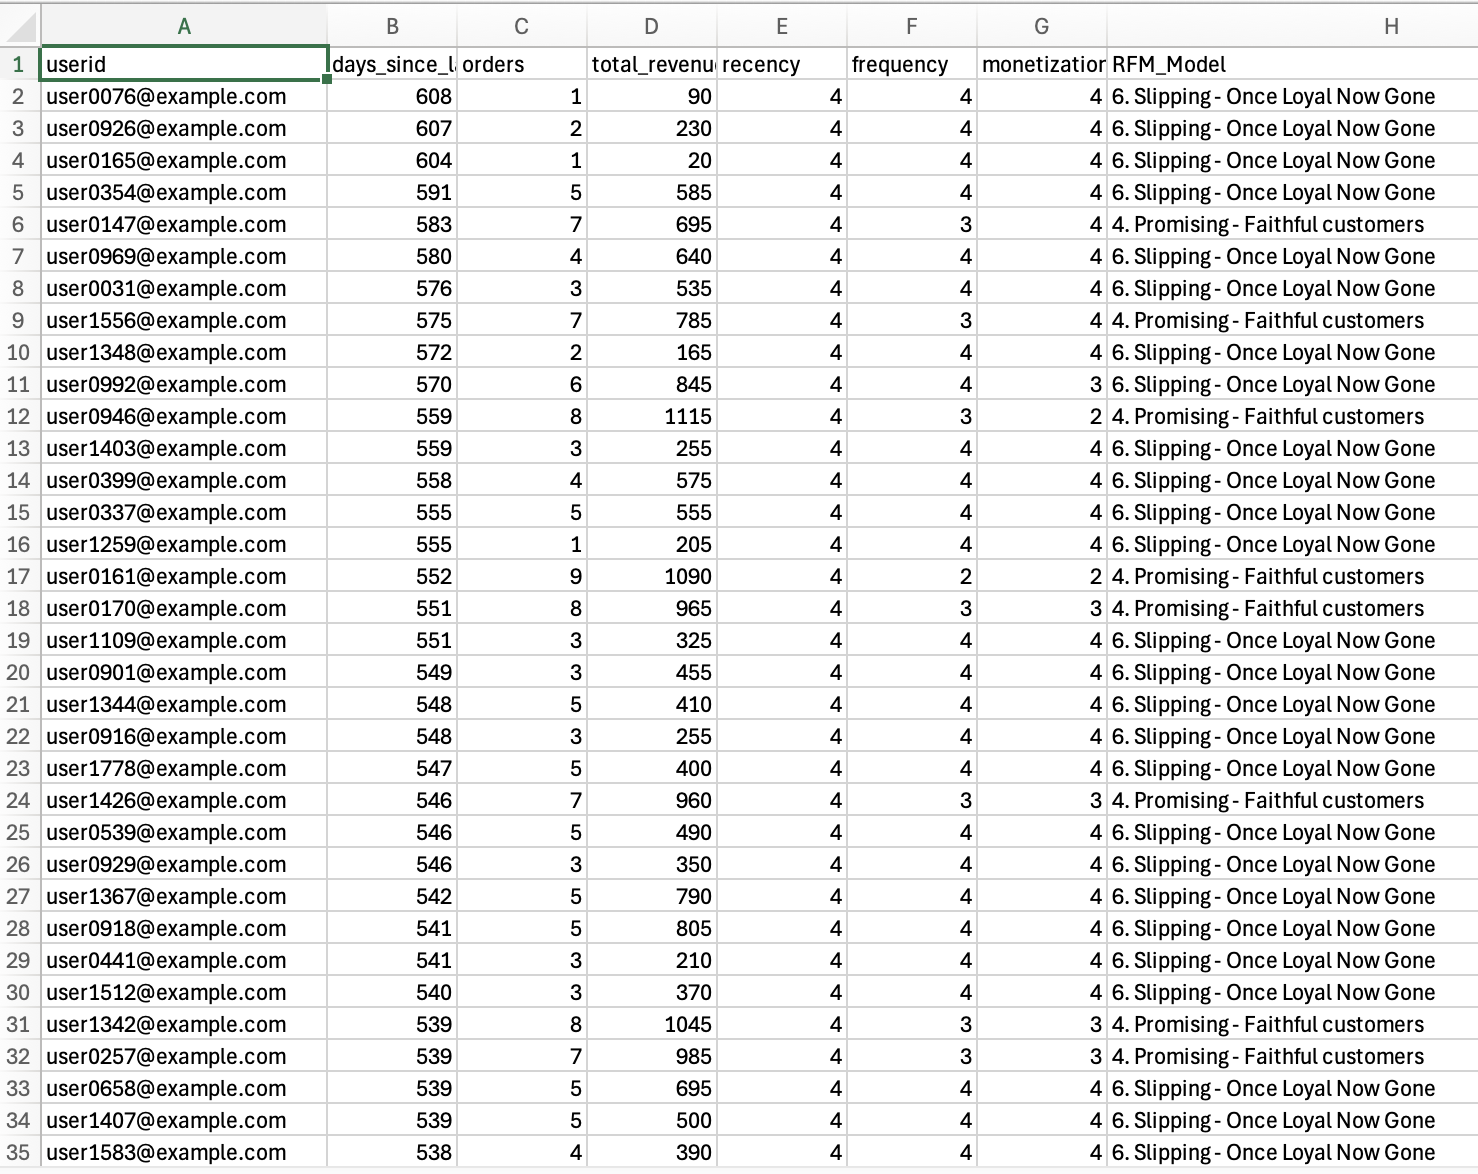
RFM data with anonymized email
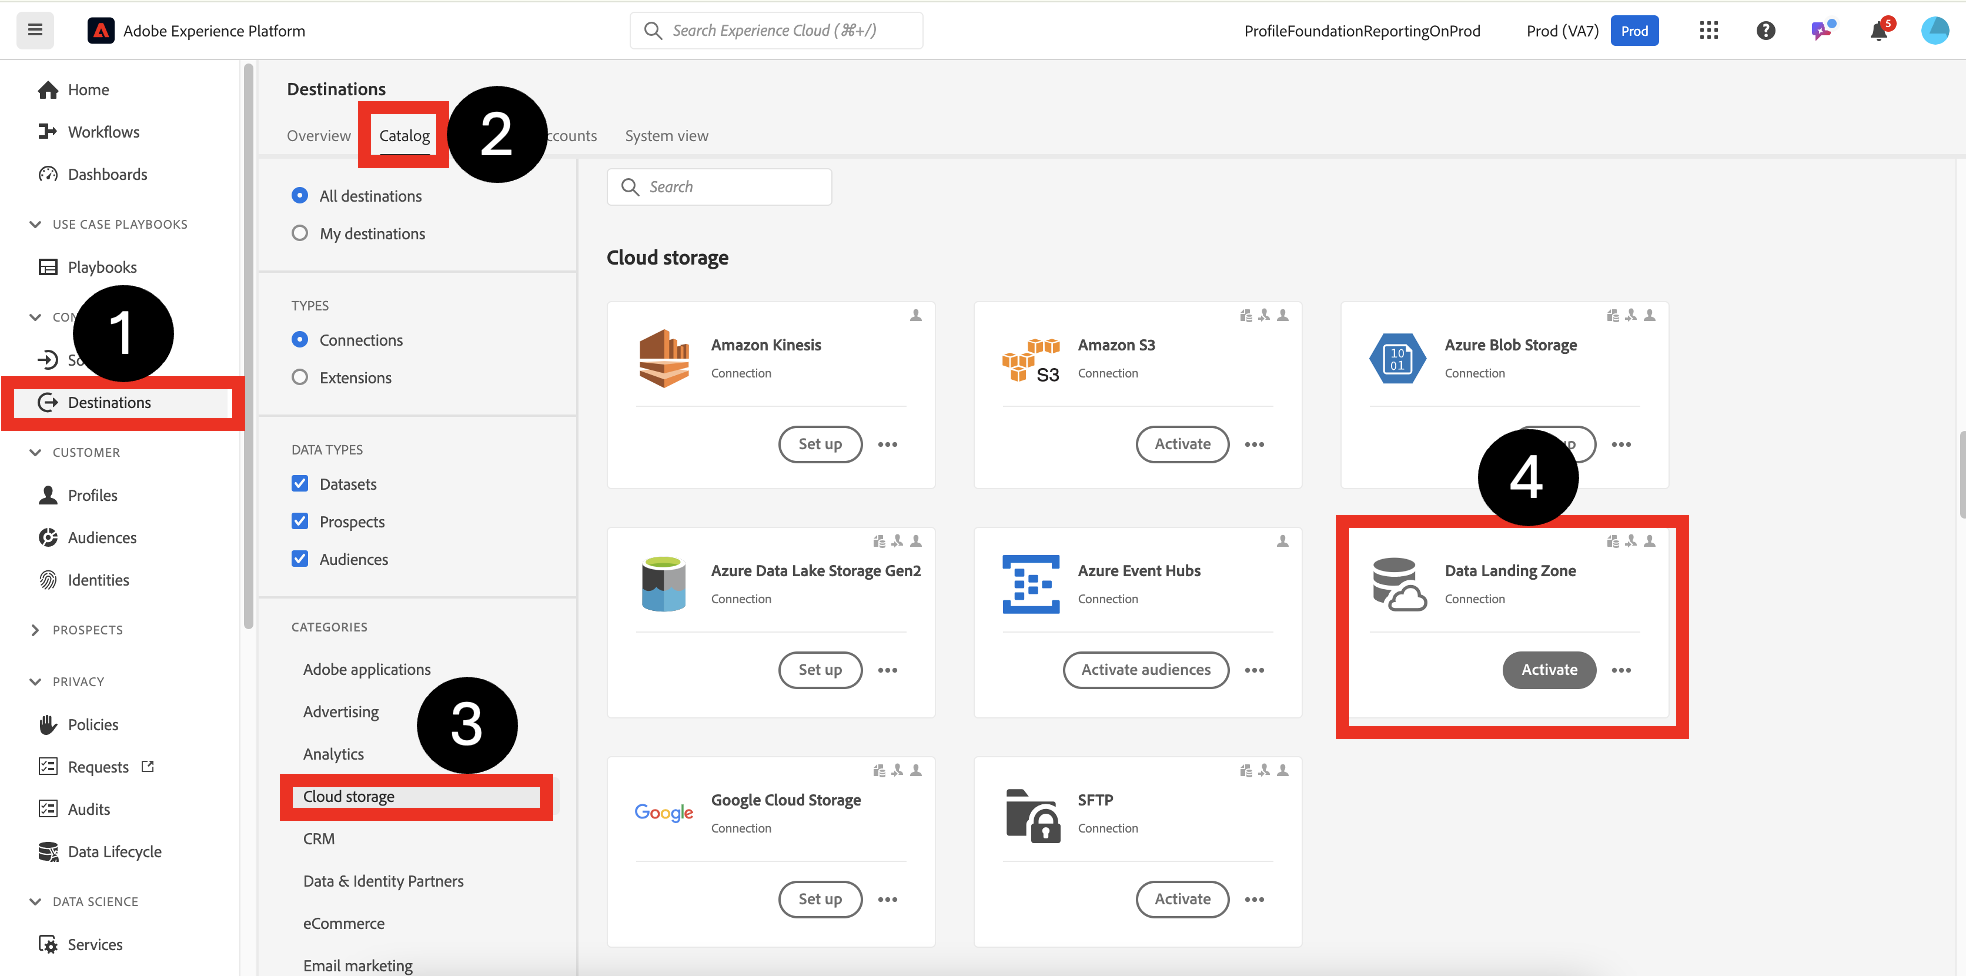
Navigate to Connections->Destinations->Catalog->Cloud Storage->Data Landing Zone. Click Activate.
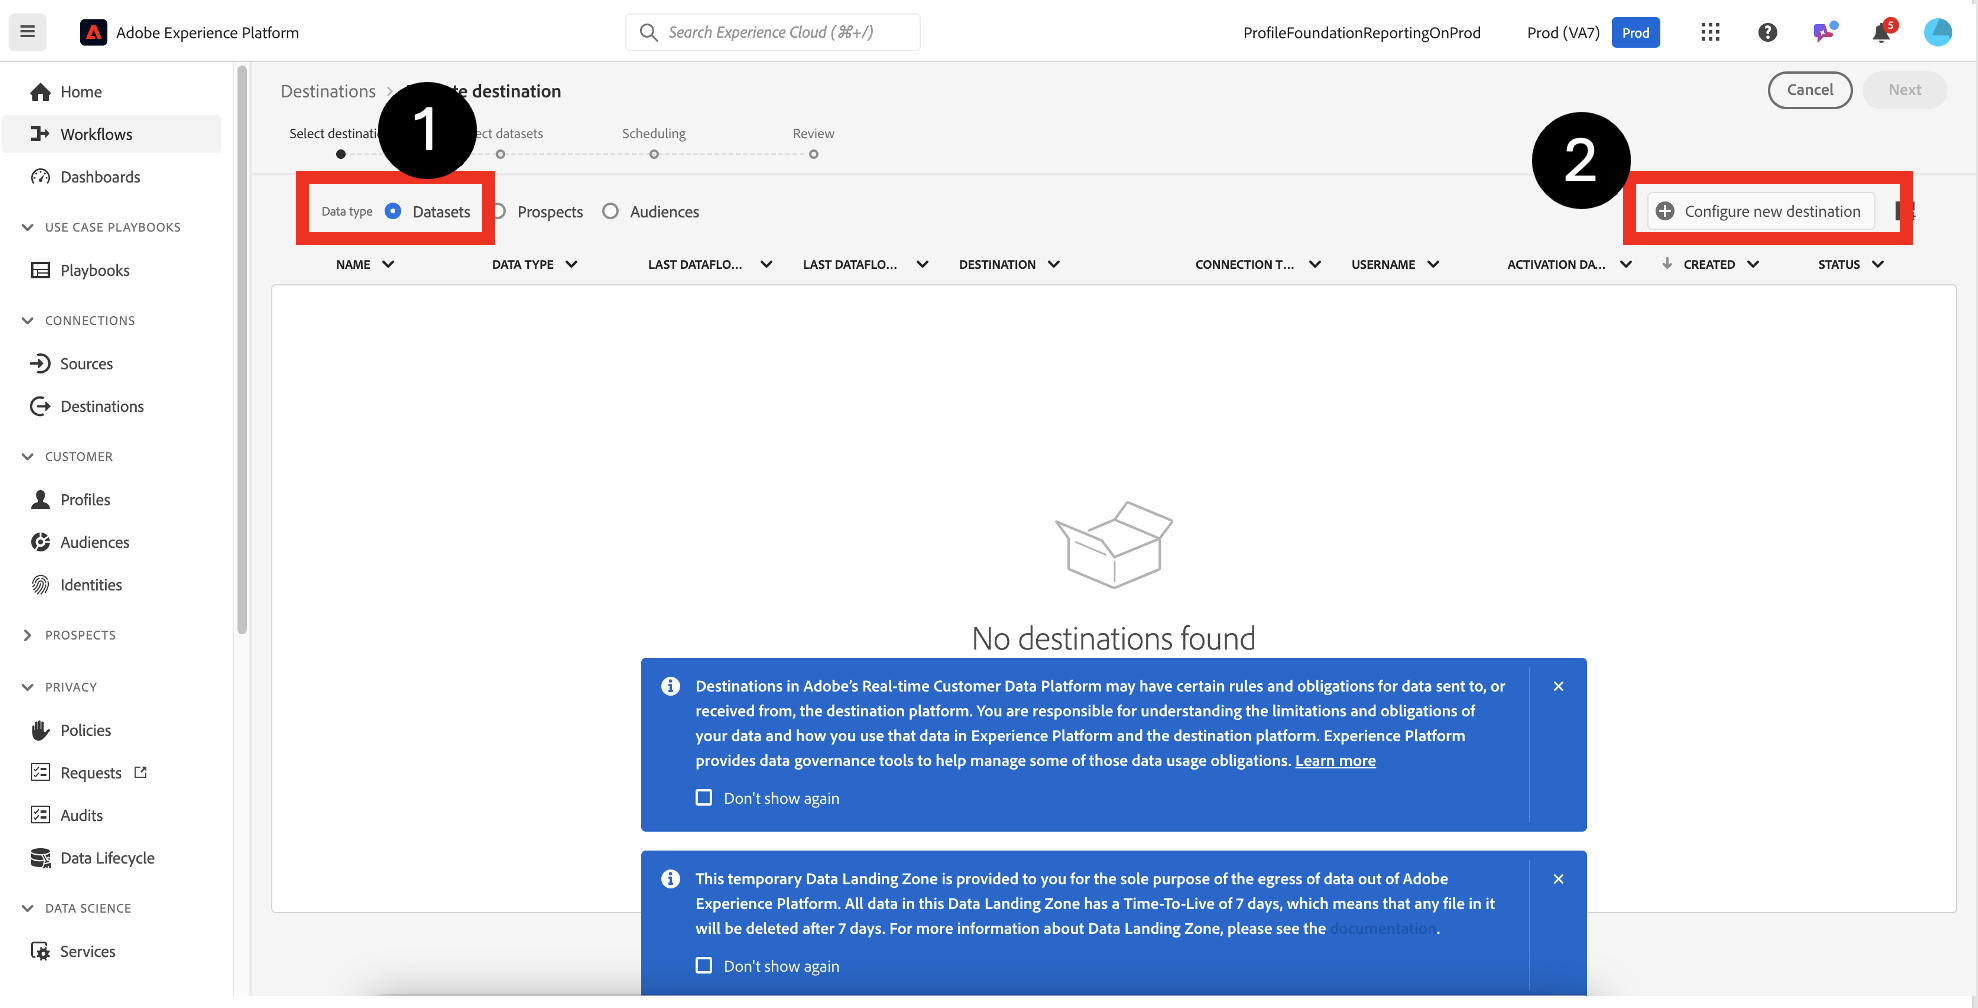
Choose Datasets intead of audiences
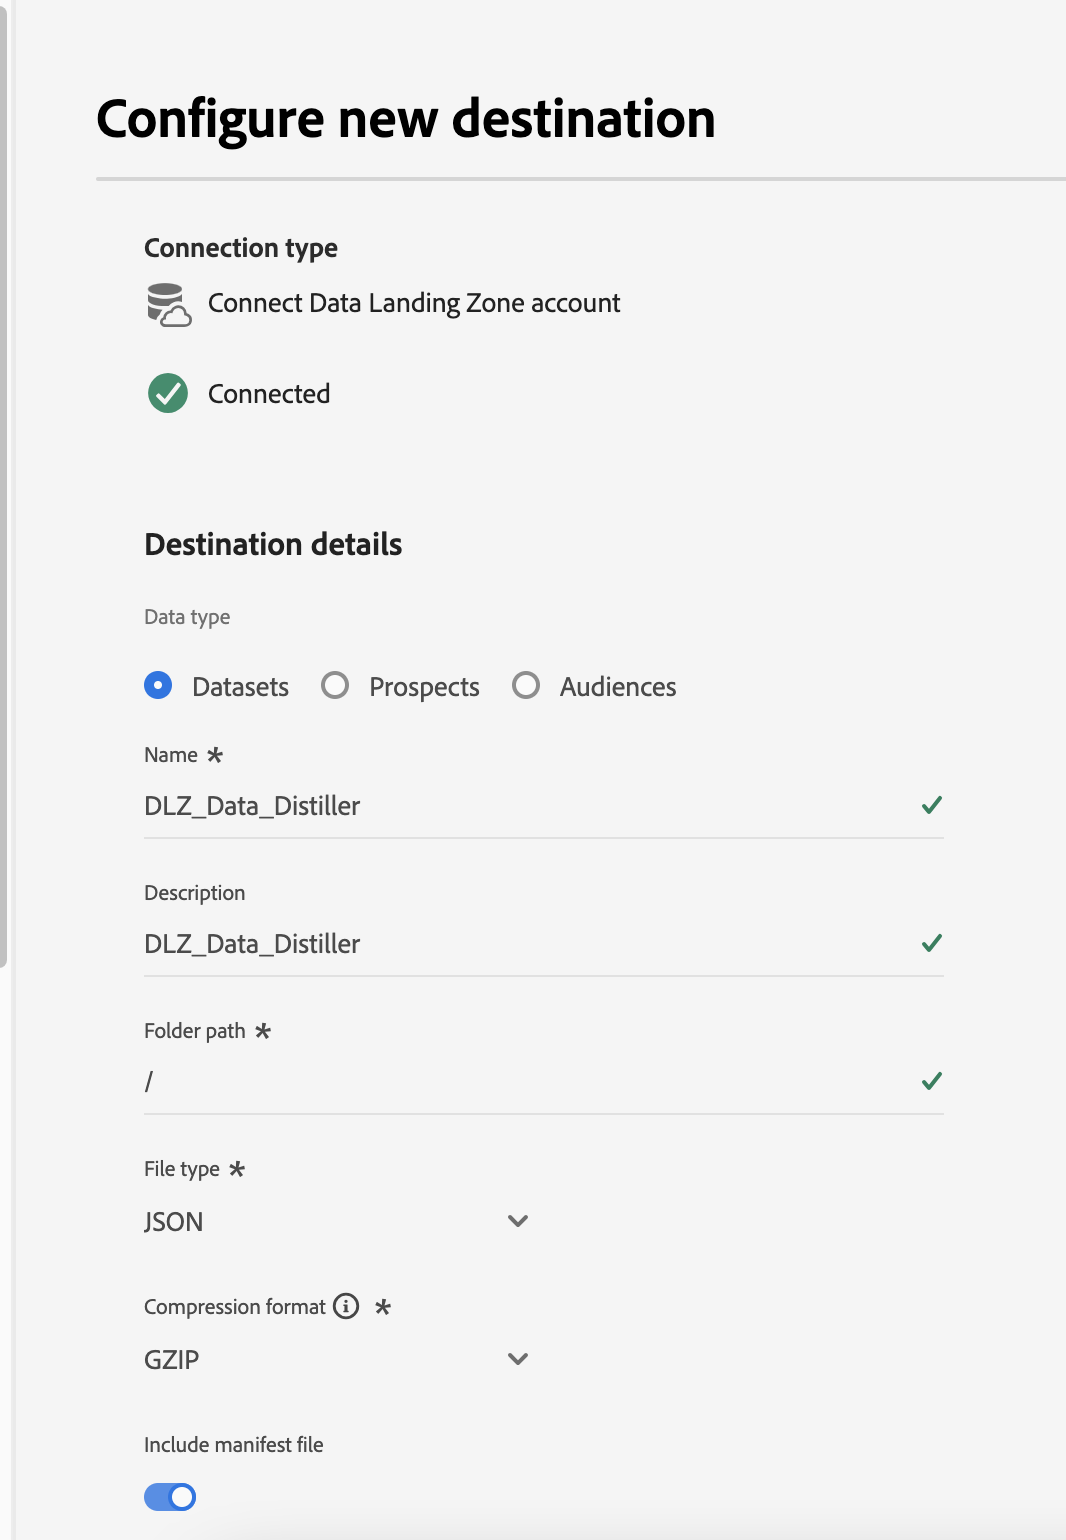
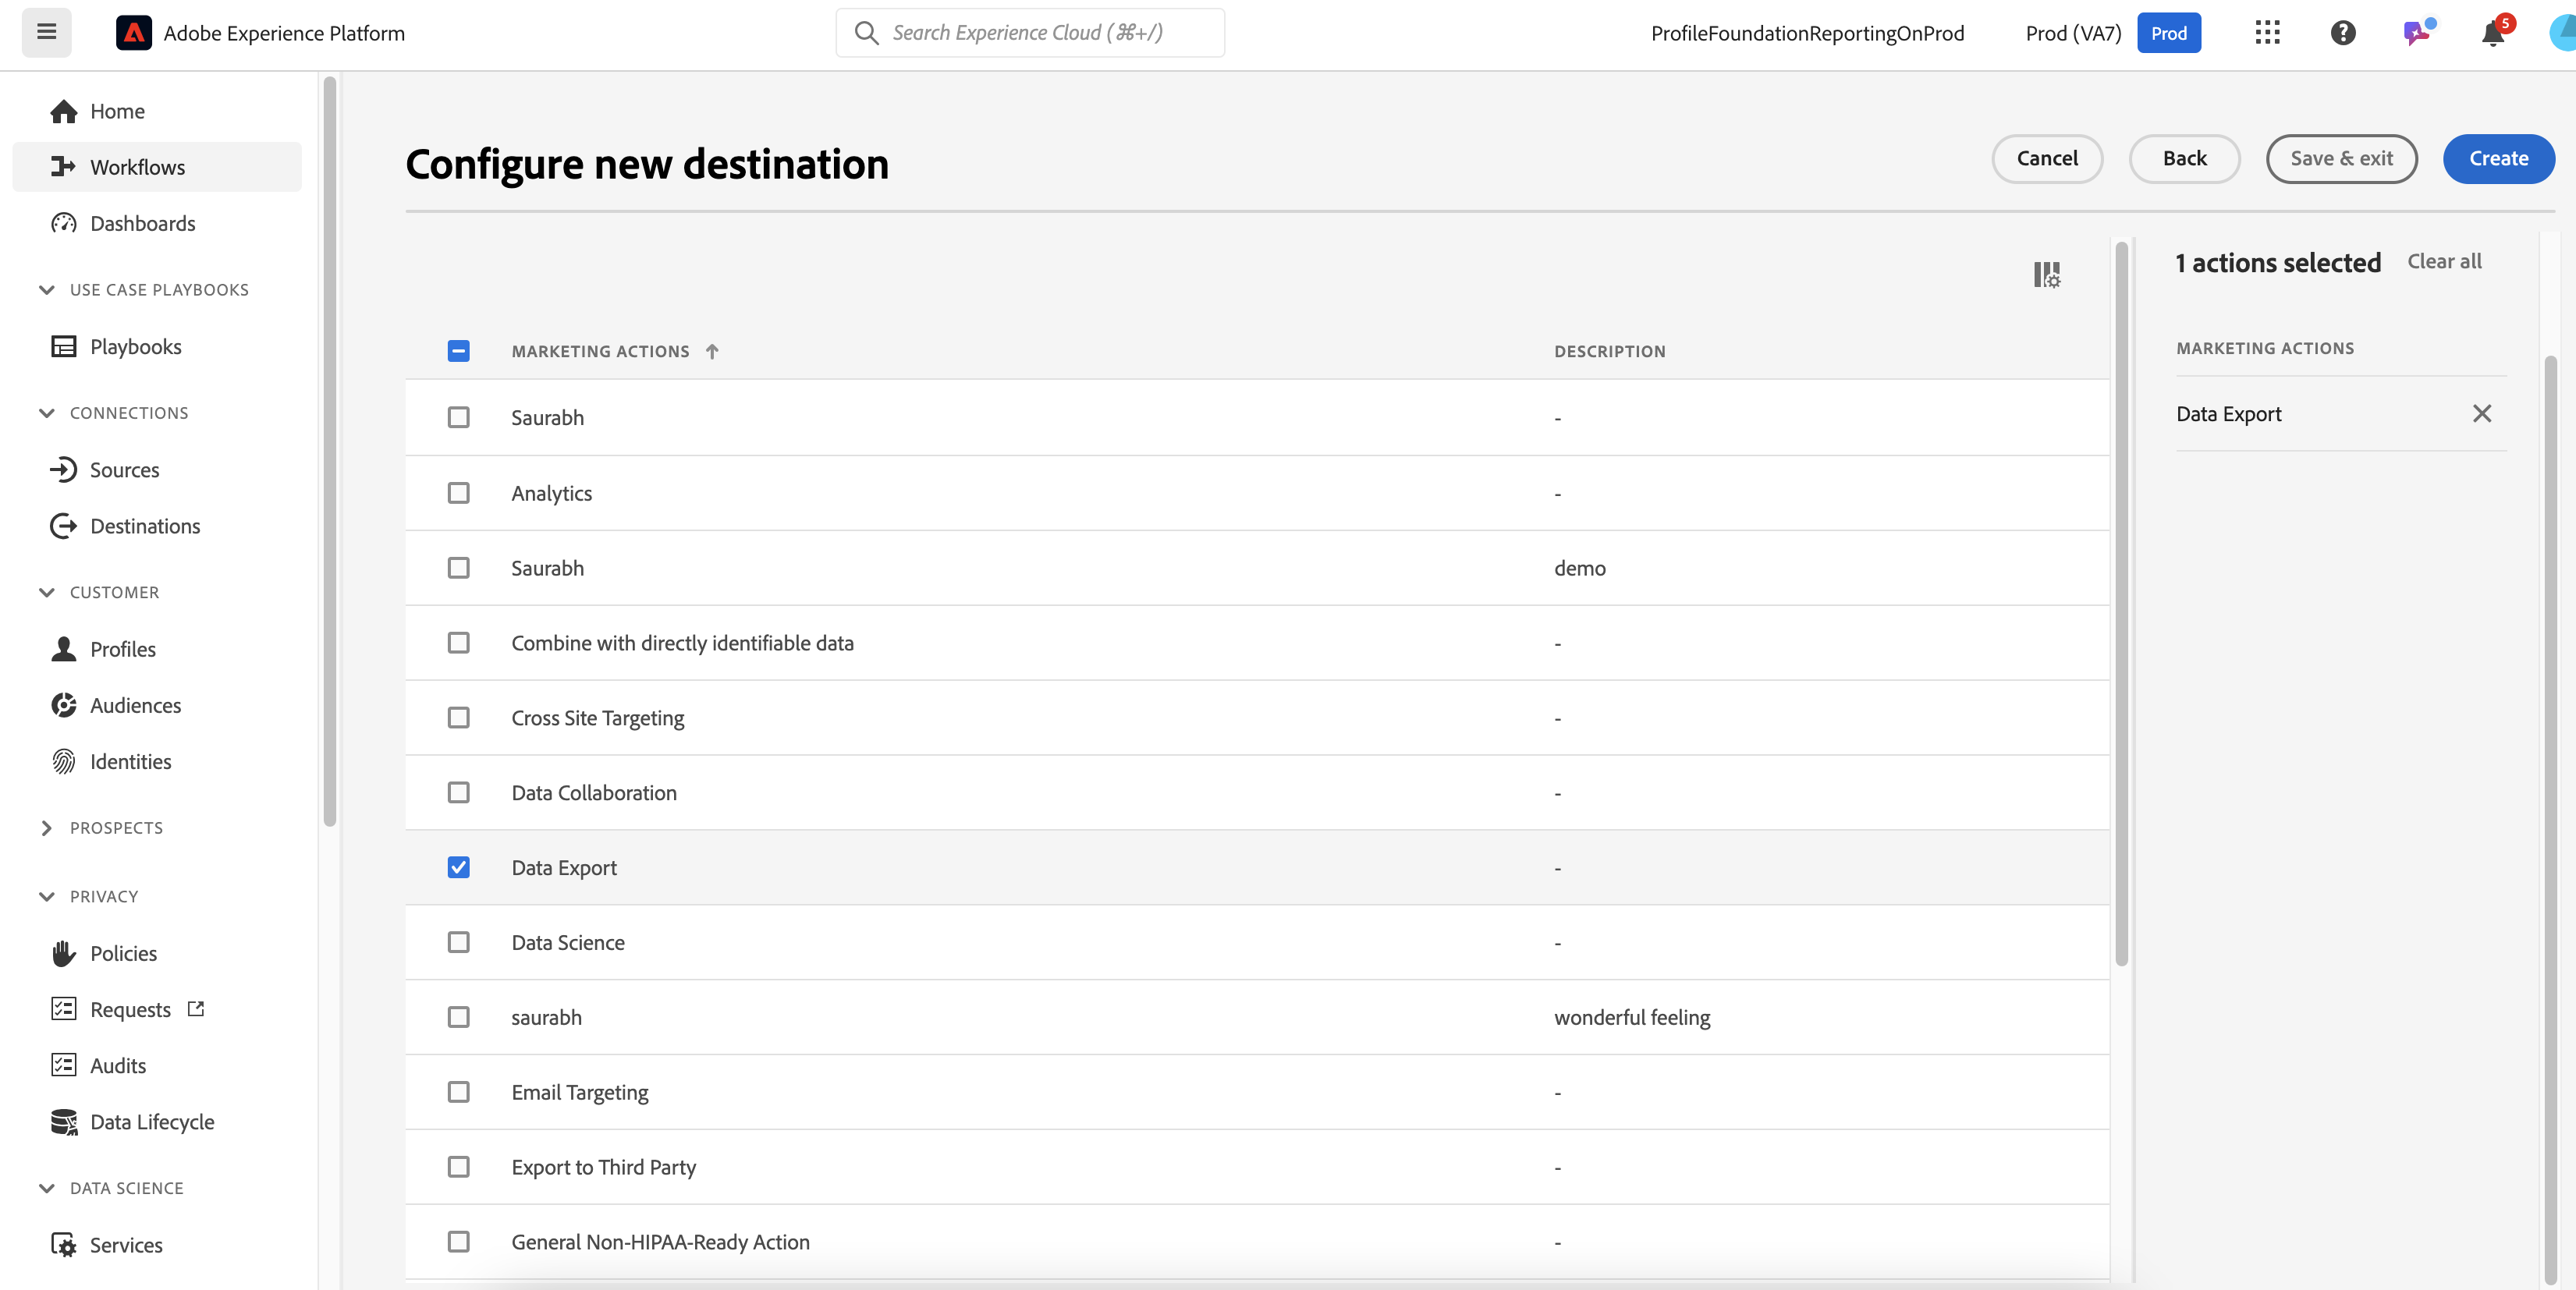
Basic setup
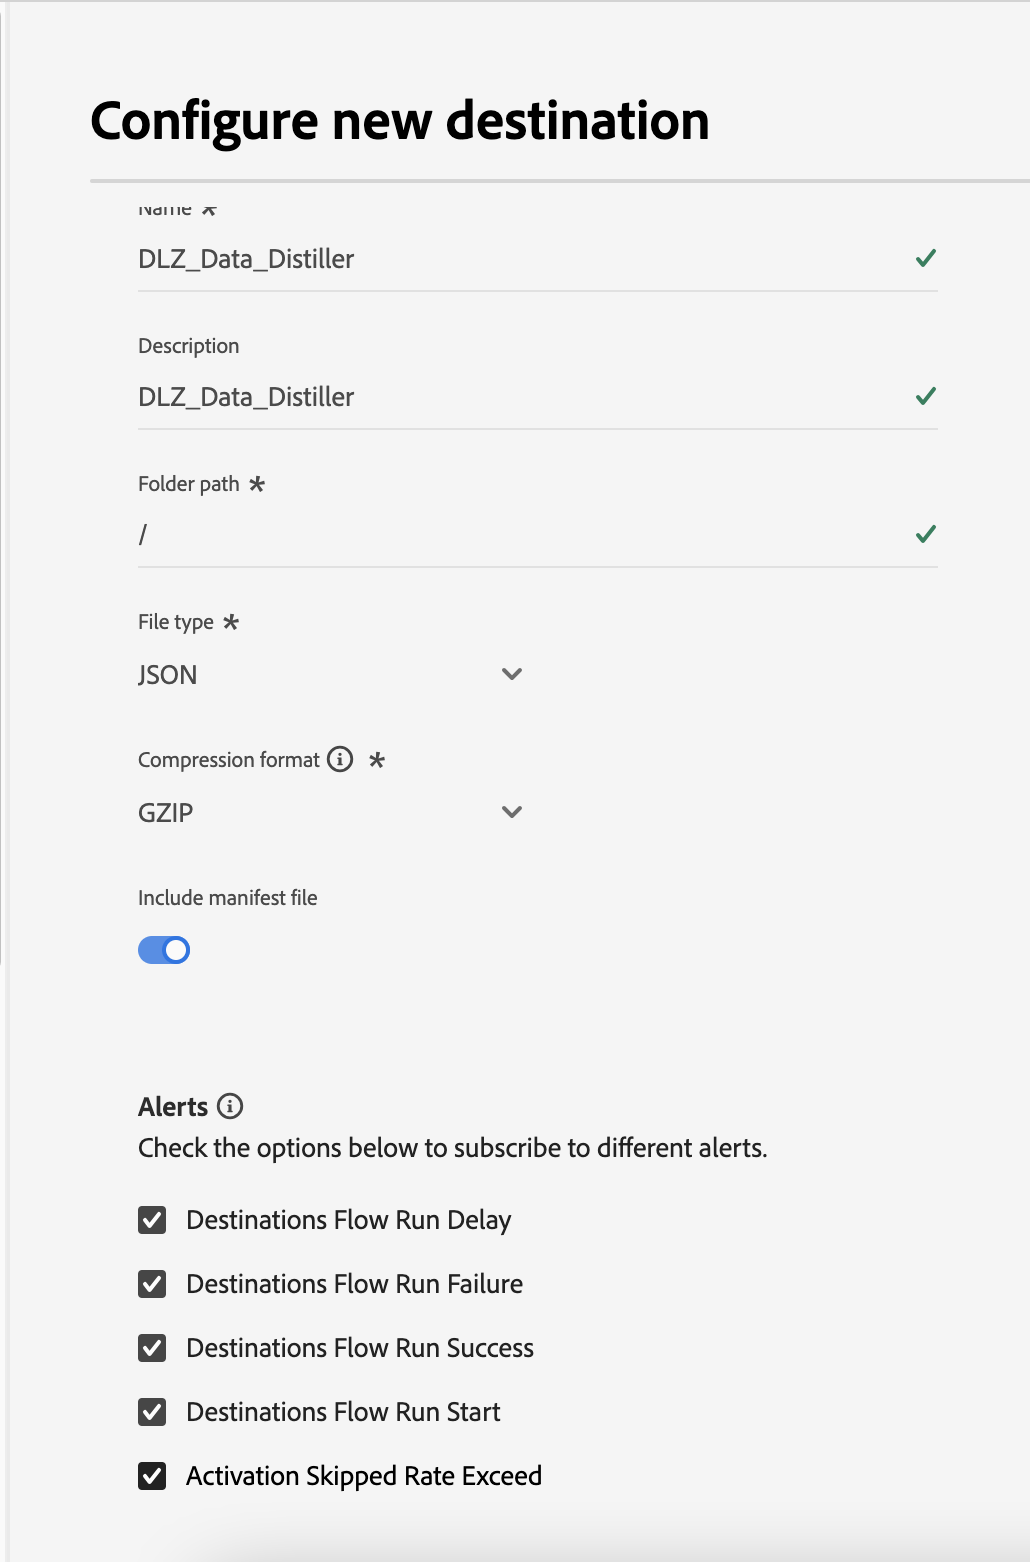
Choose the alerts
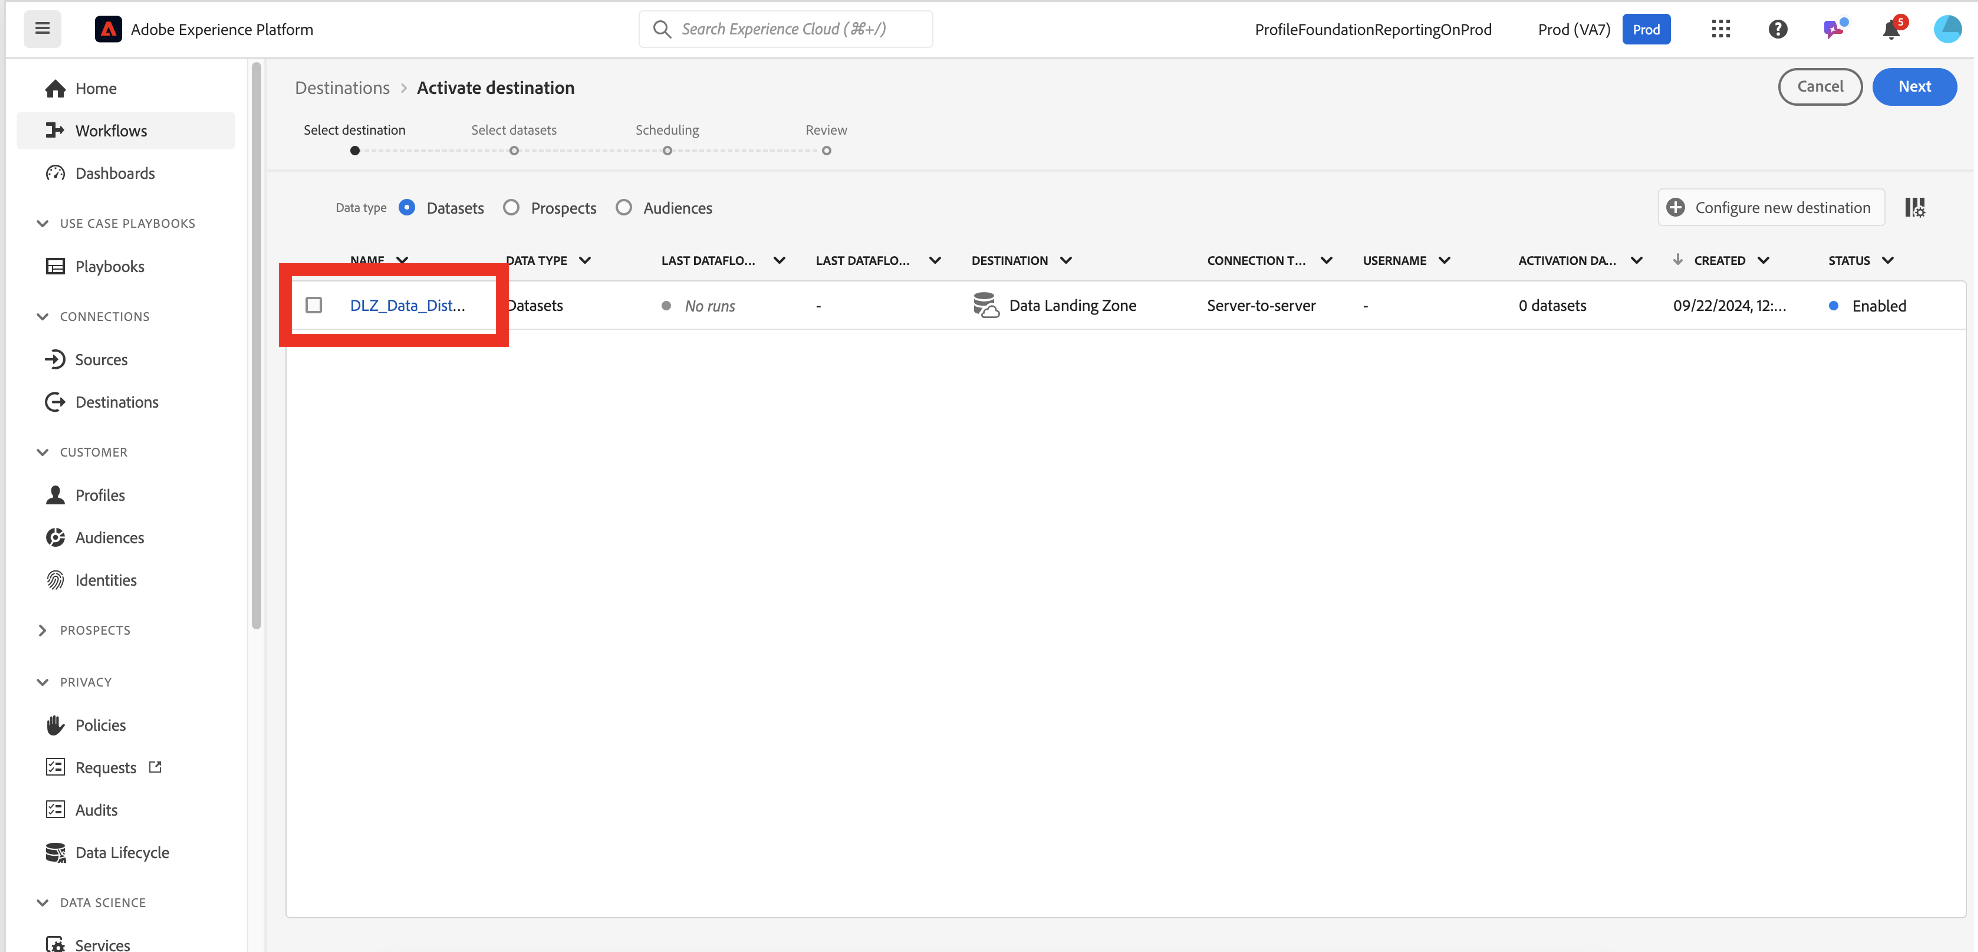
Click on the Destination Account created.
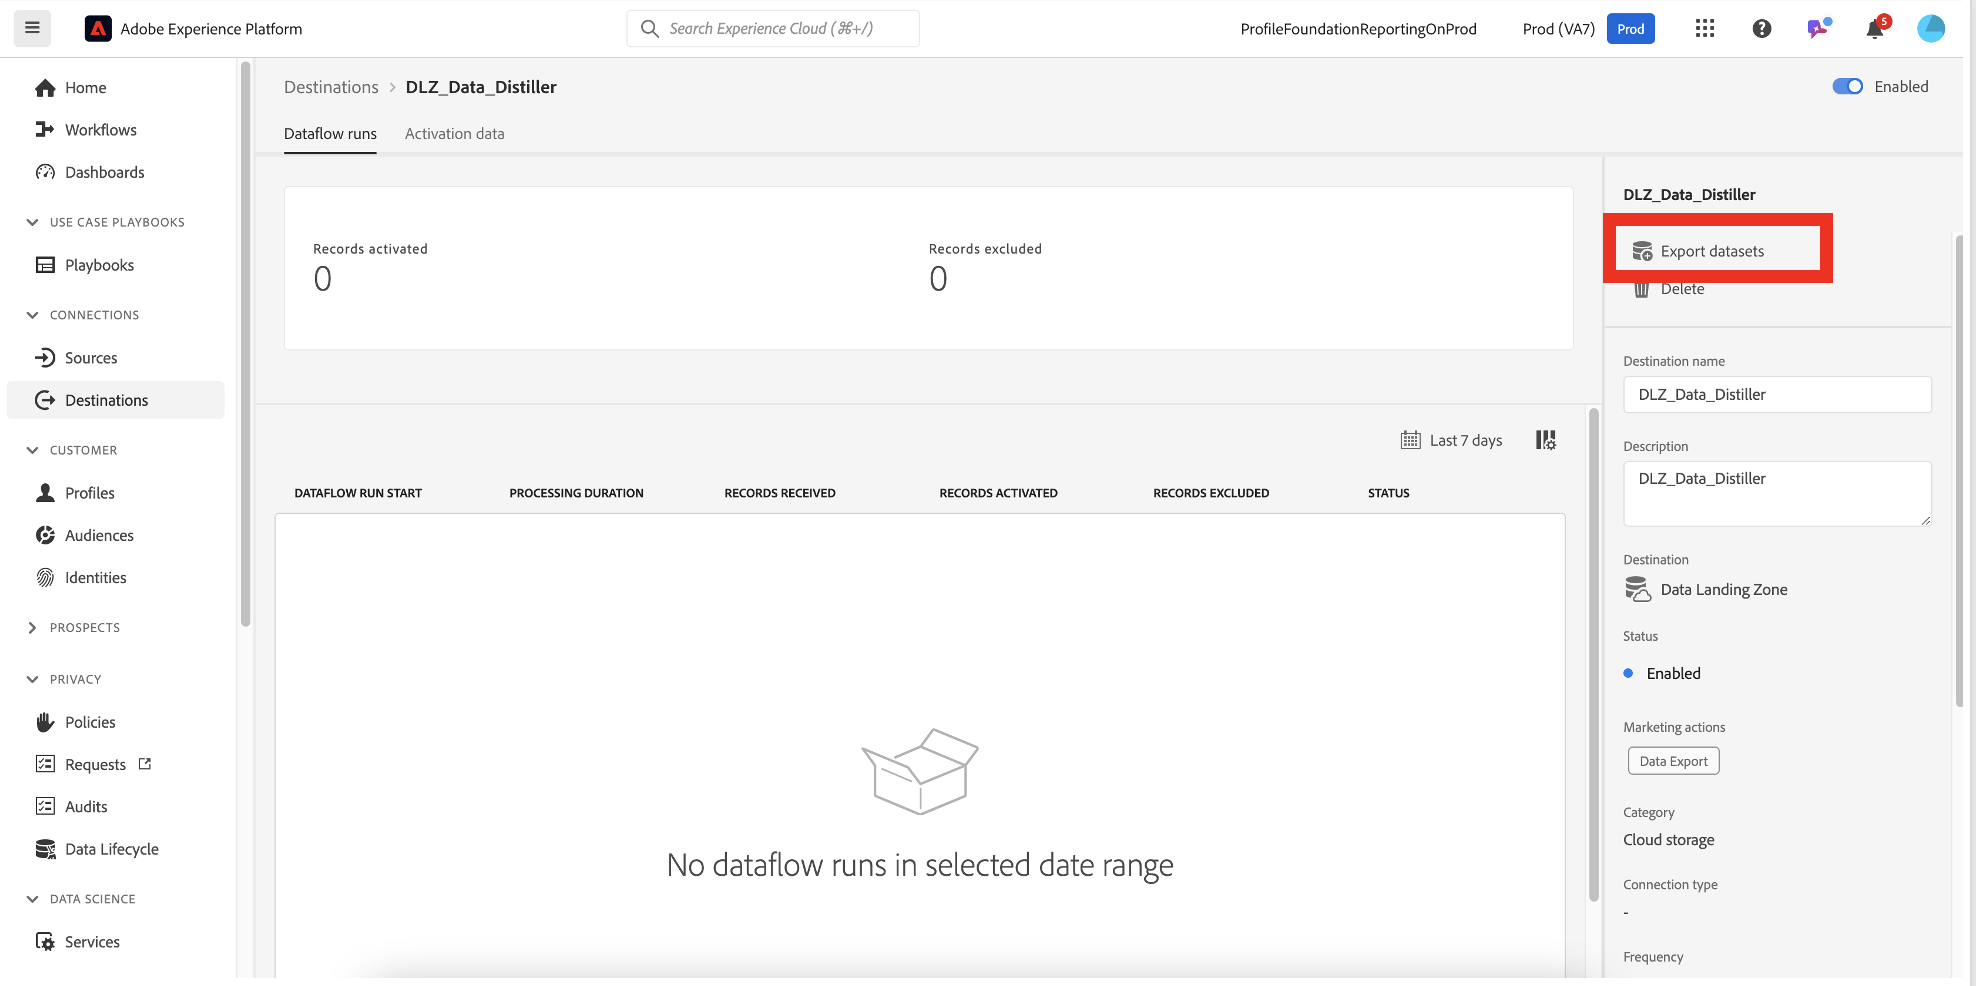
Export datasets
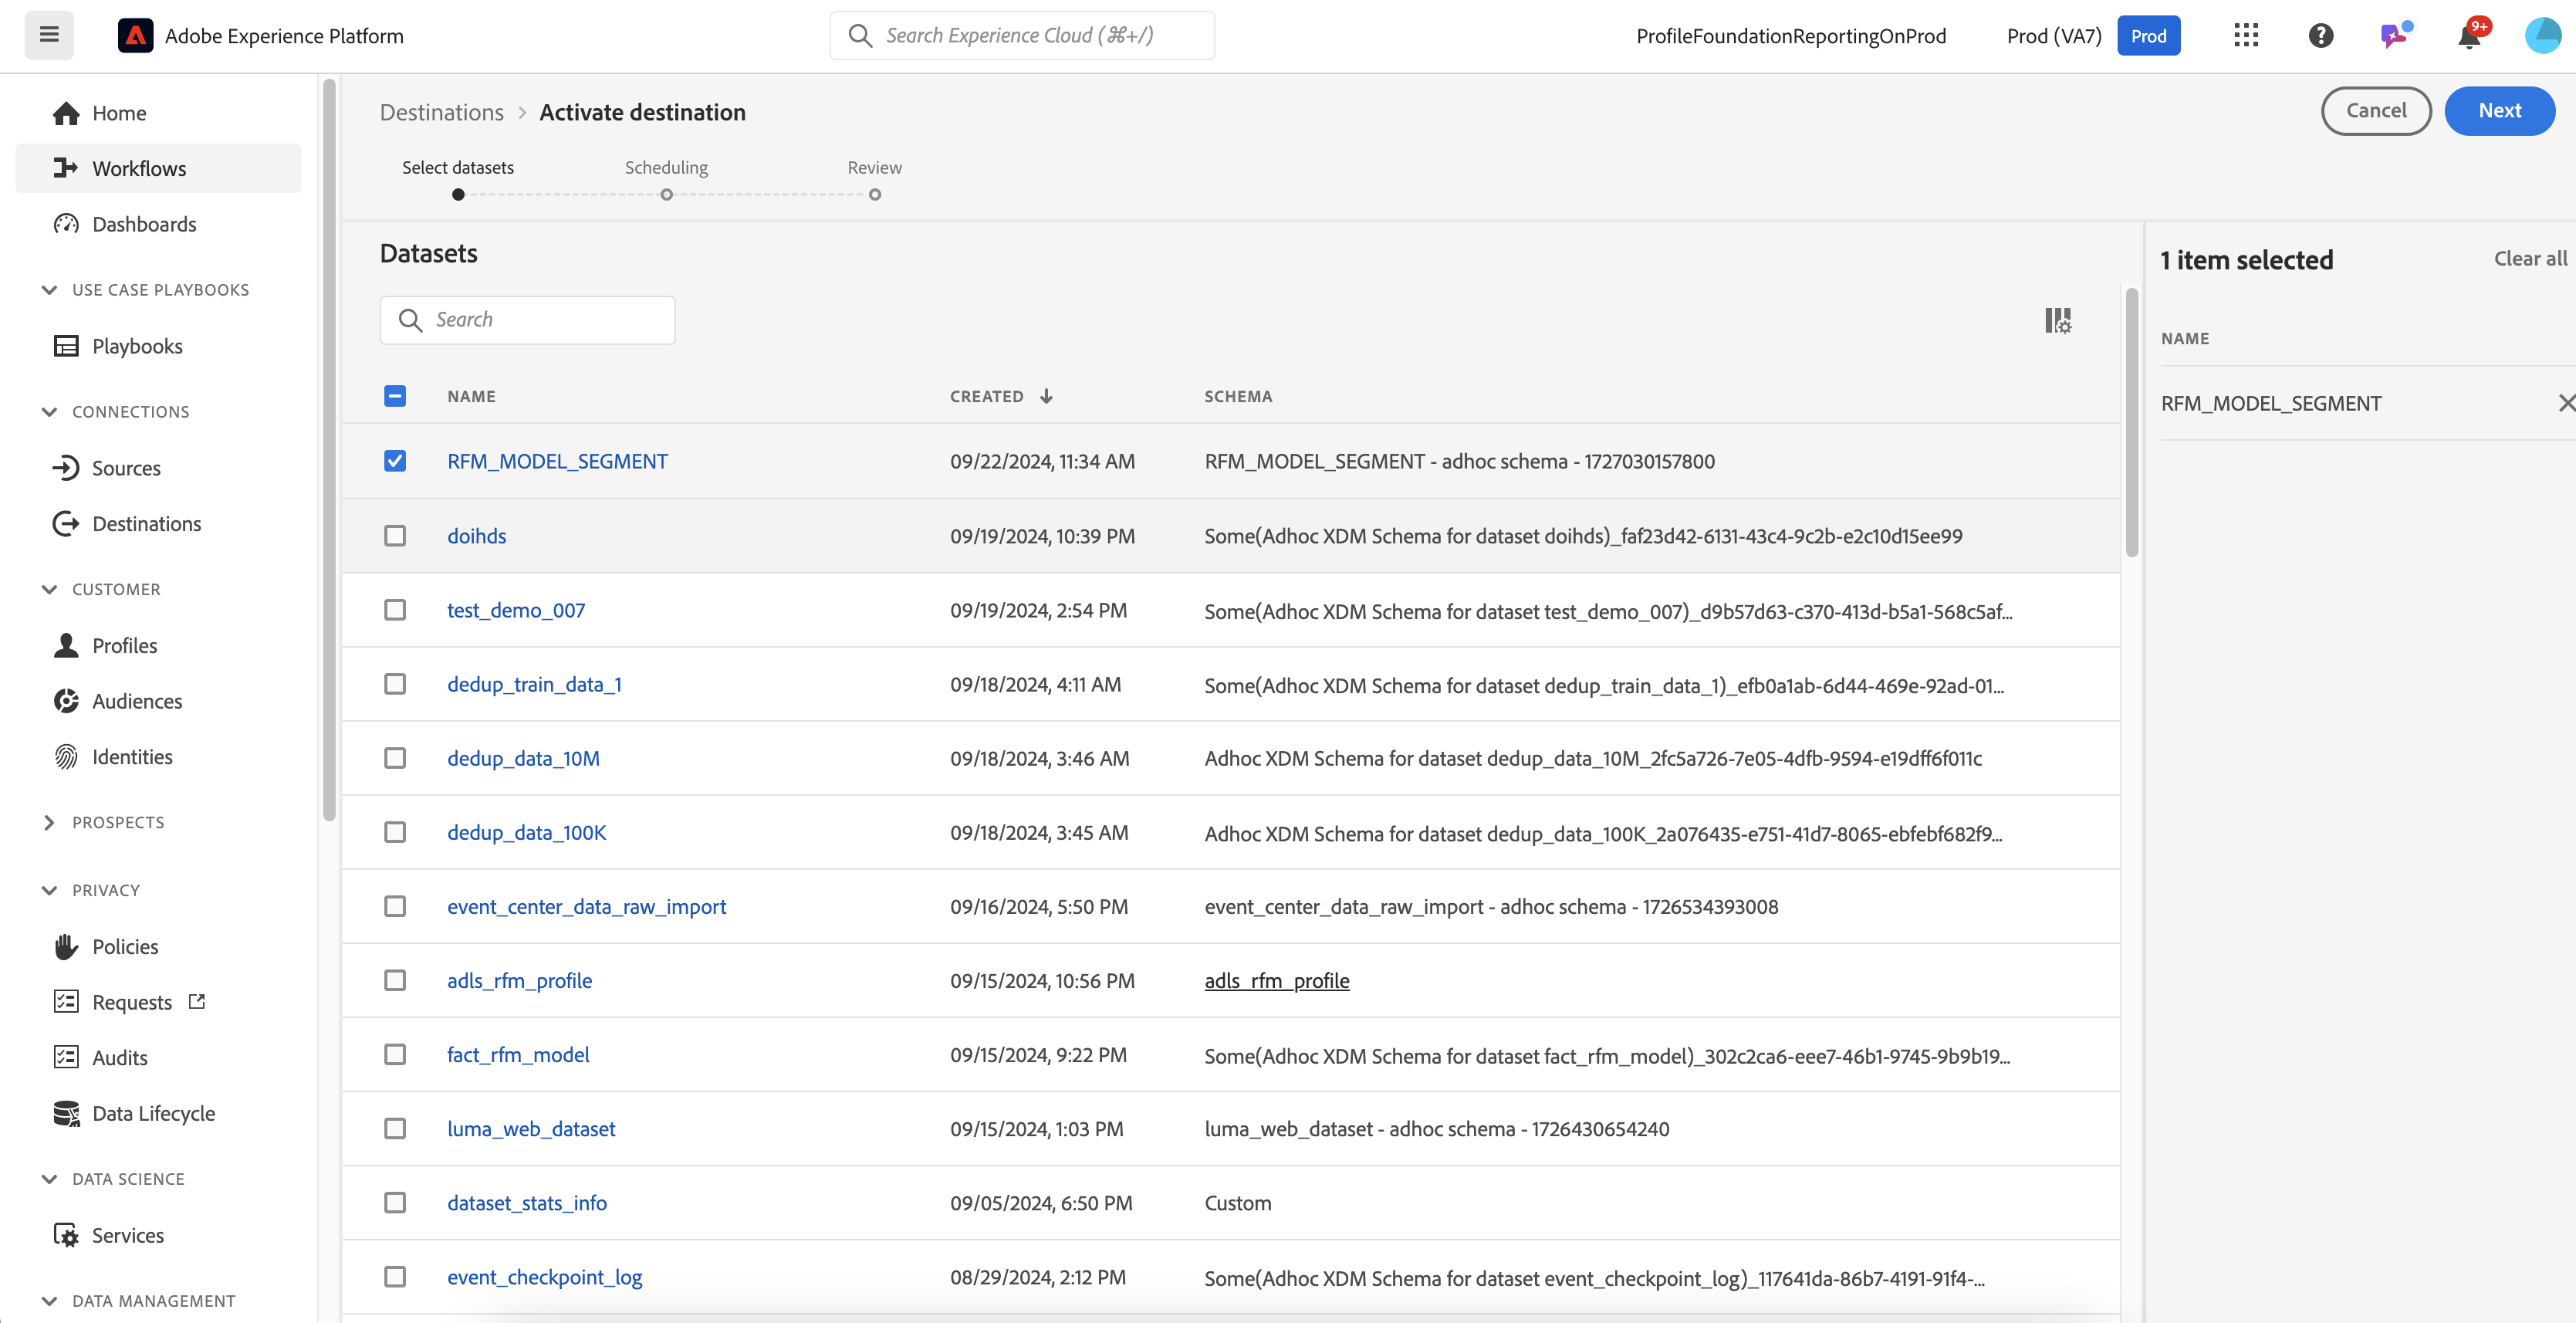
Choose RFM_MODEL_SEGMENT dataset to export
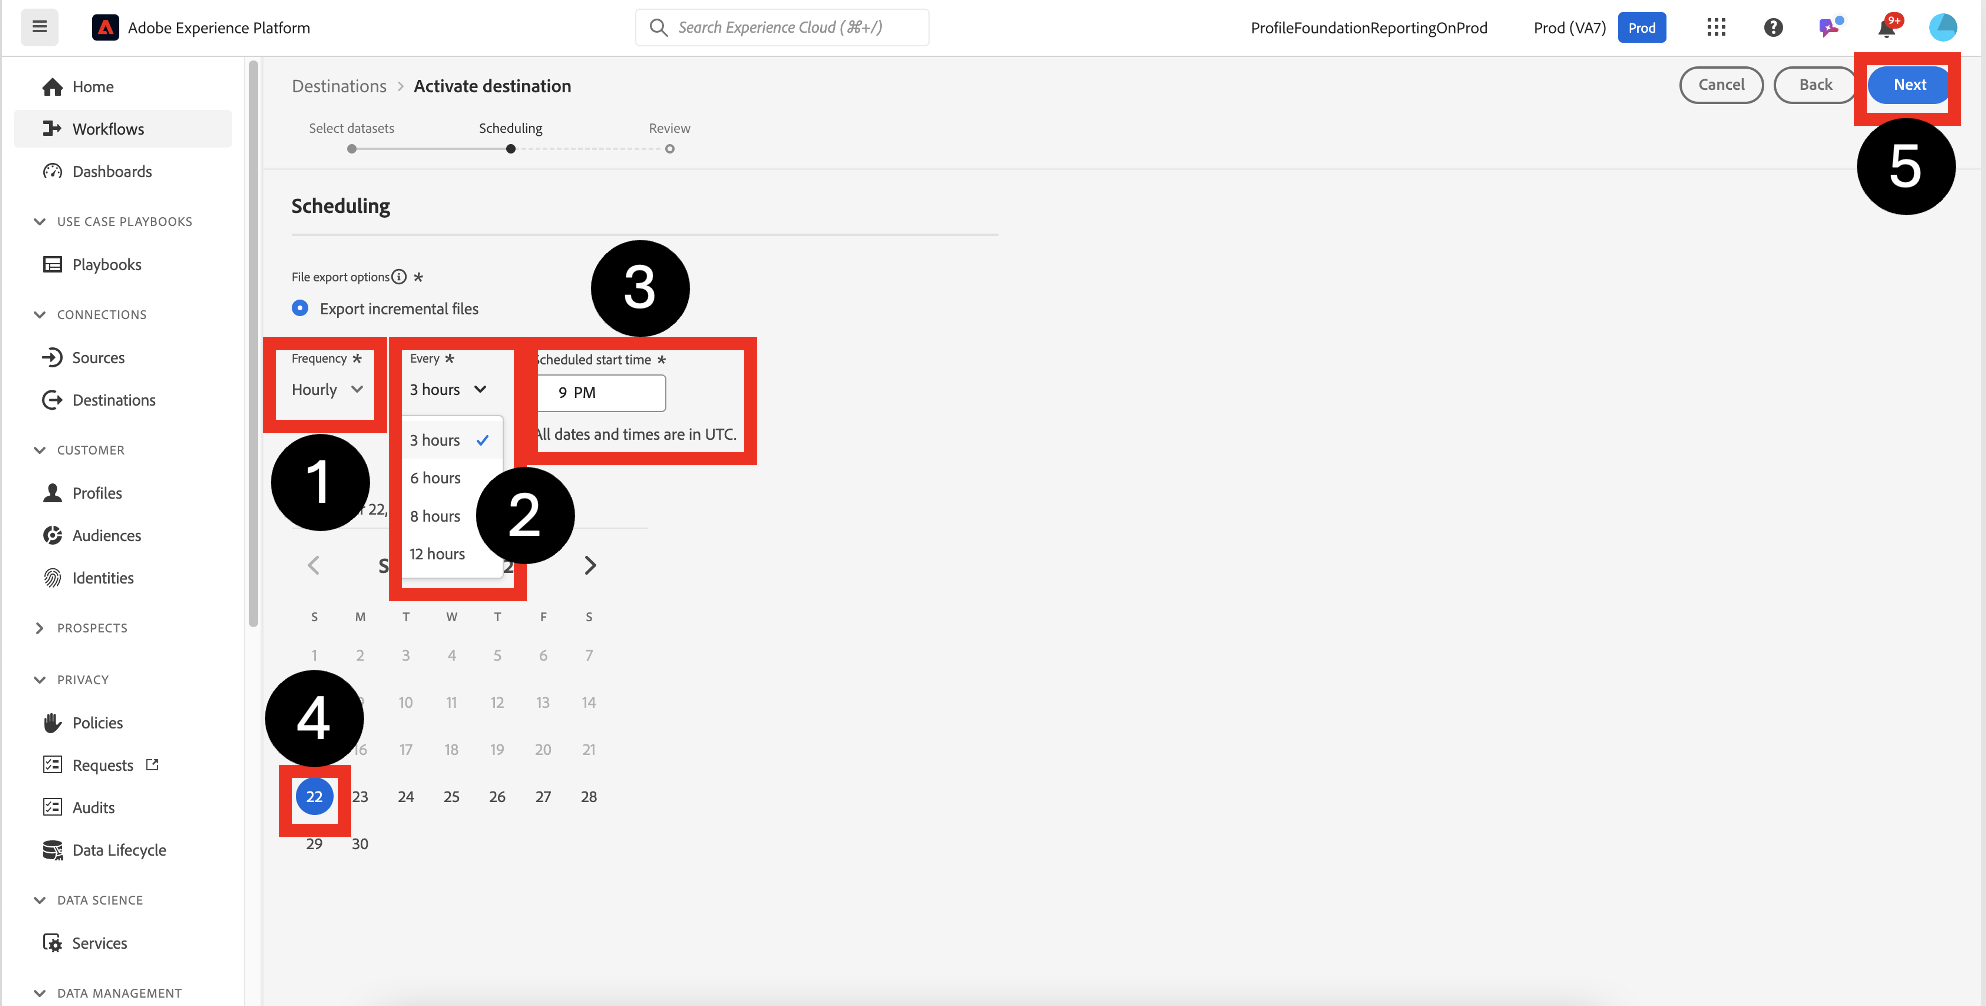
Configure the schedule
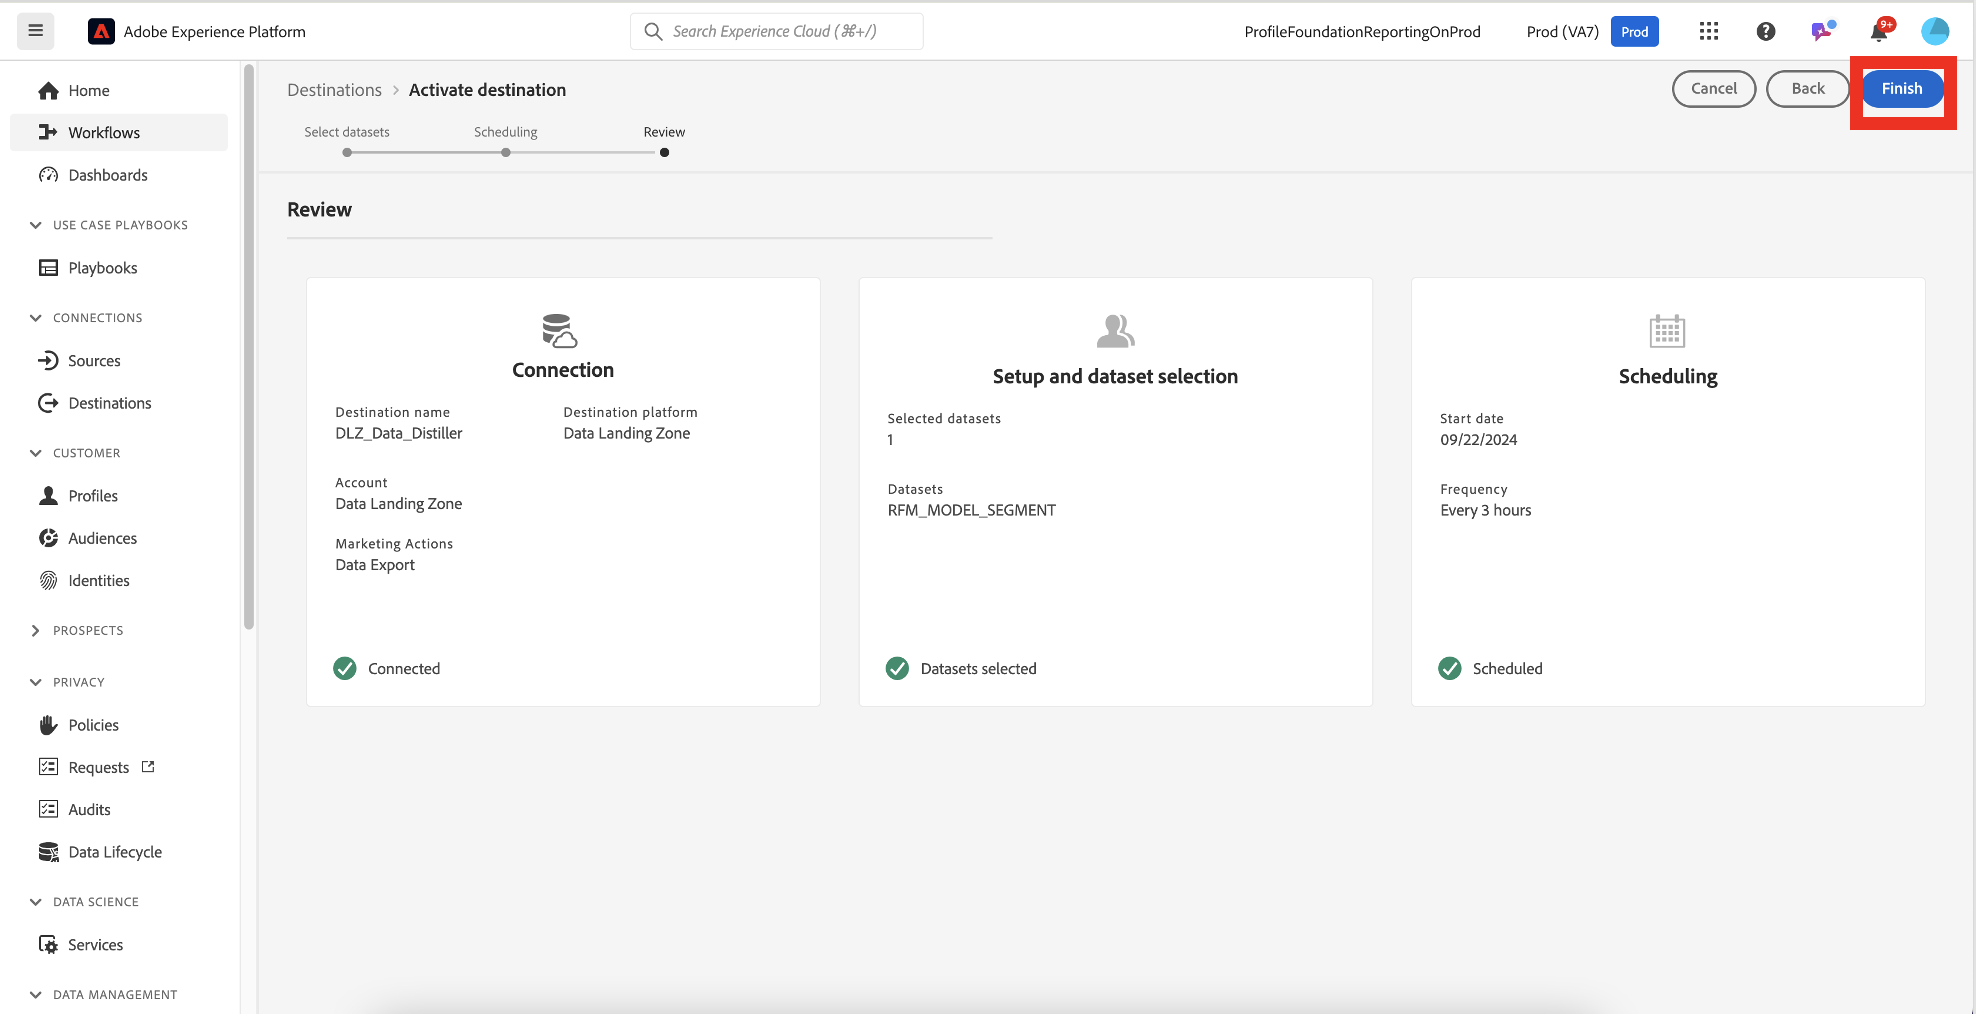
Click Finish to complete the setup
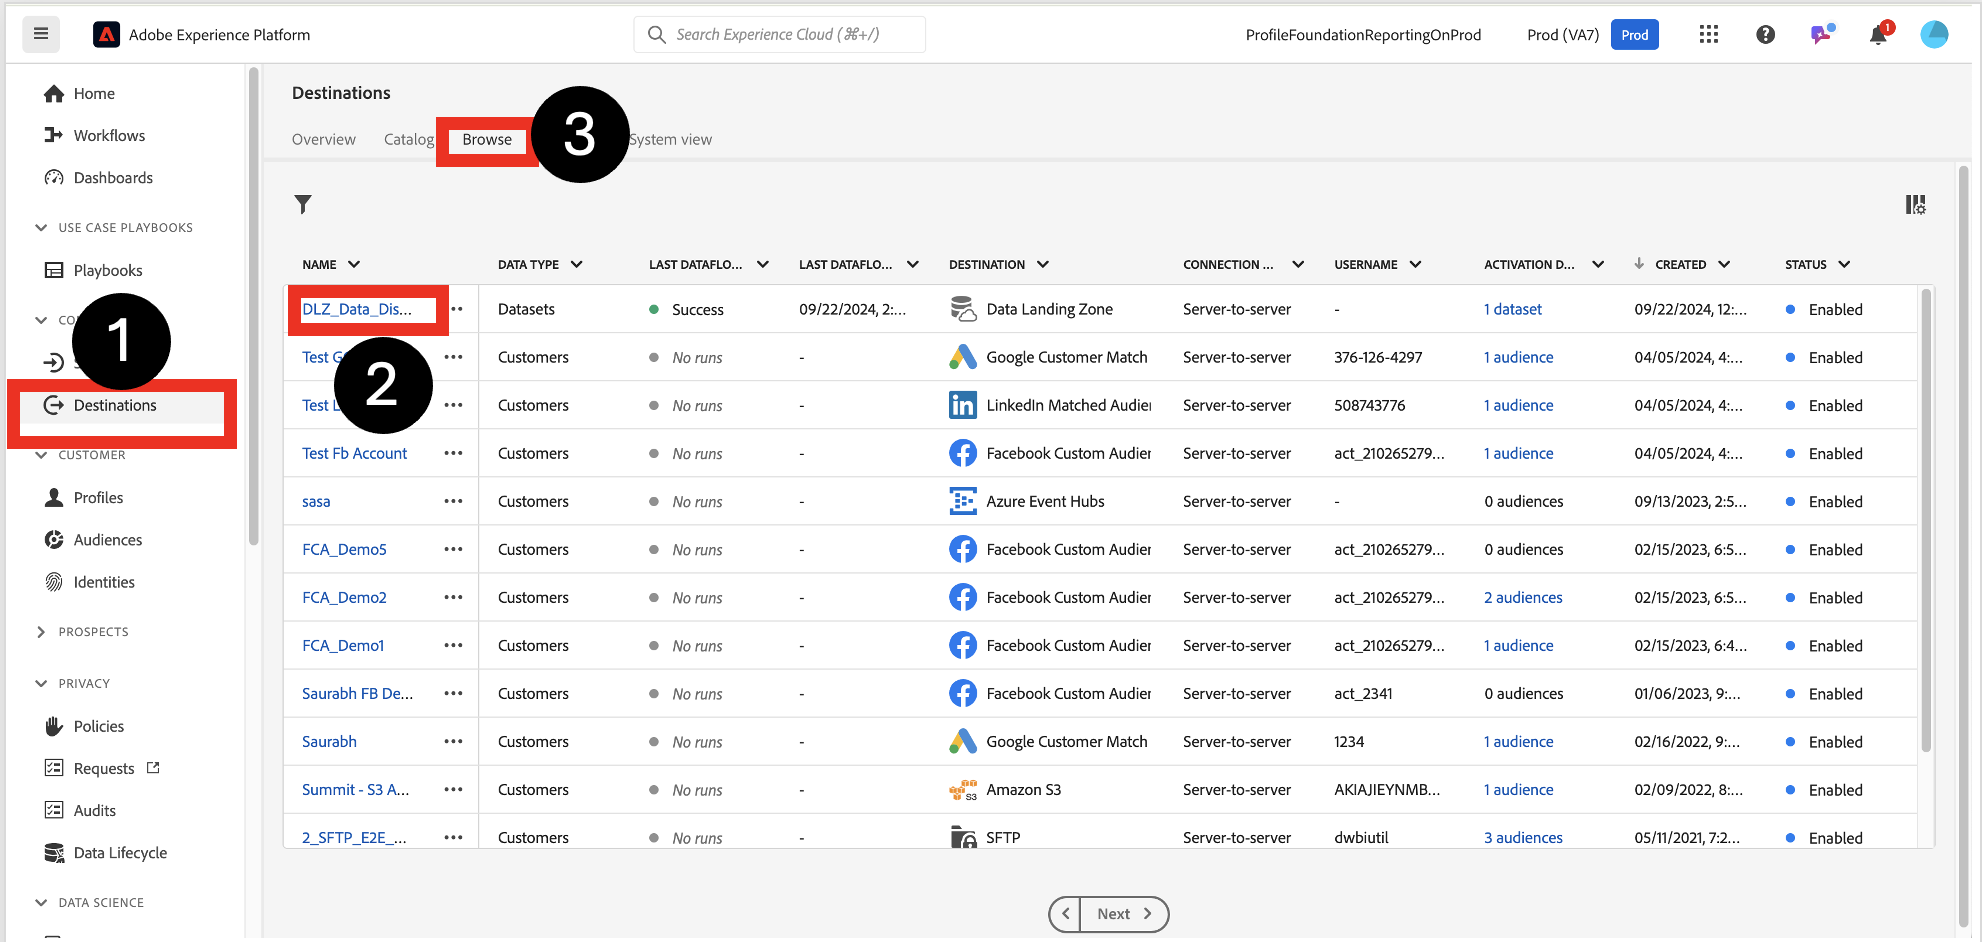
Click on Destinations->Browse->DLZ_Data_Distiller flow
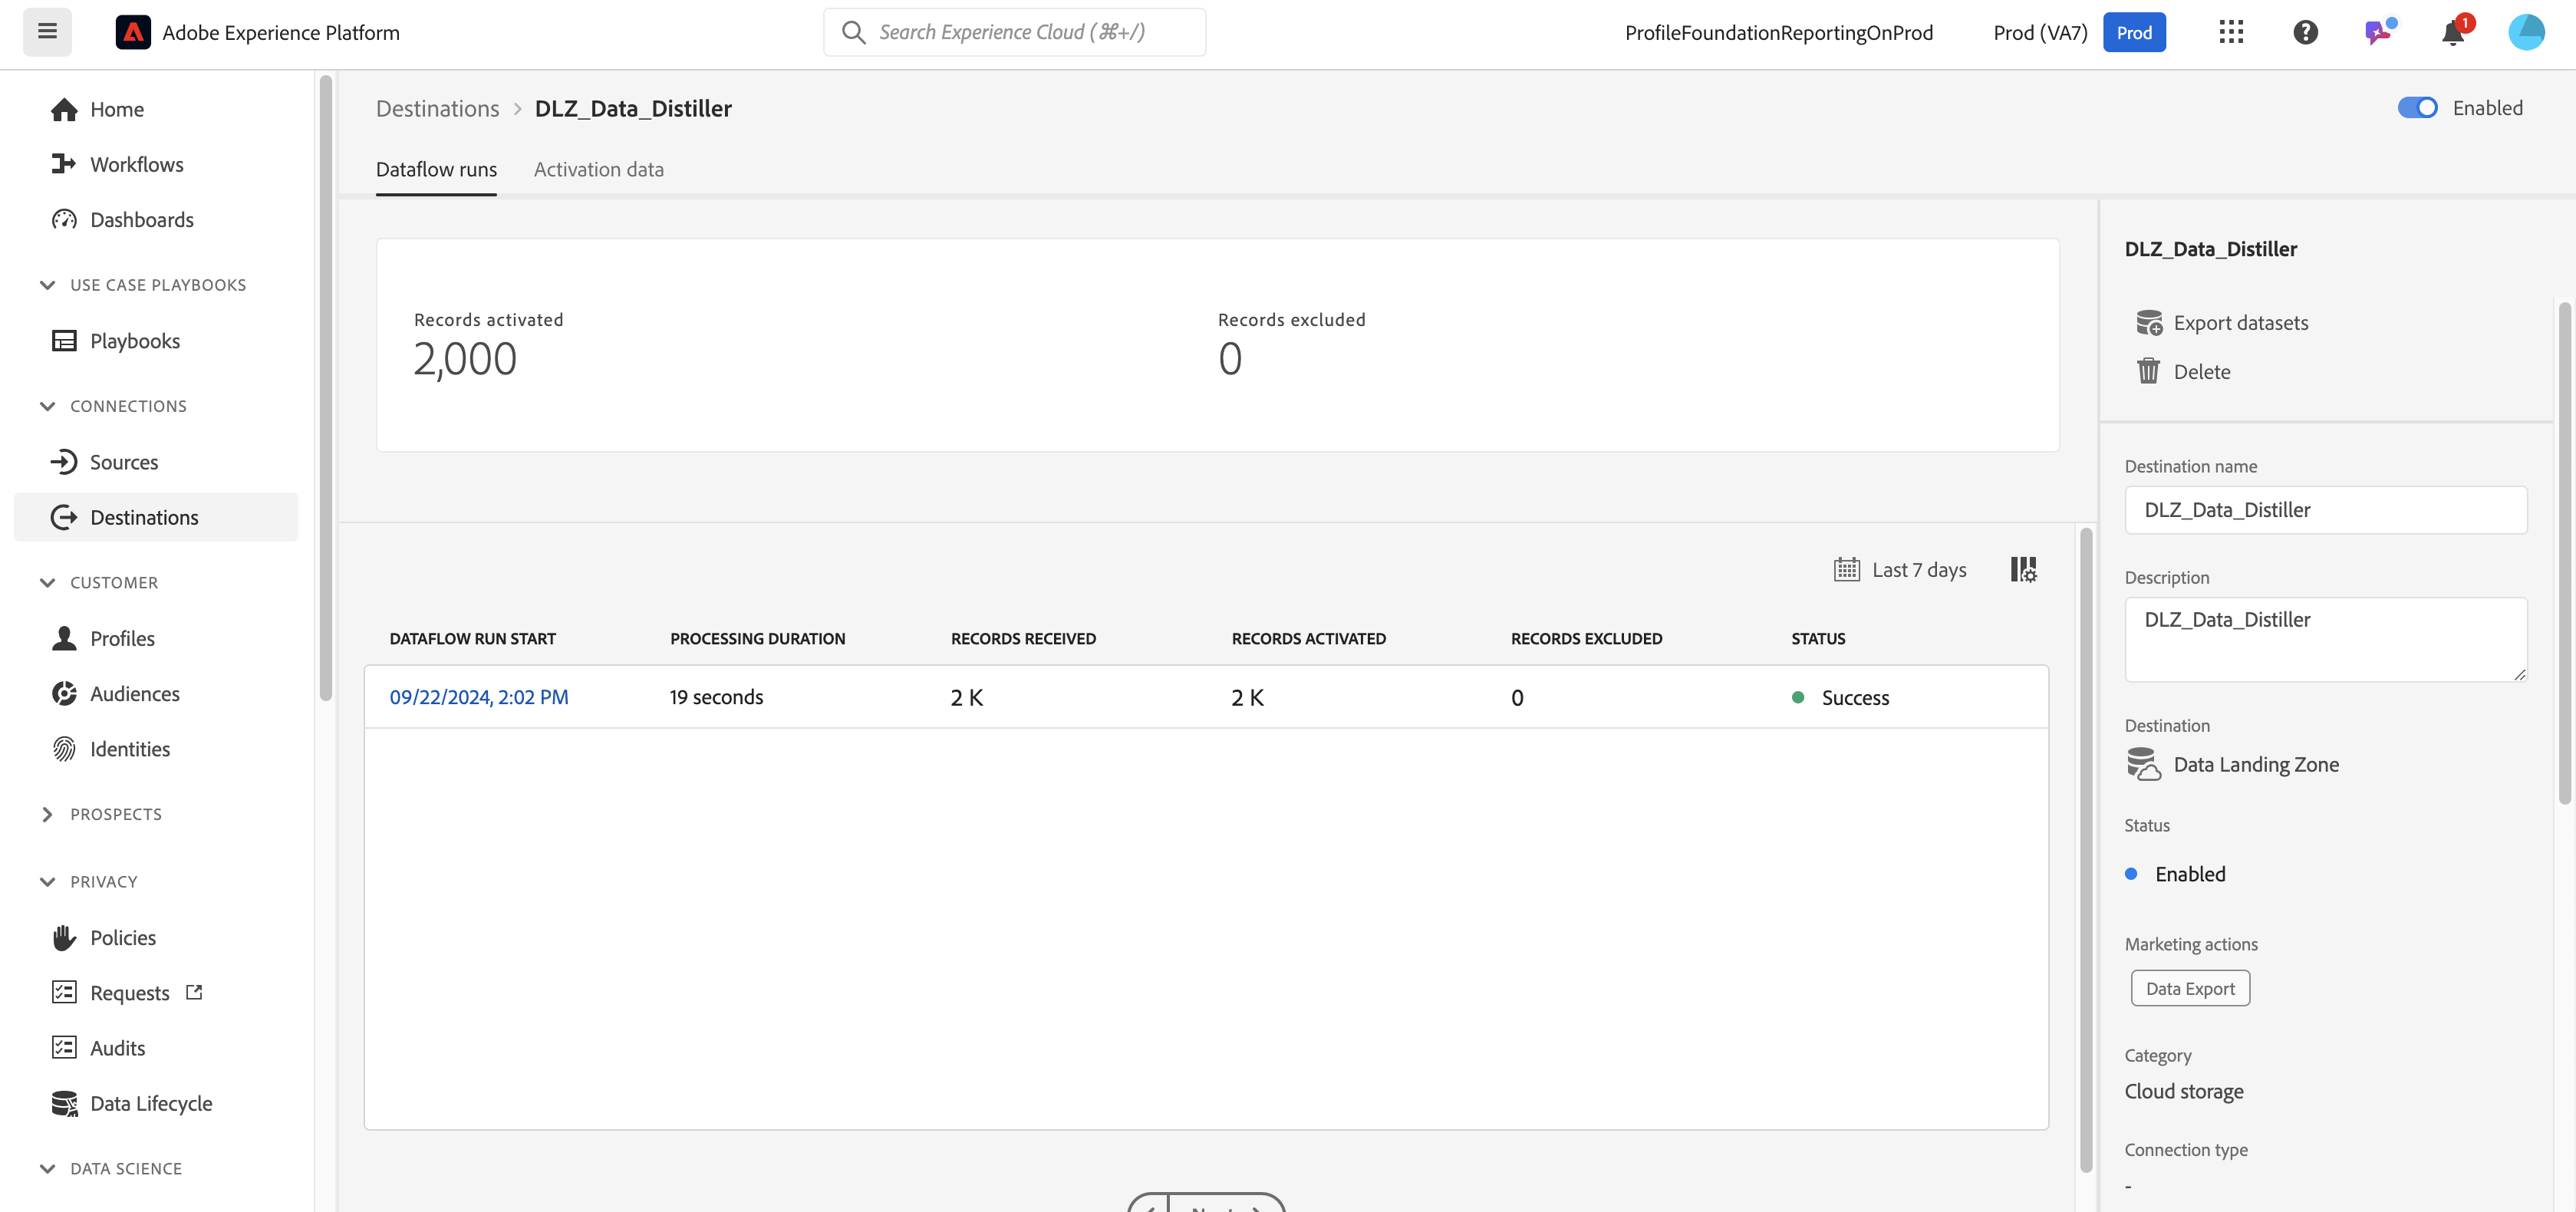
Successful export
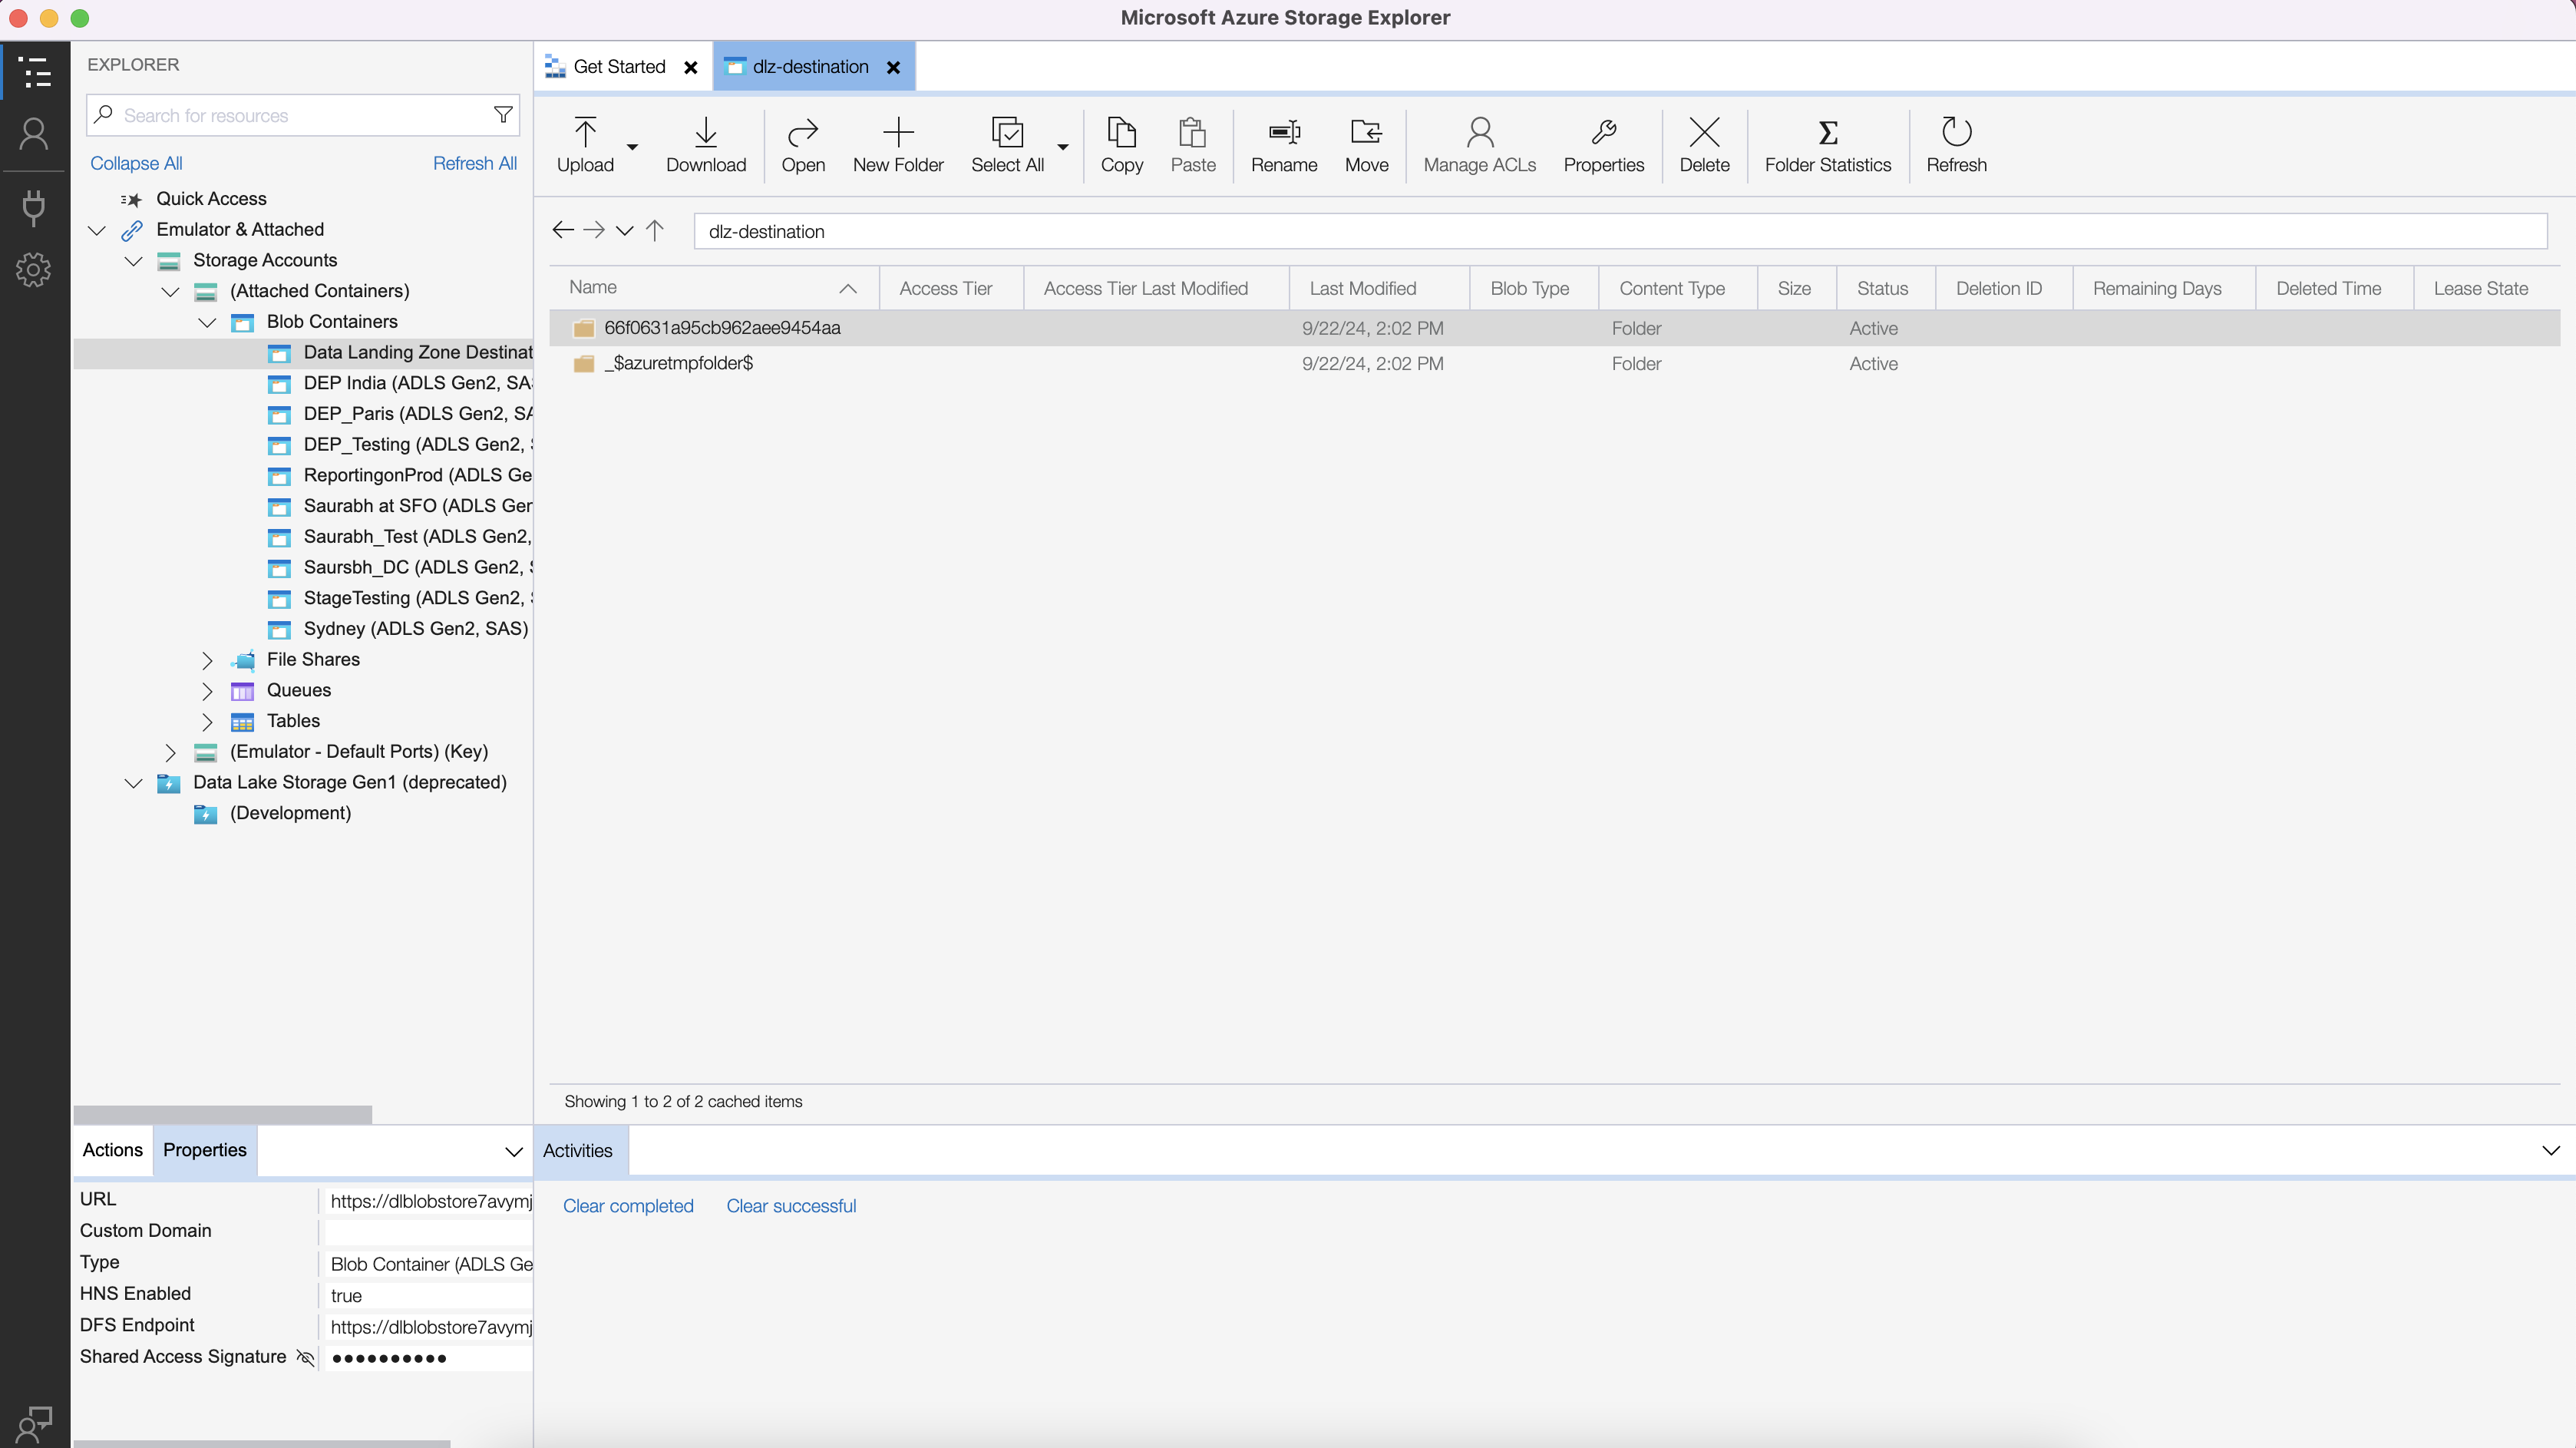
New folders are created
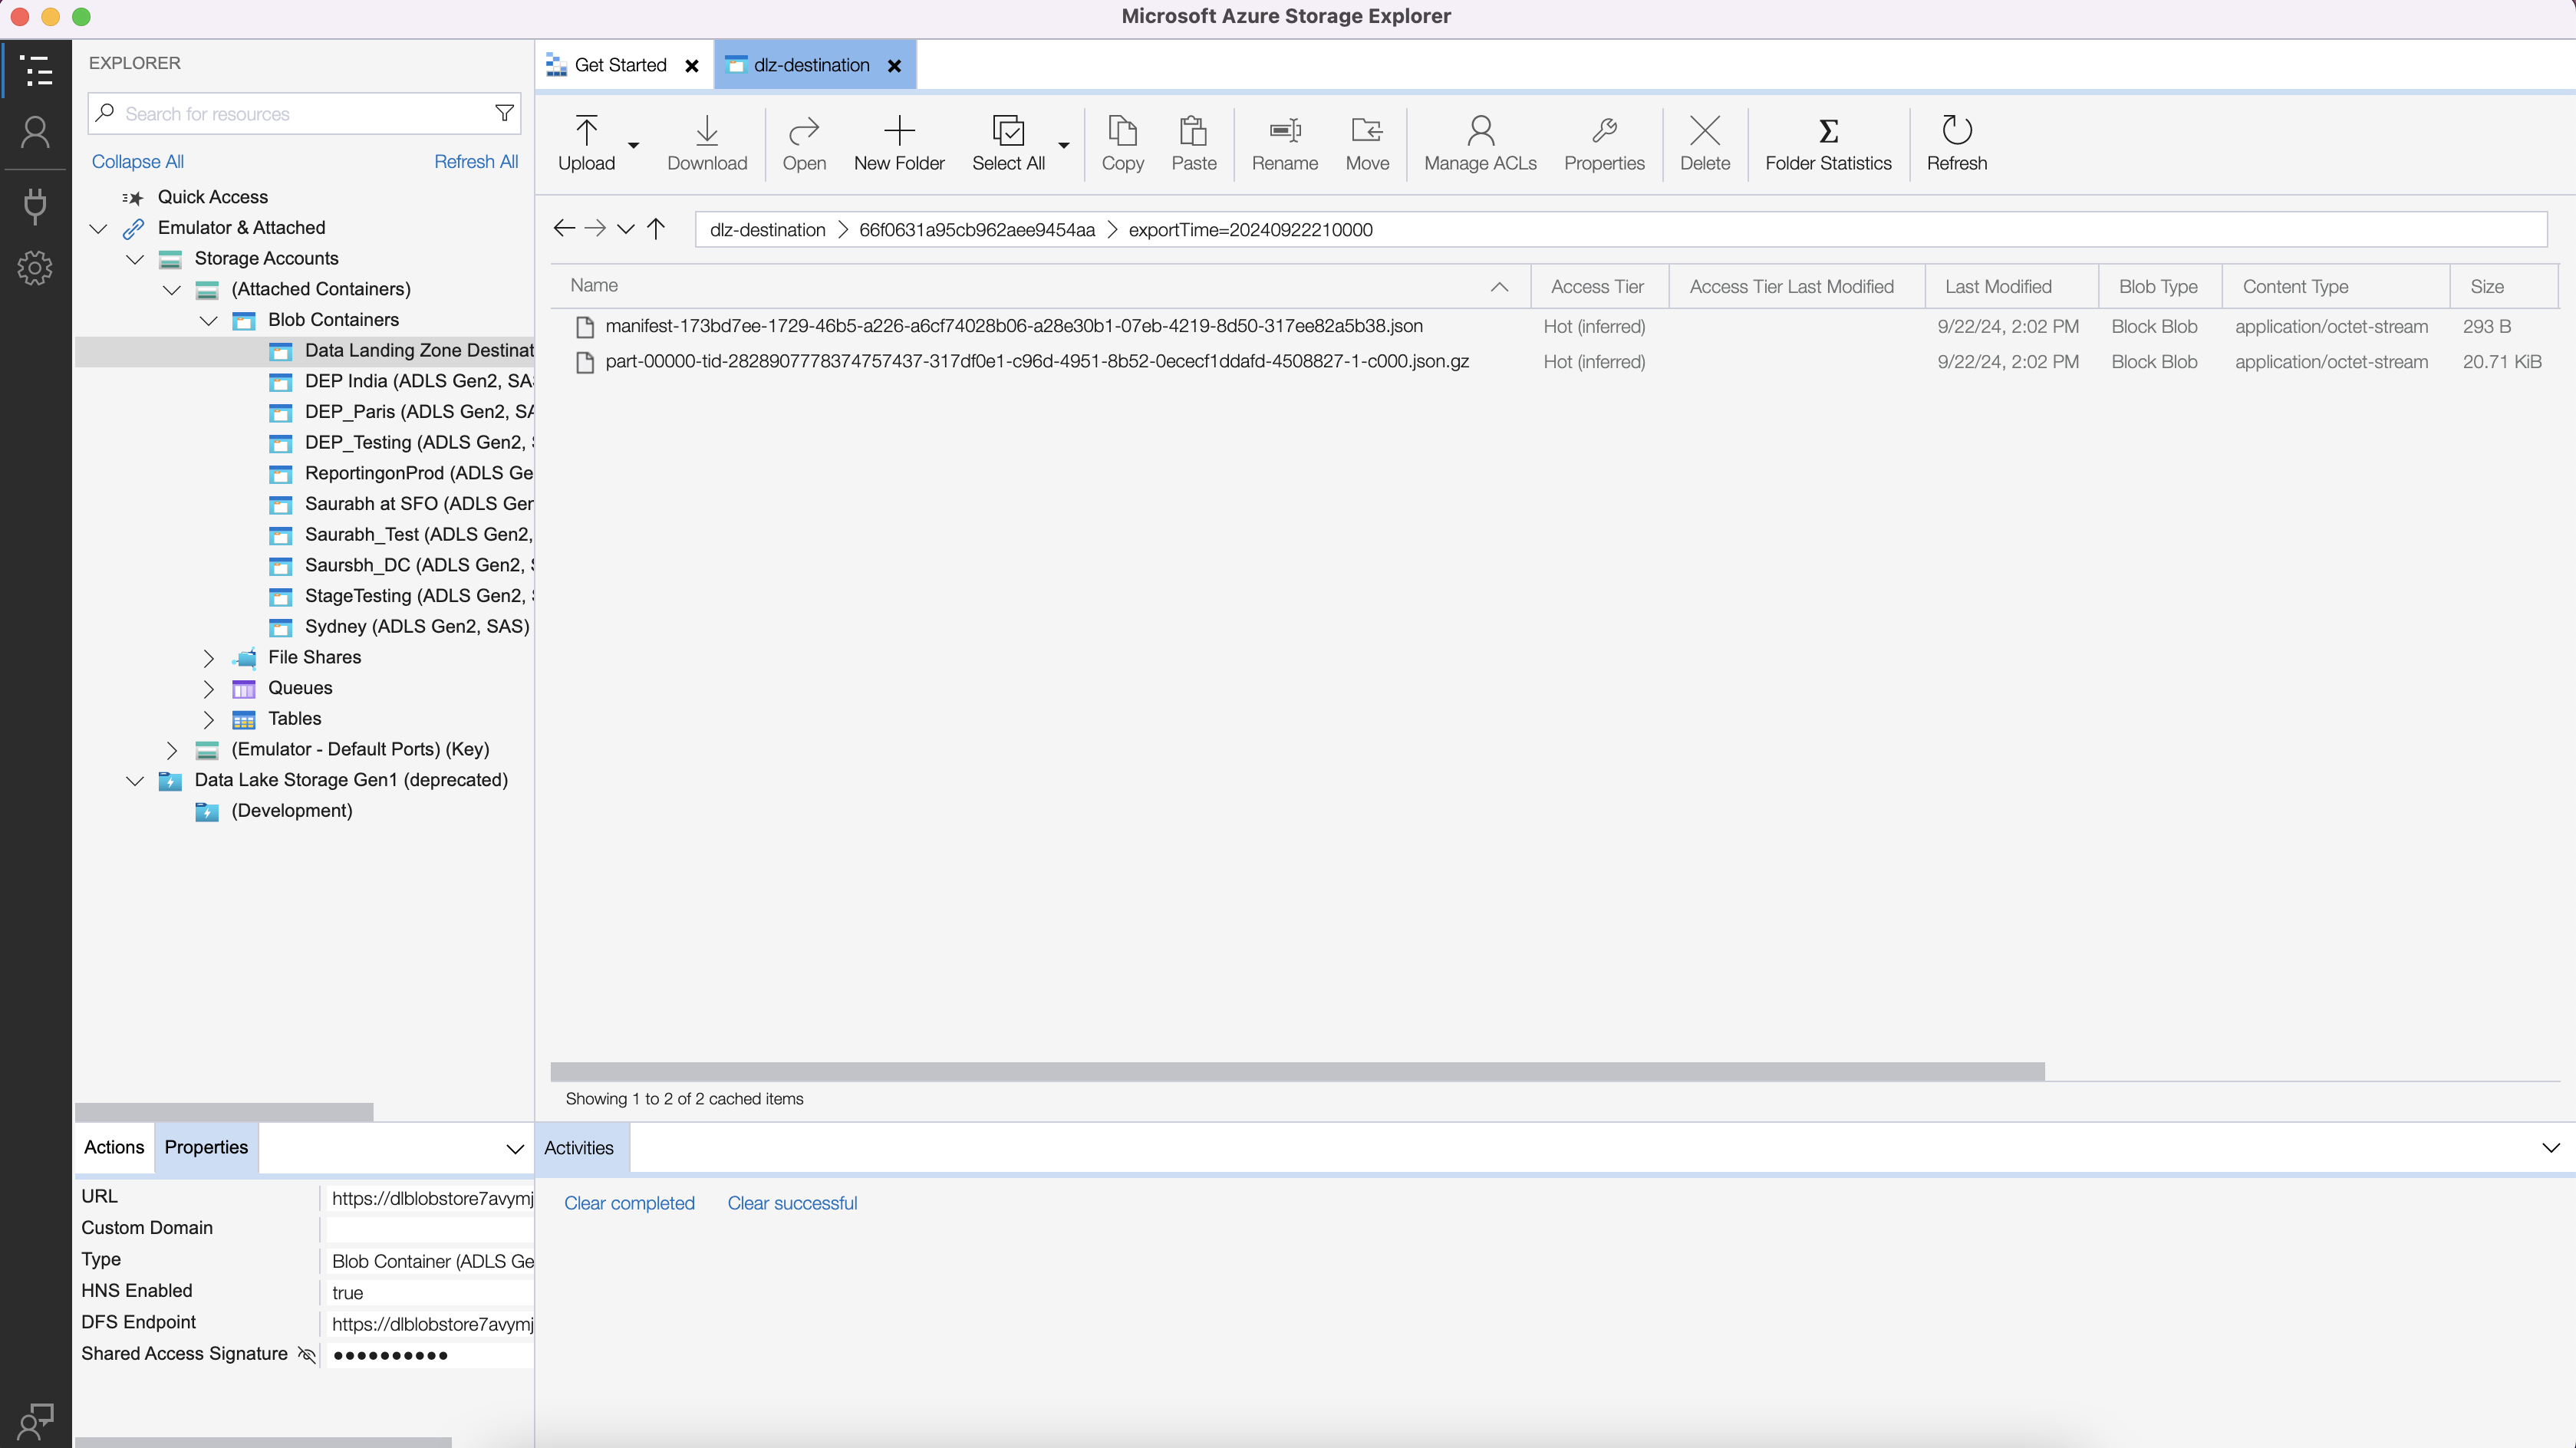
You should see the raw files.
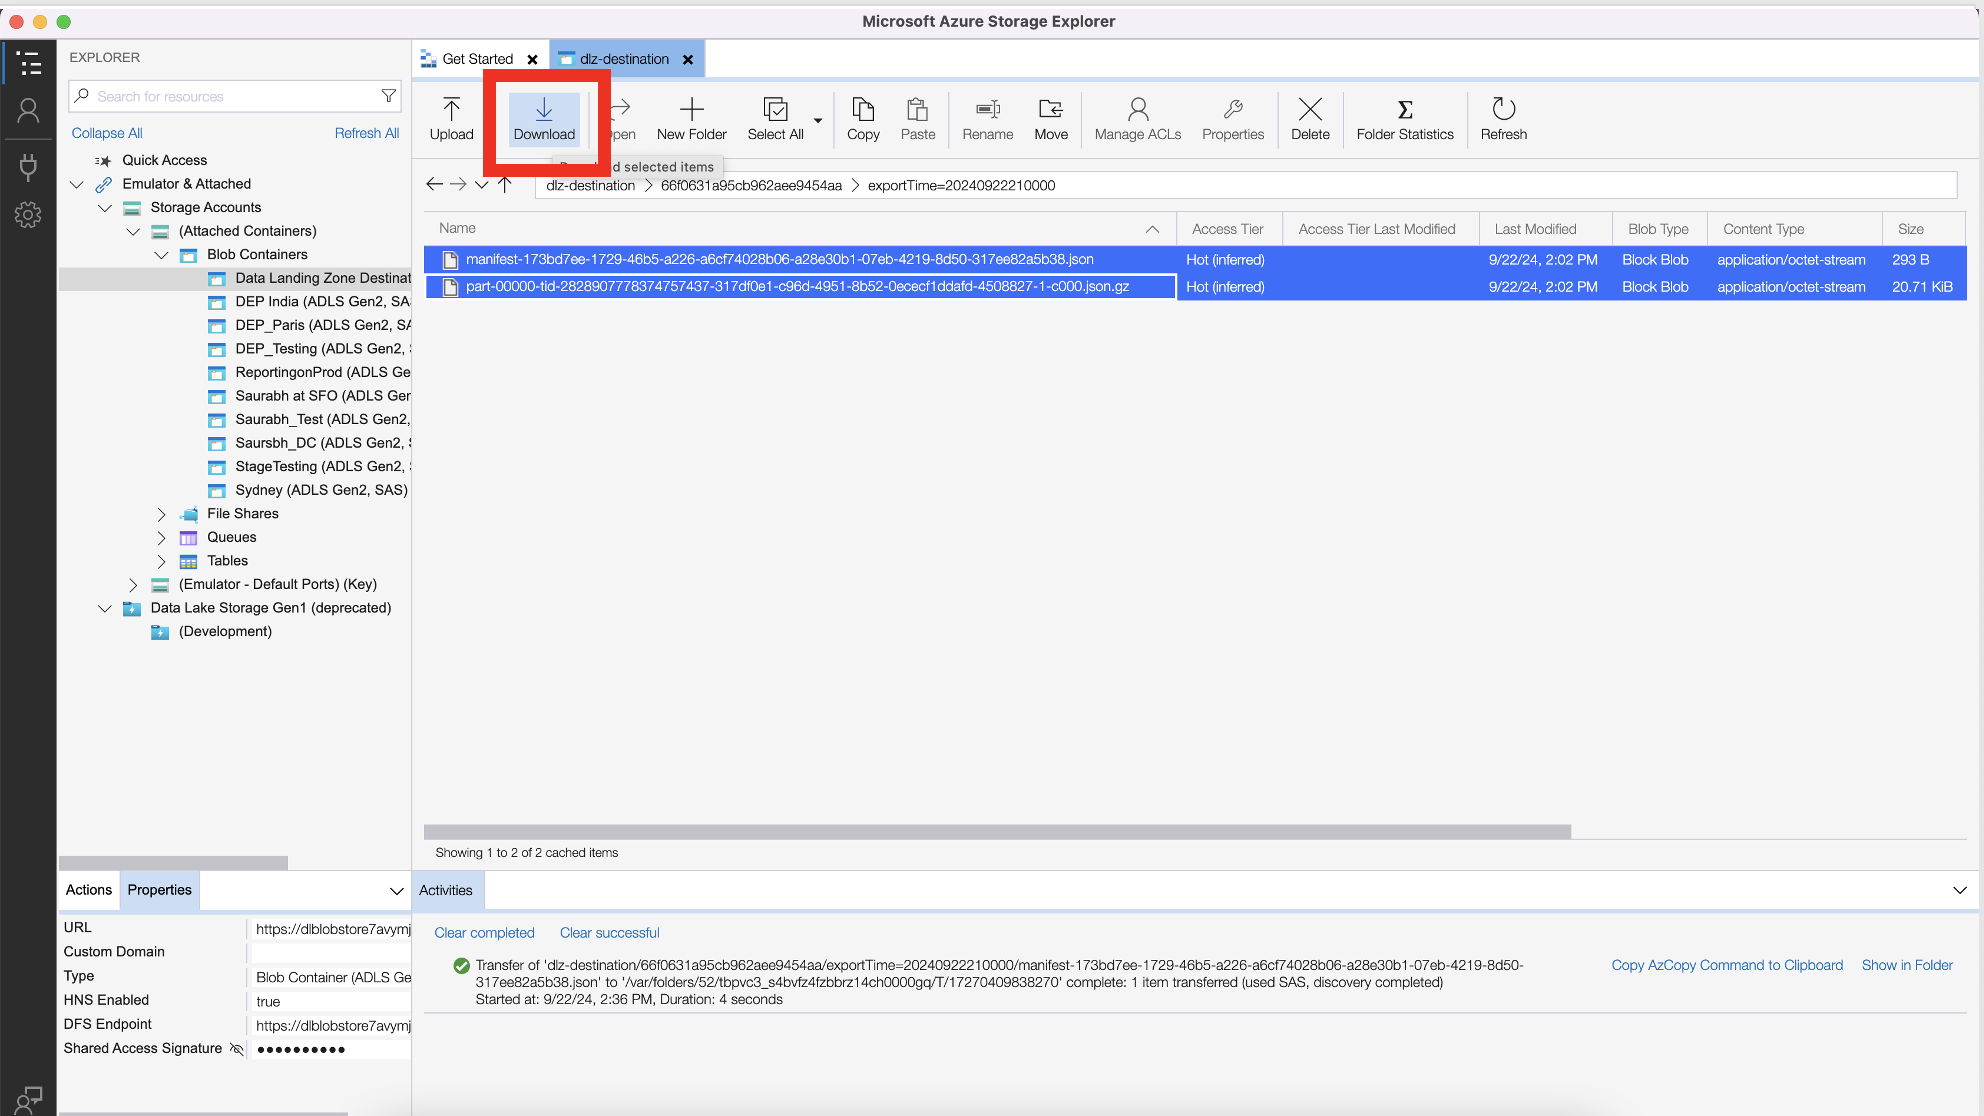
Download the two files

Manifest files in TextEdit application on Mac
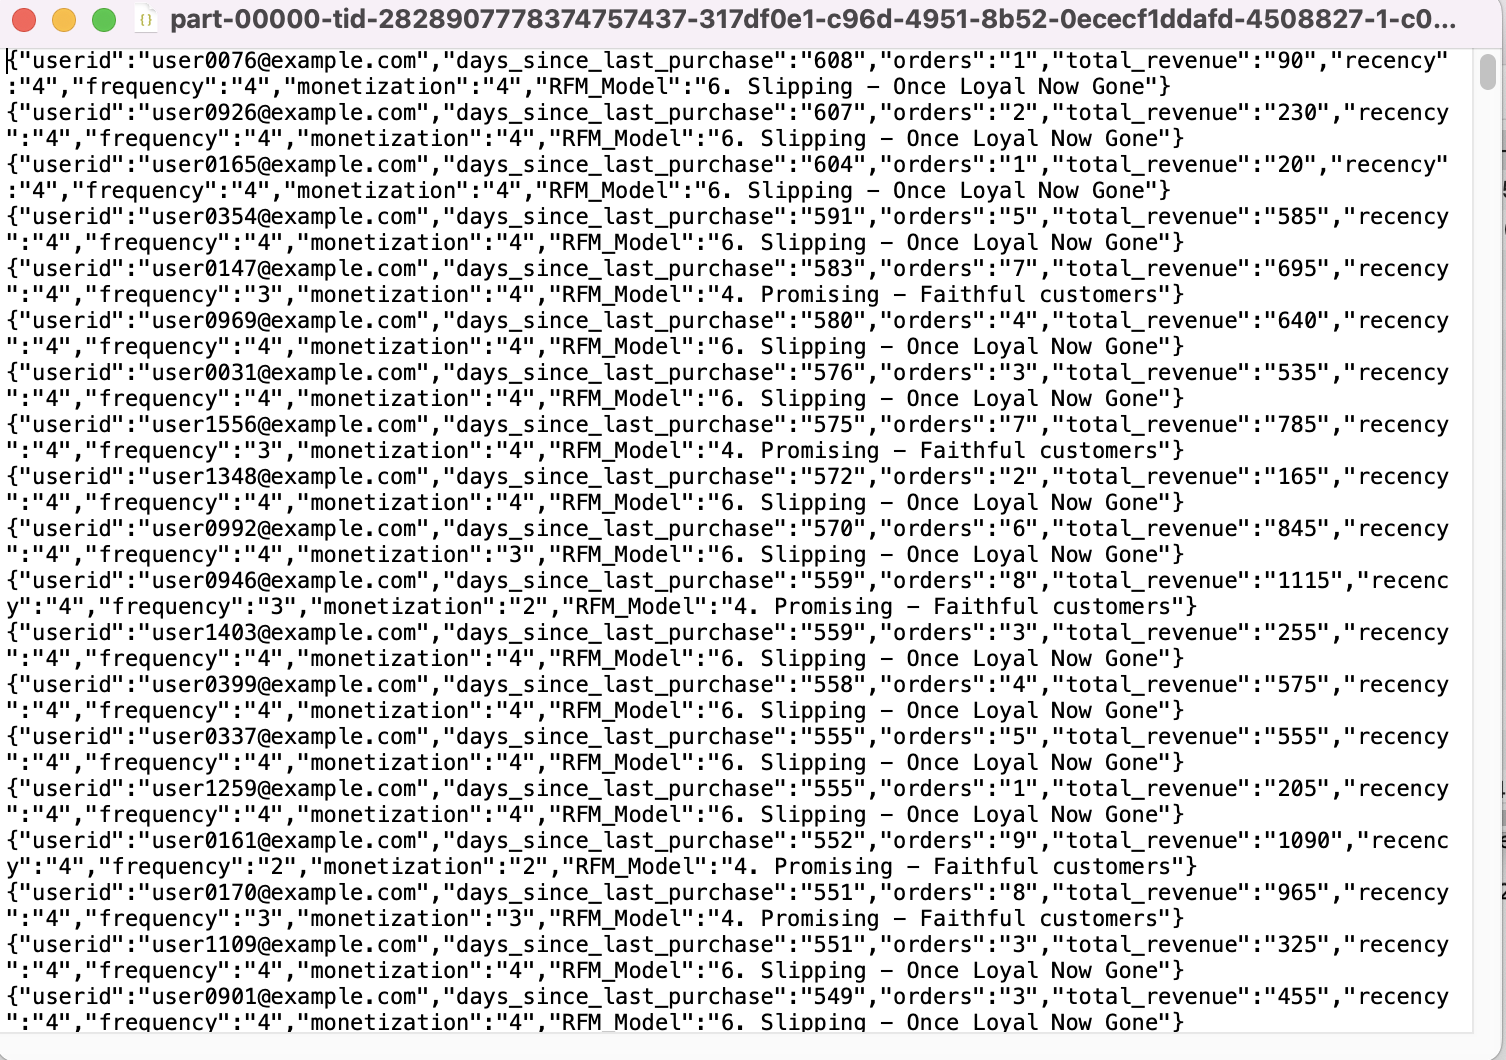
JSON file
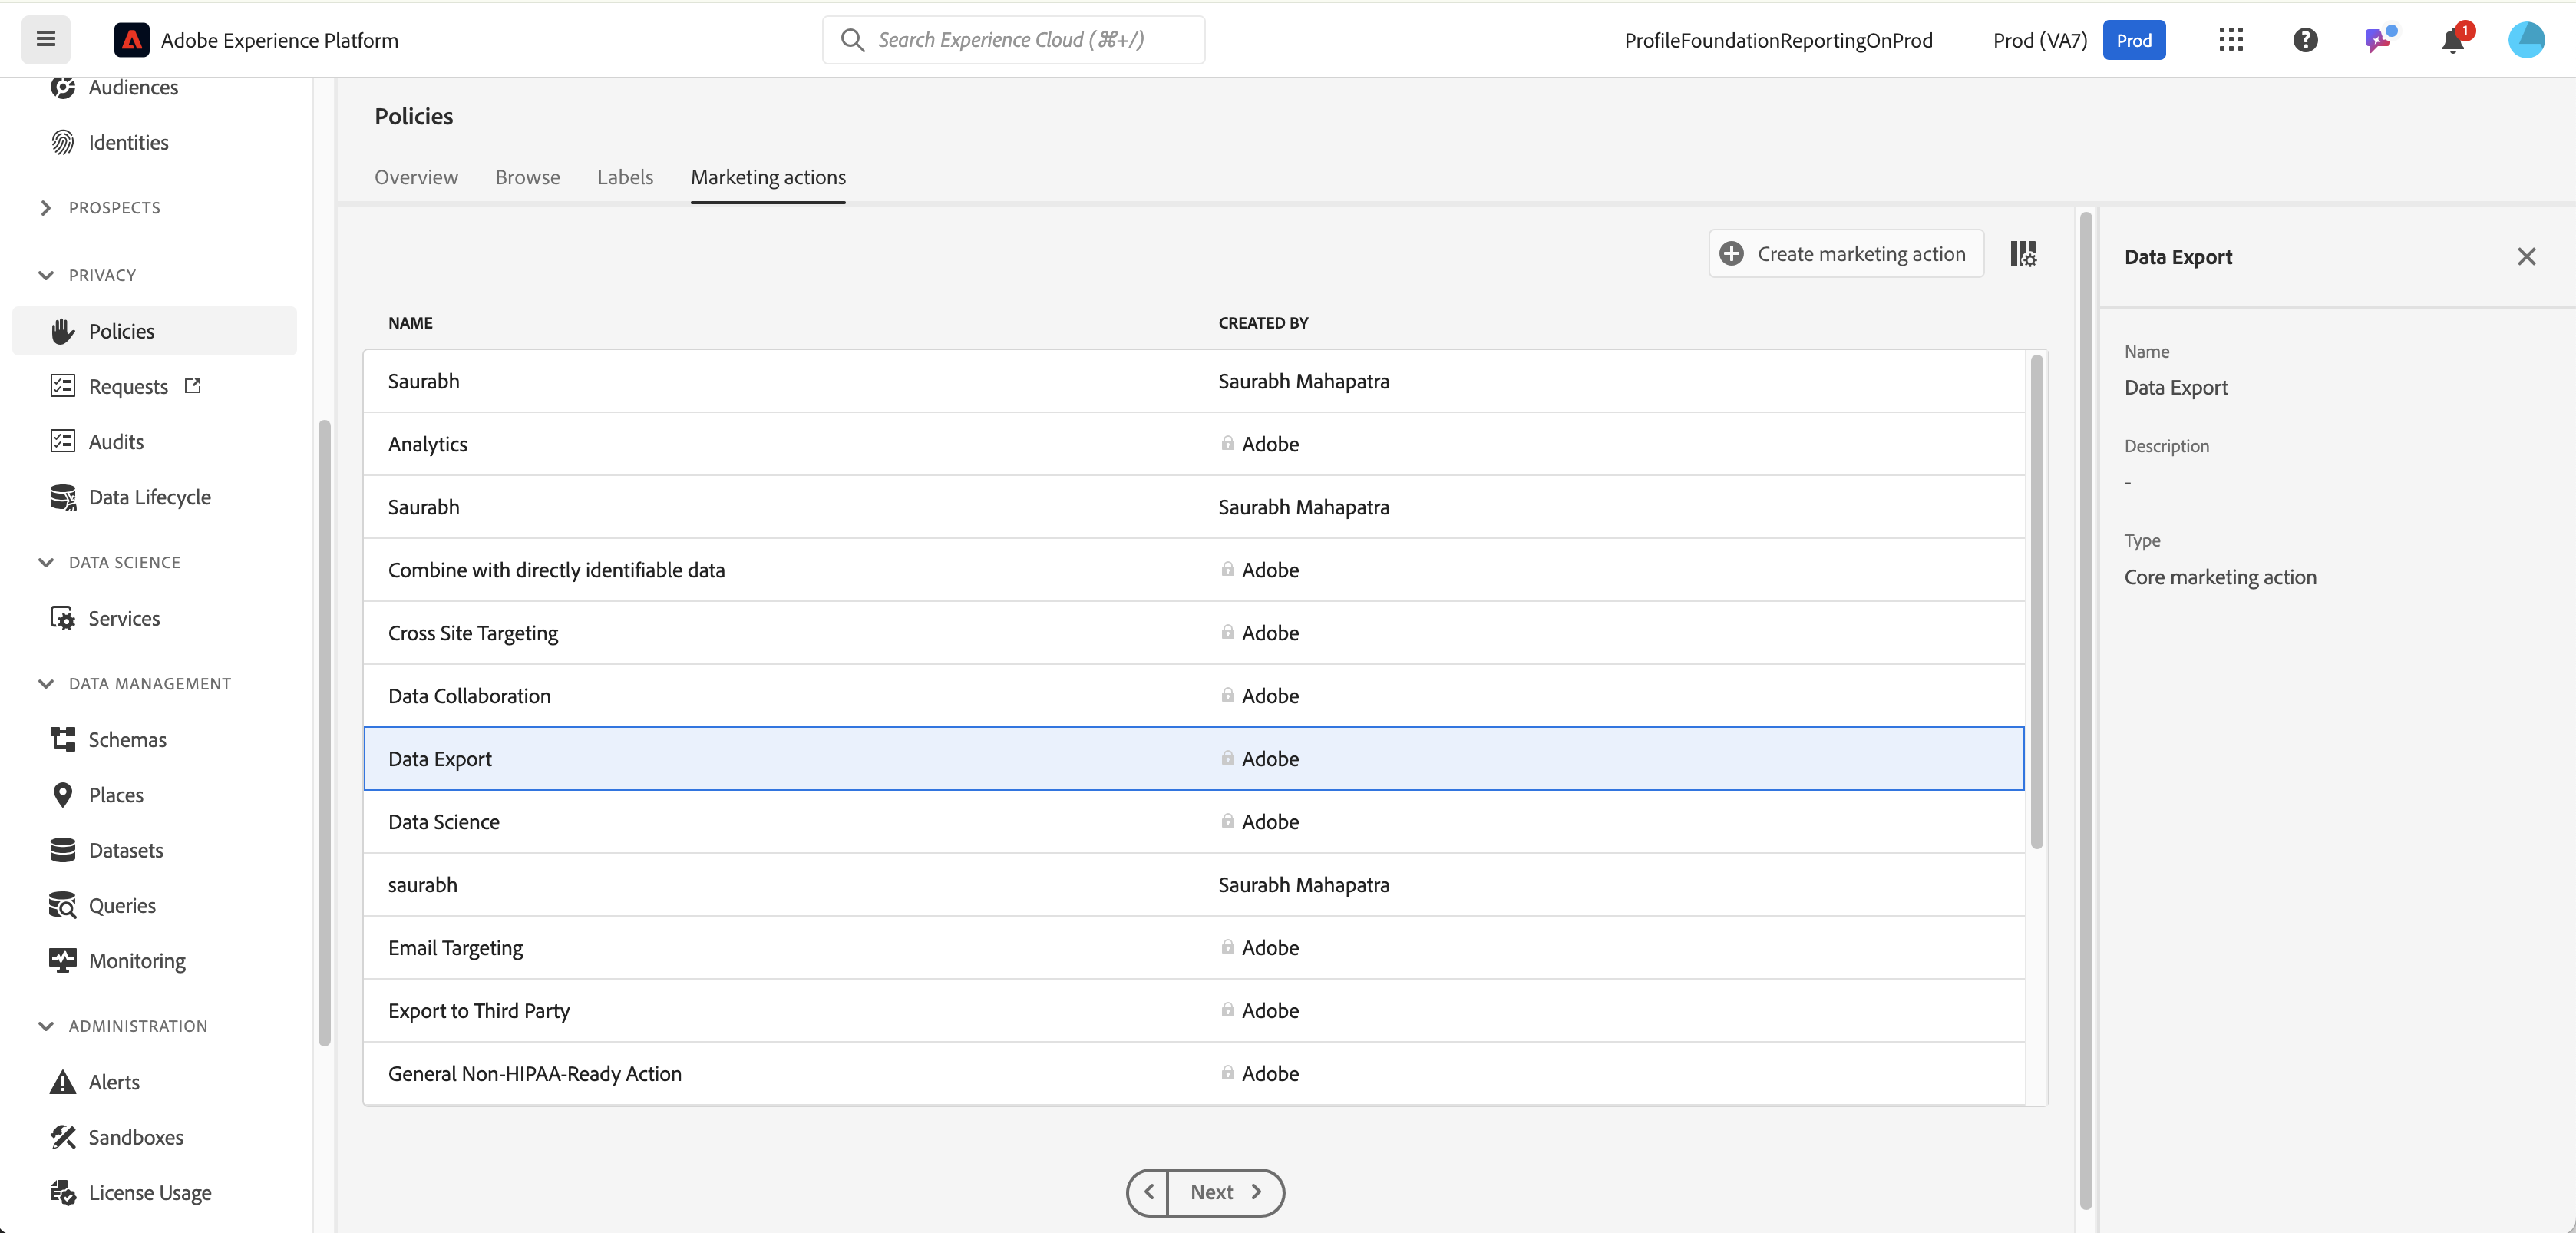
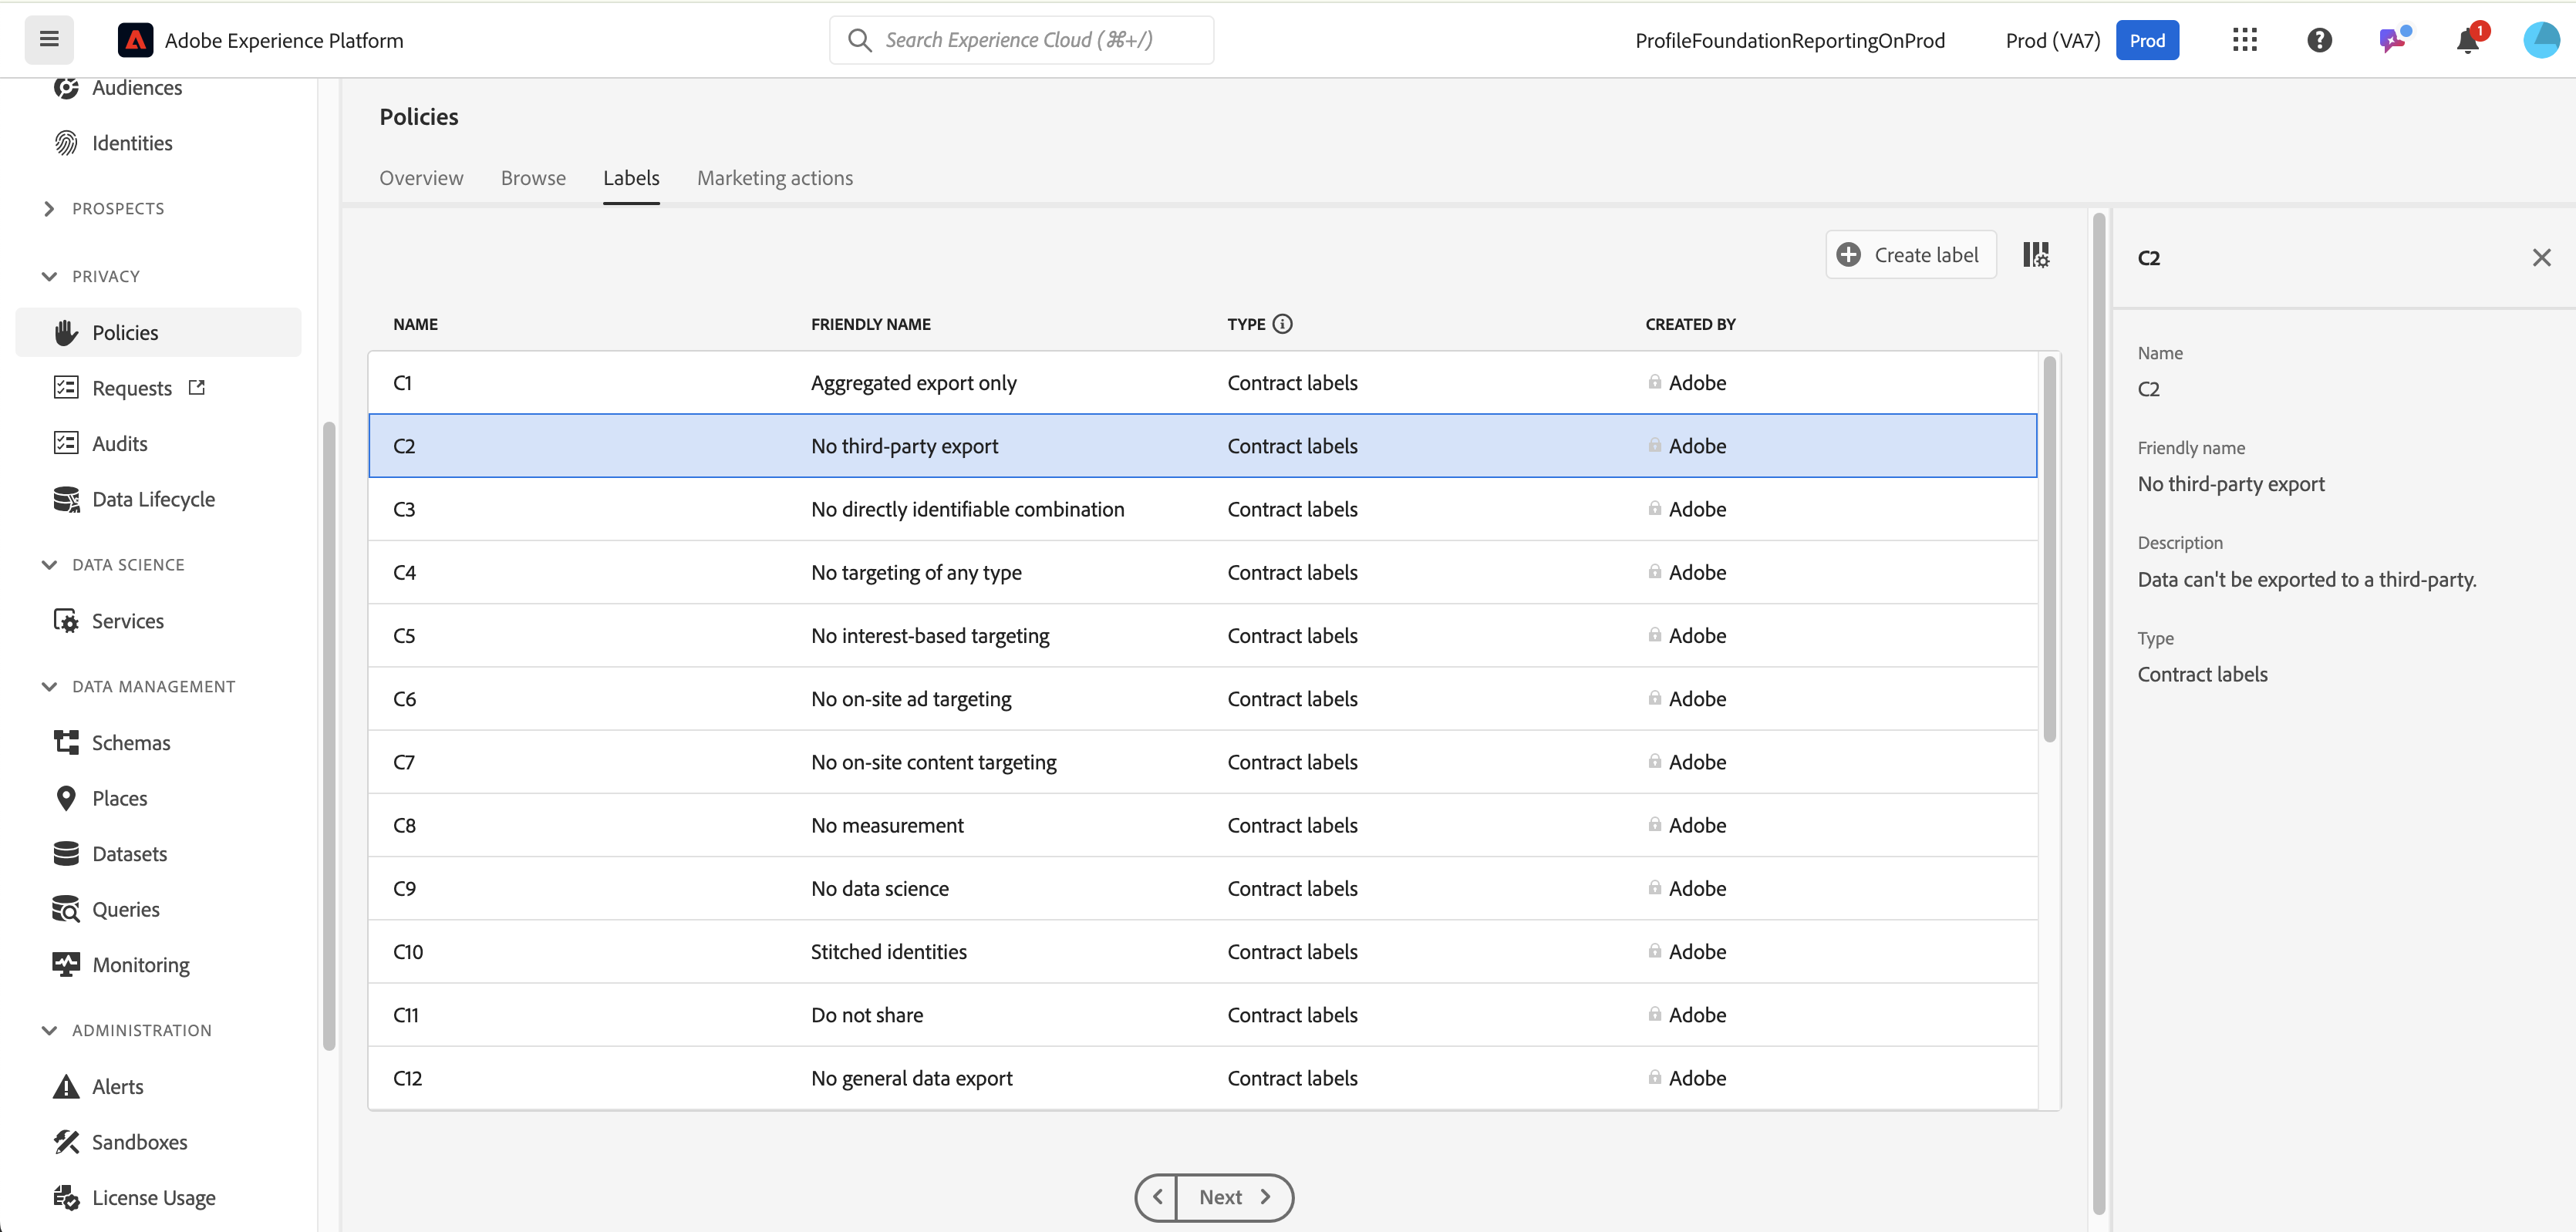
Labels available
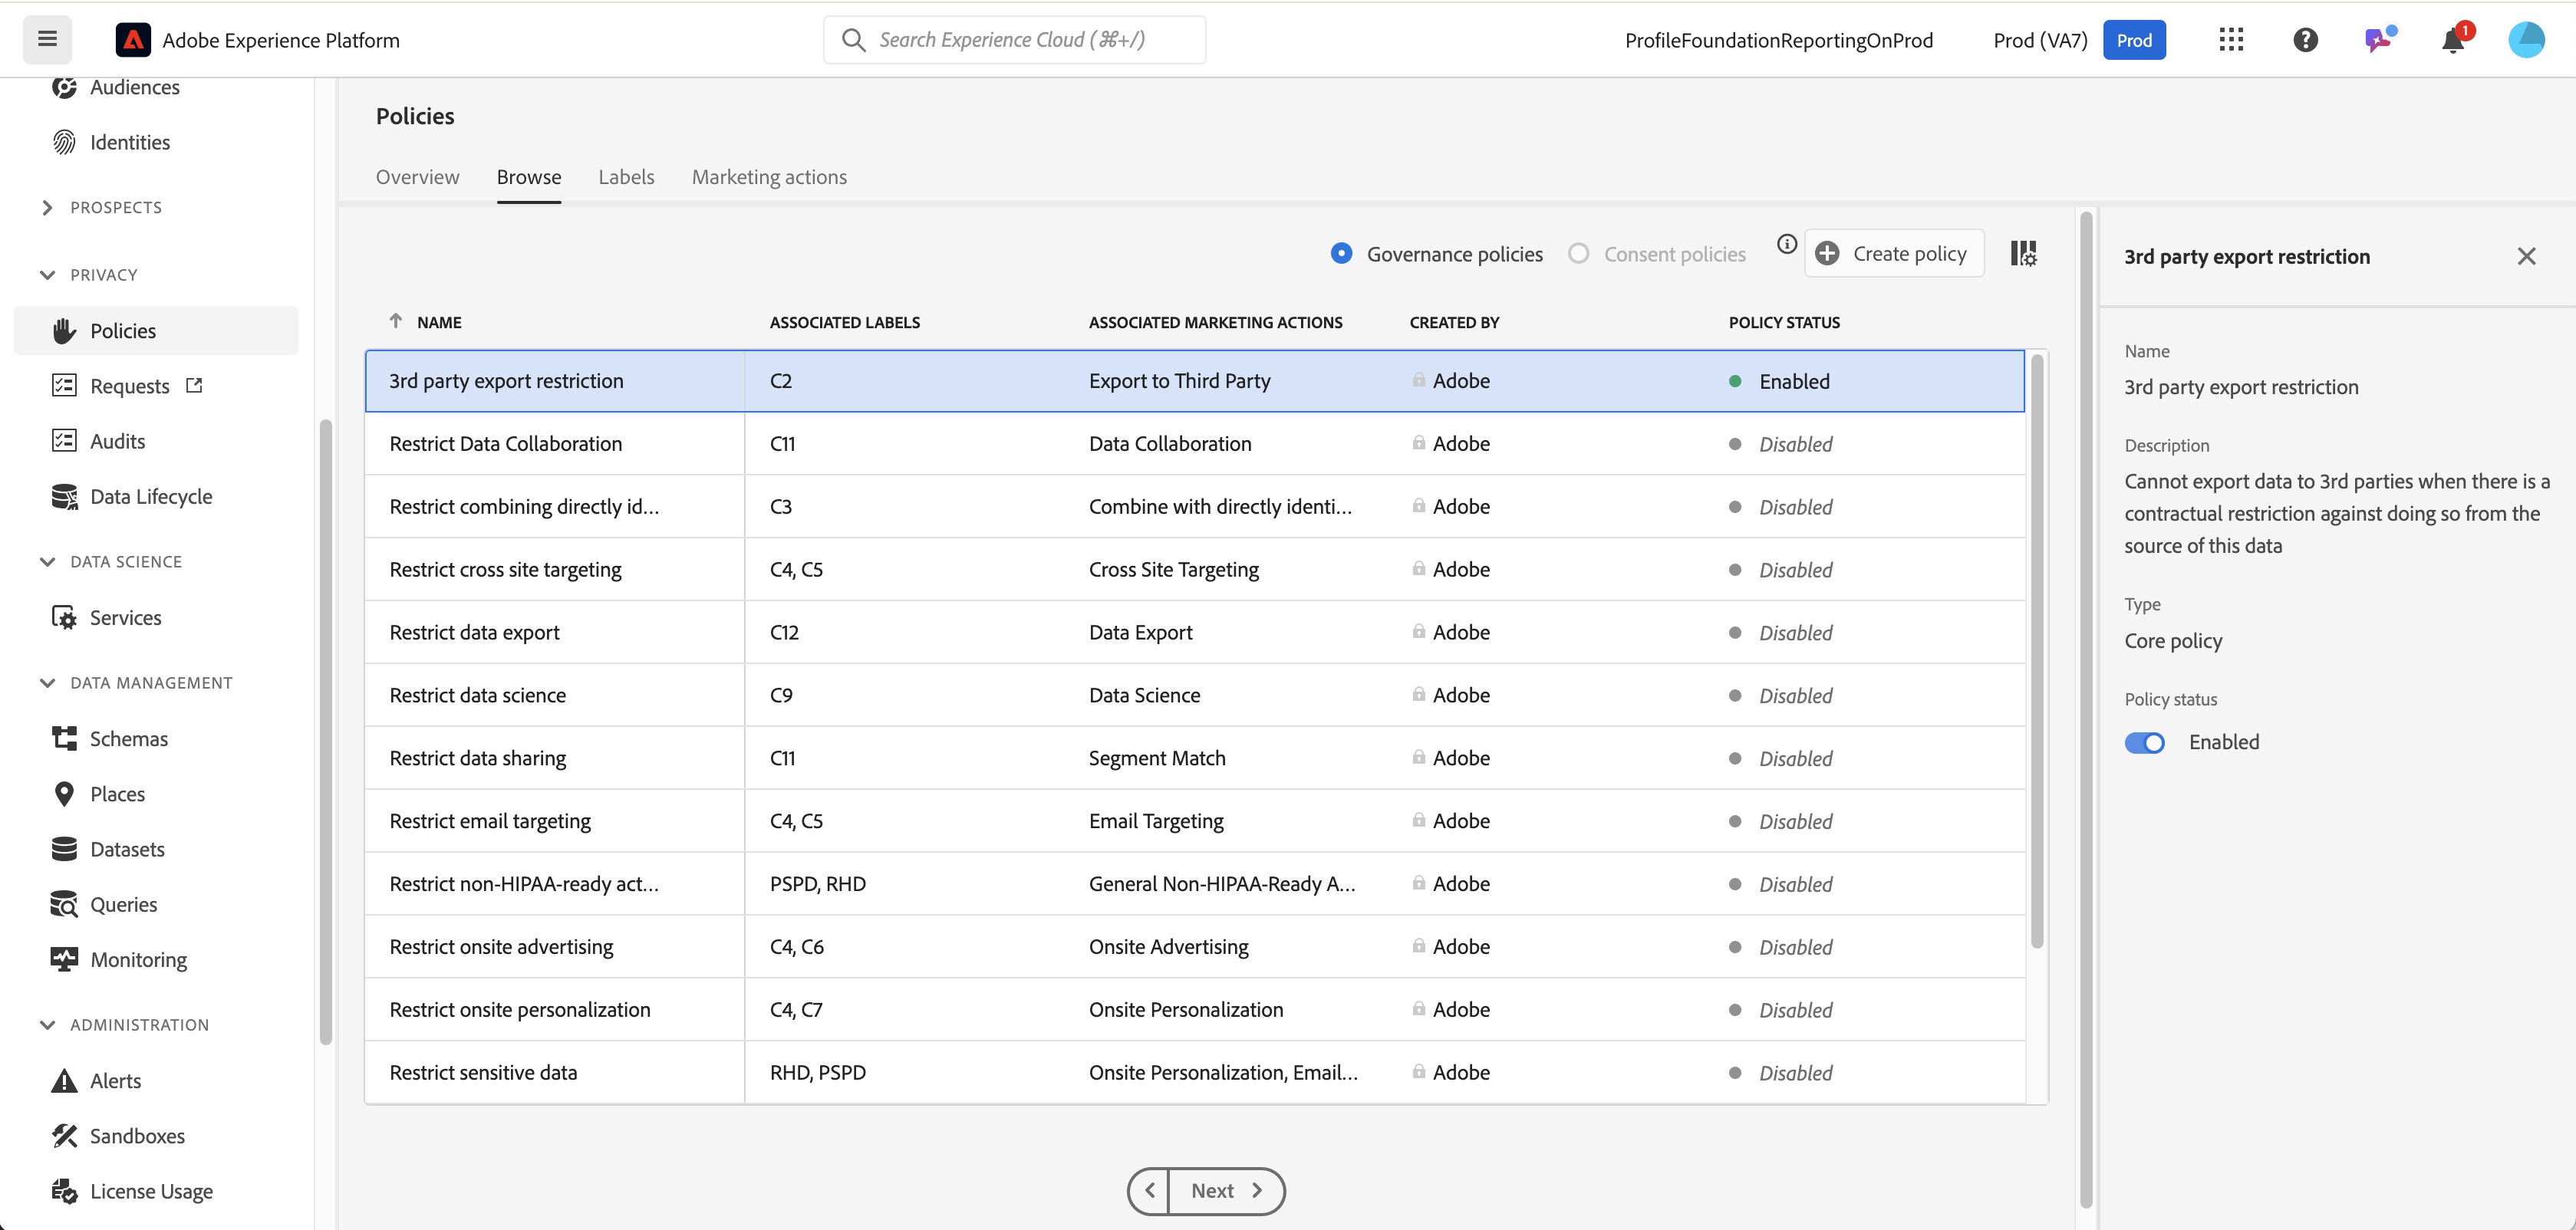
3rd Party Export Restriction
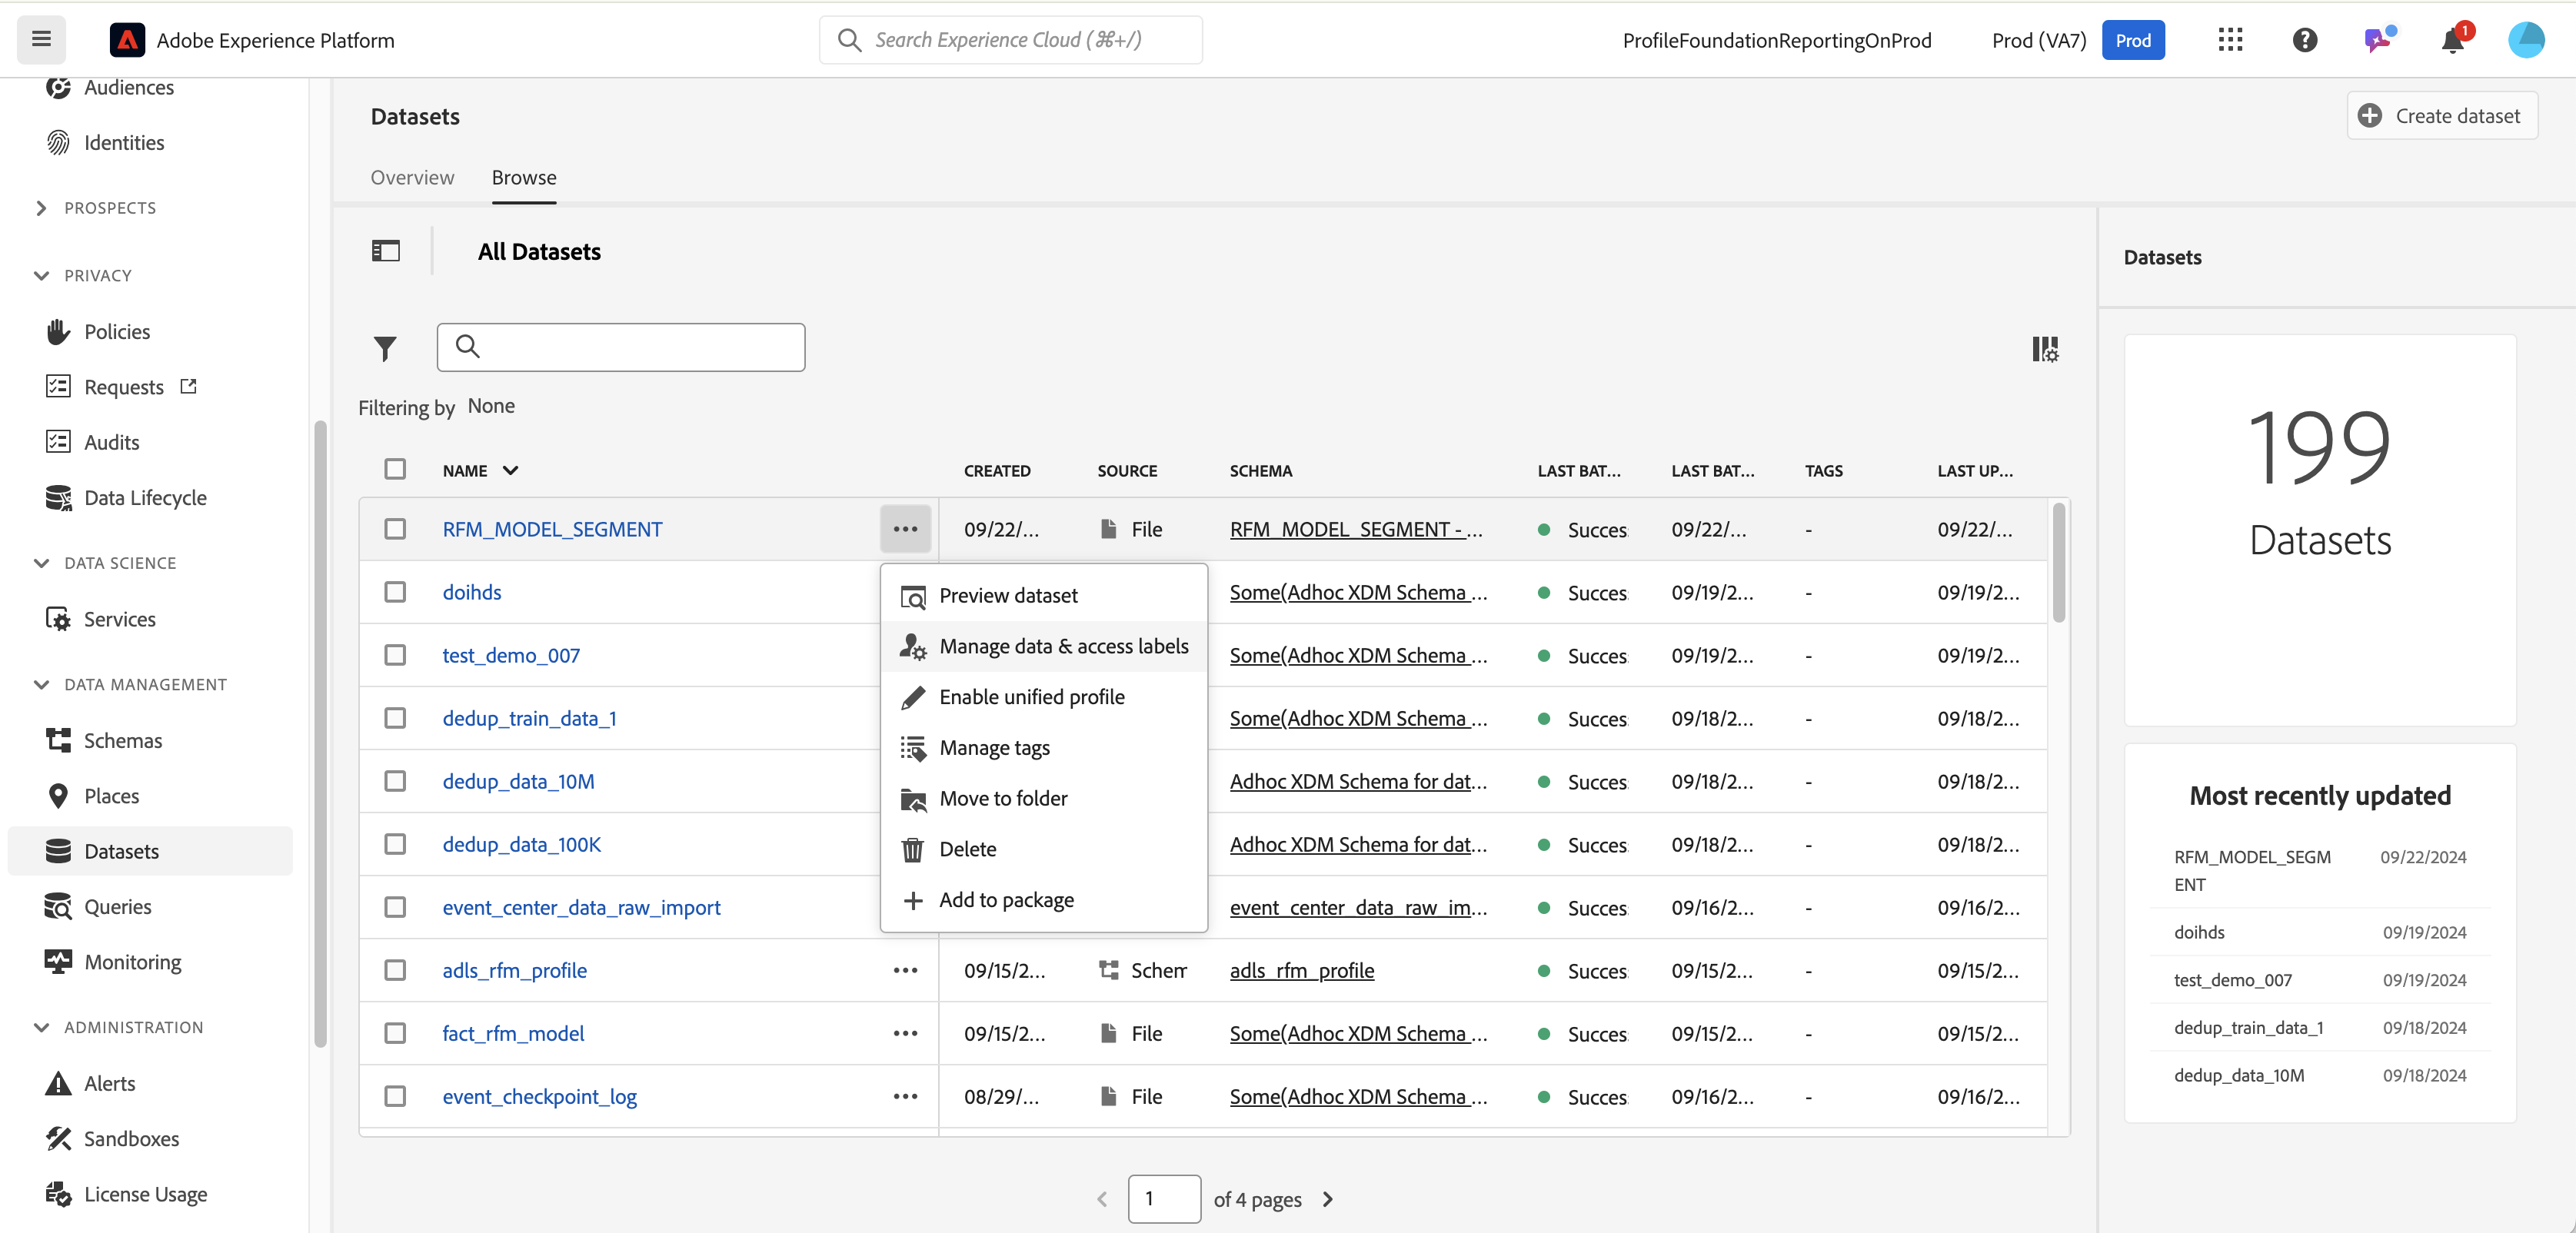
Click on the ellipsis to access the Data Labels
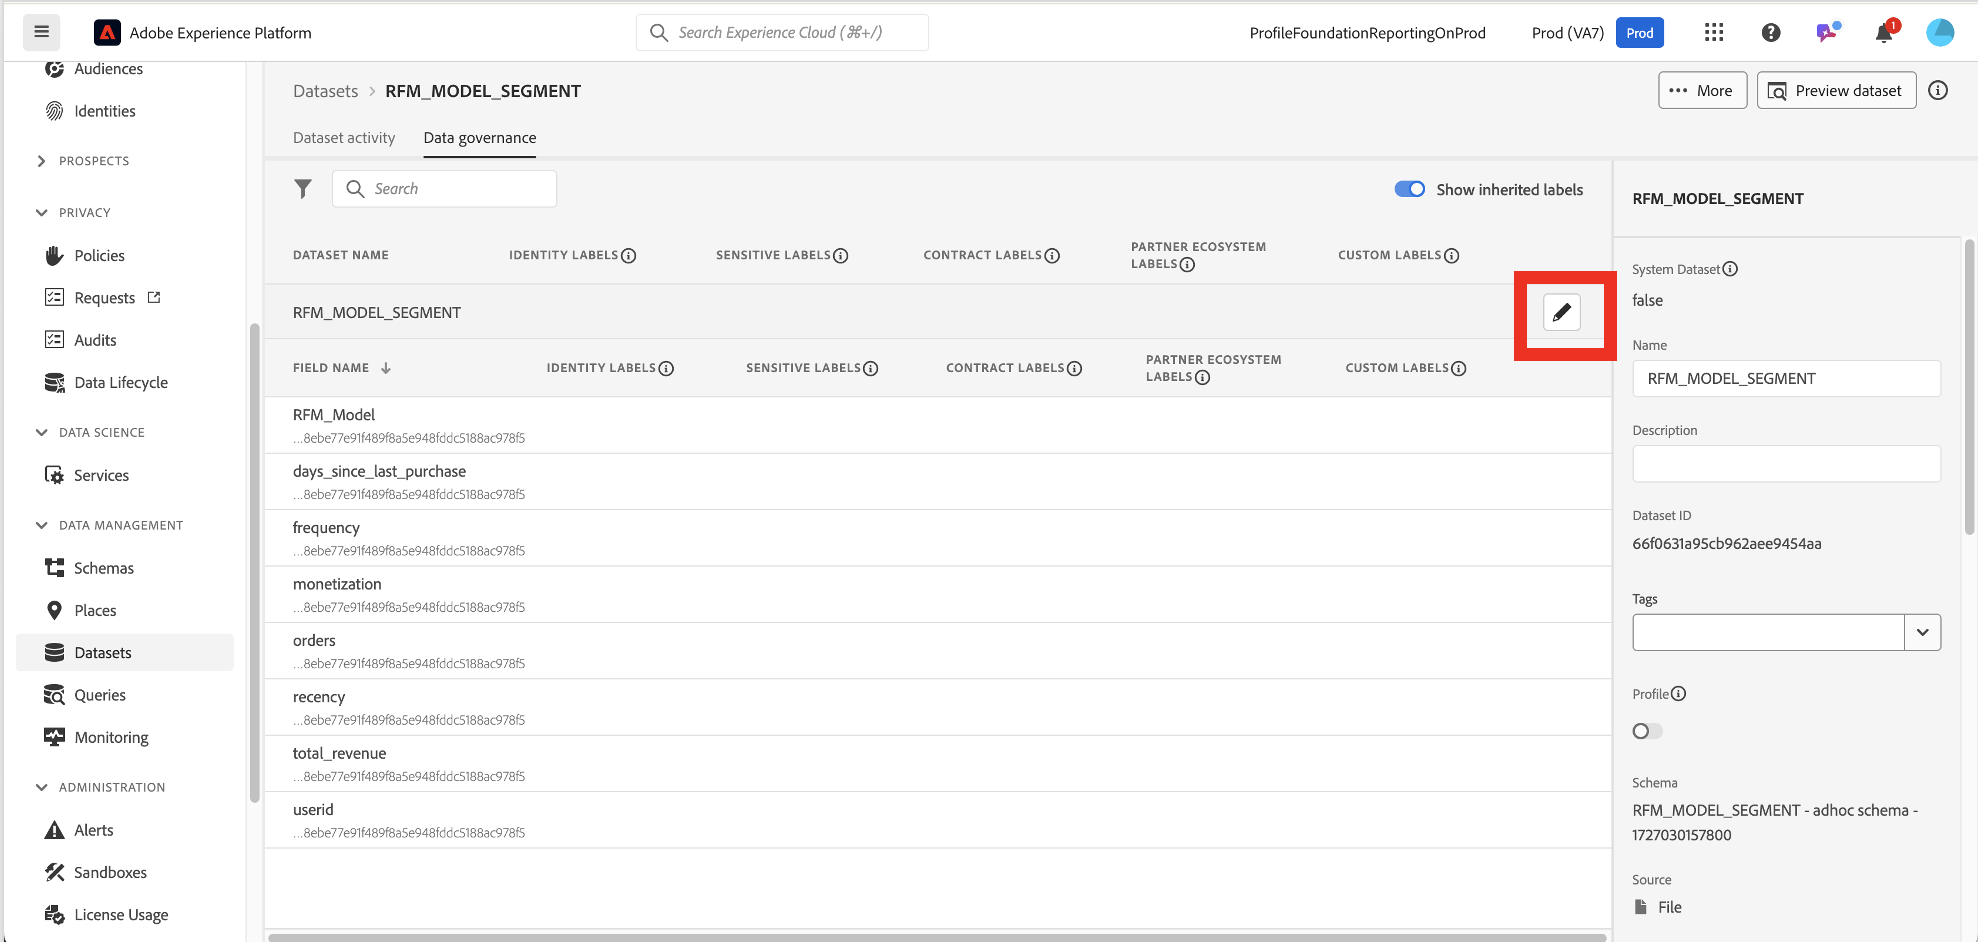
All fields are available as a flat list
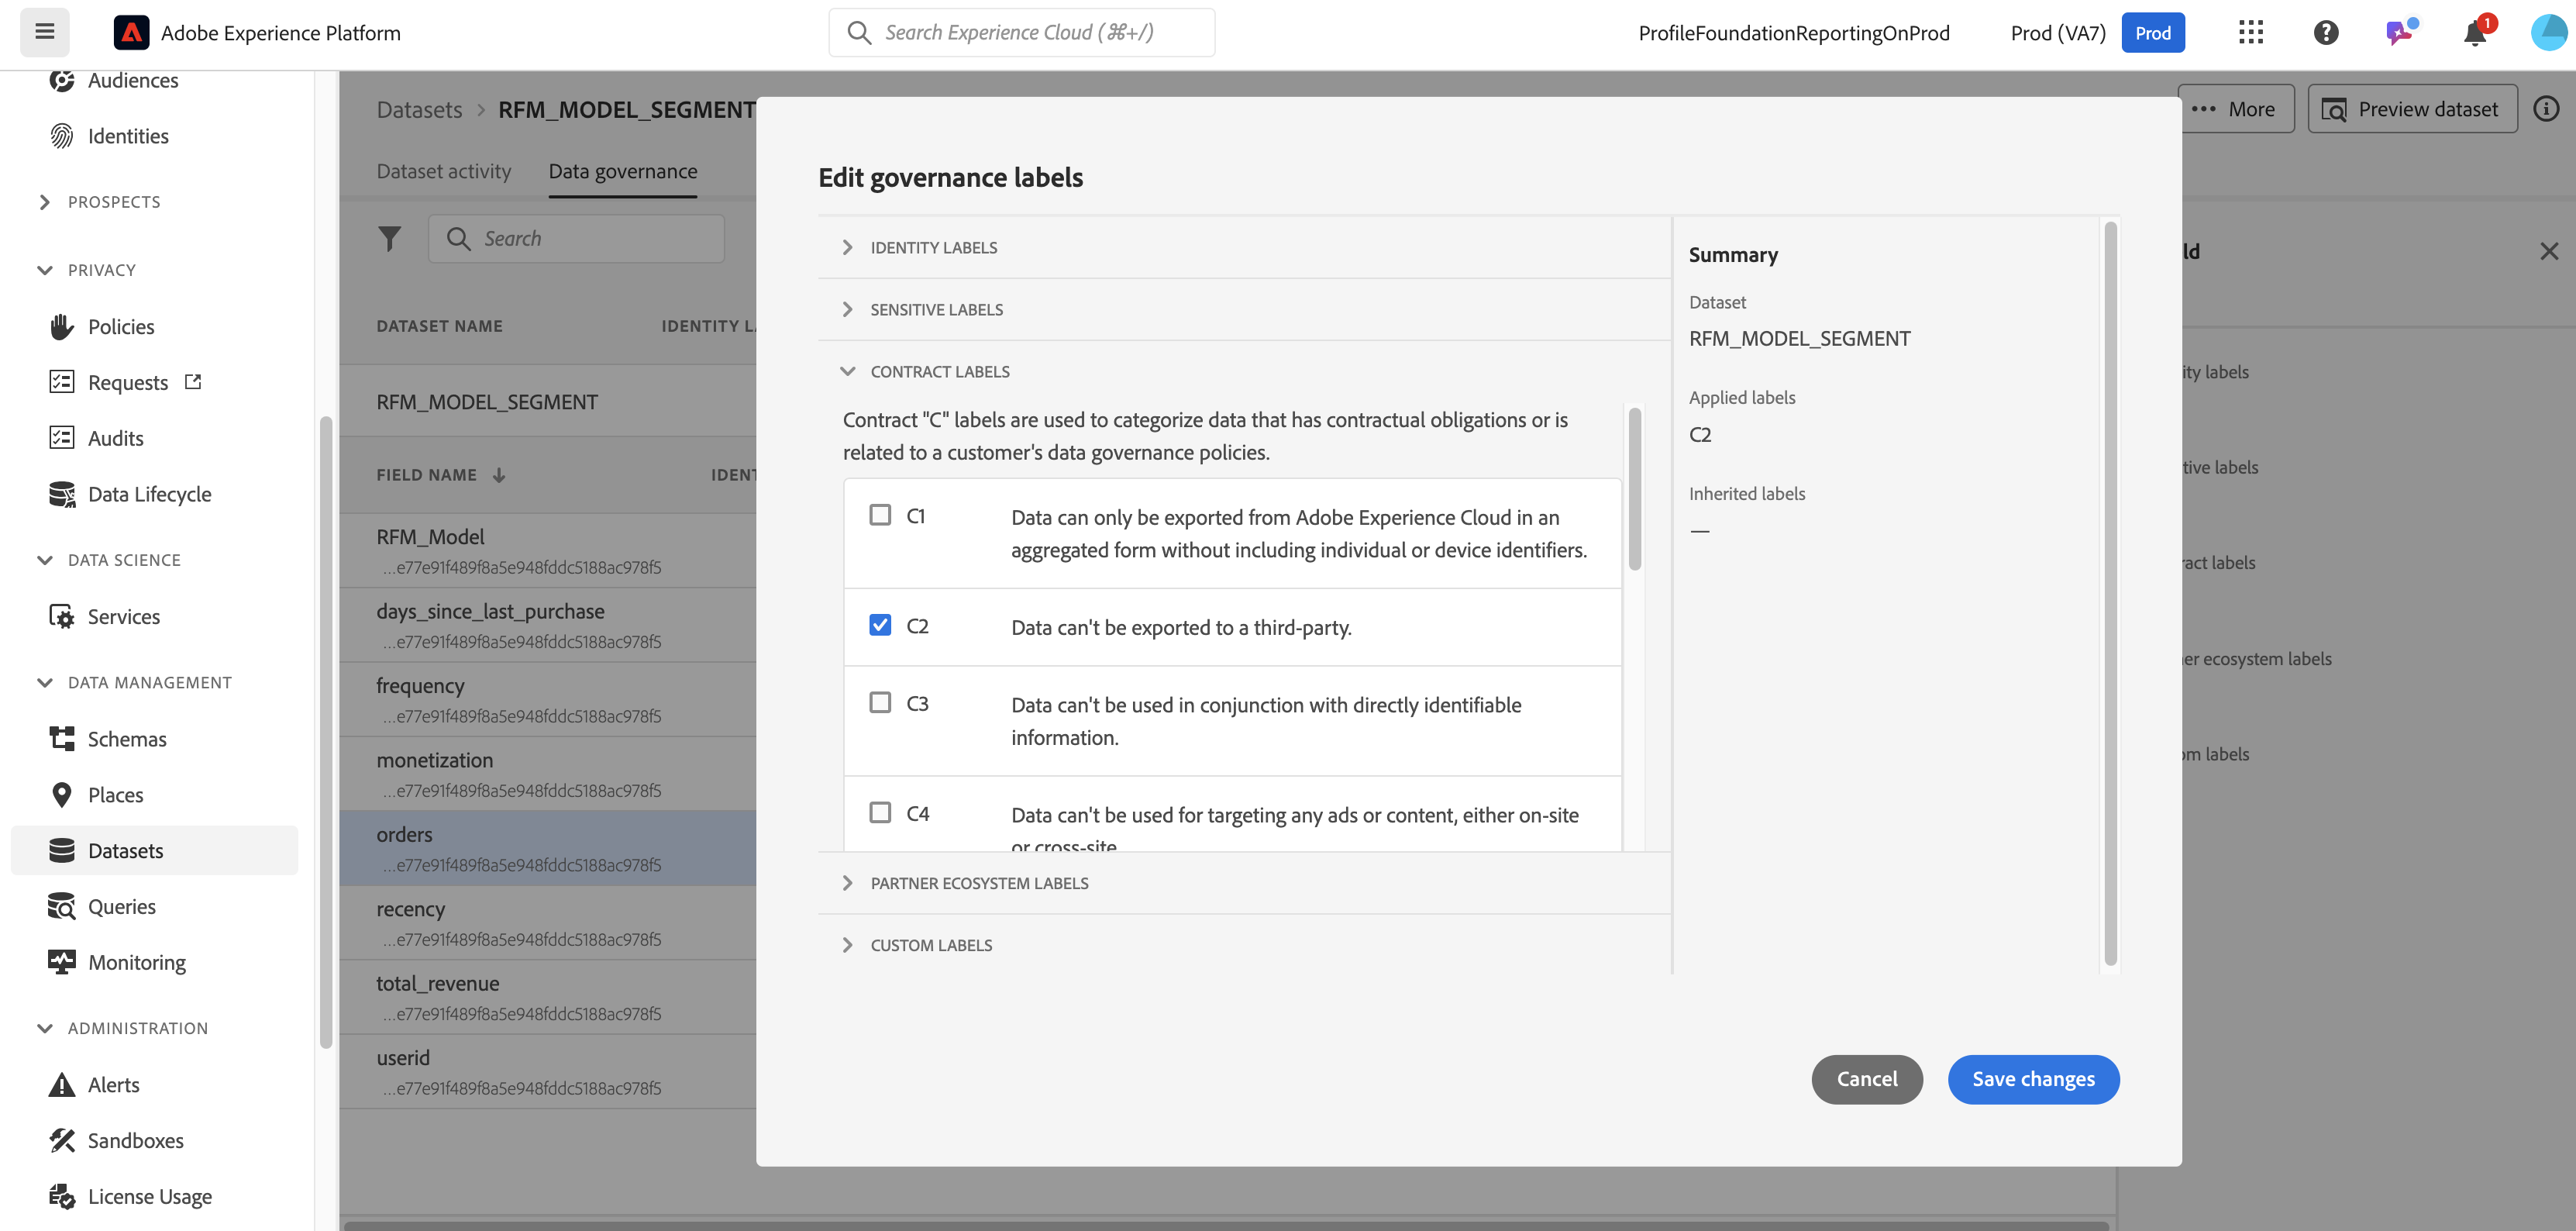
Apply a label on an entire dataset
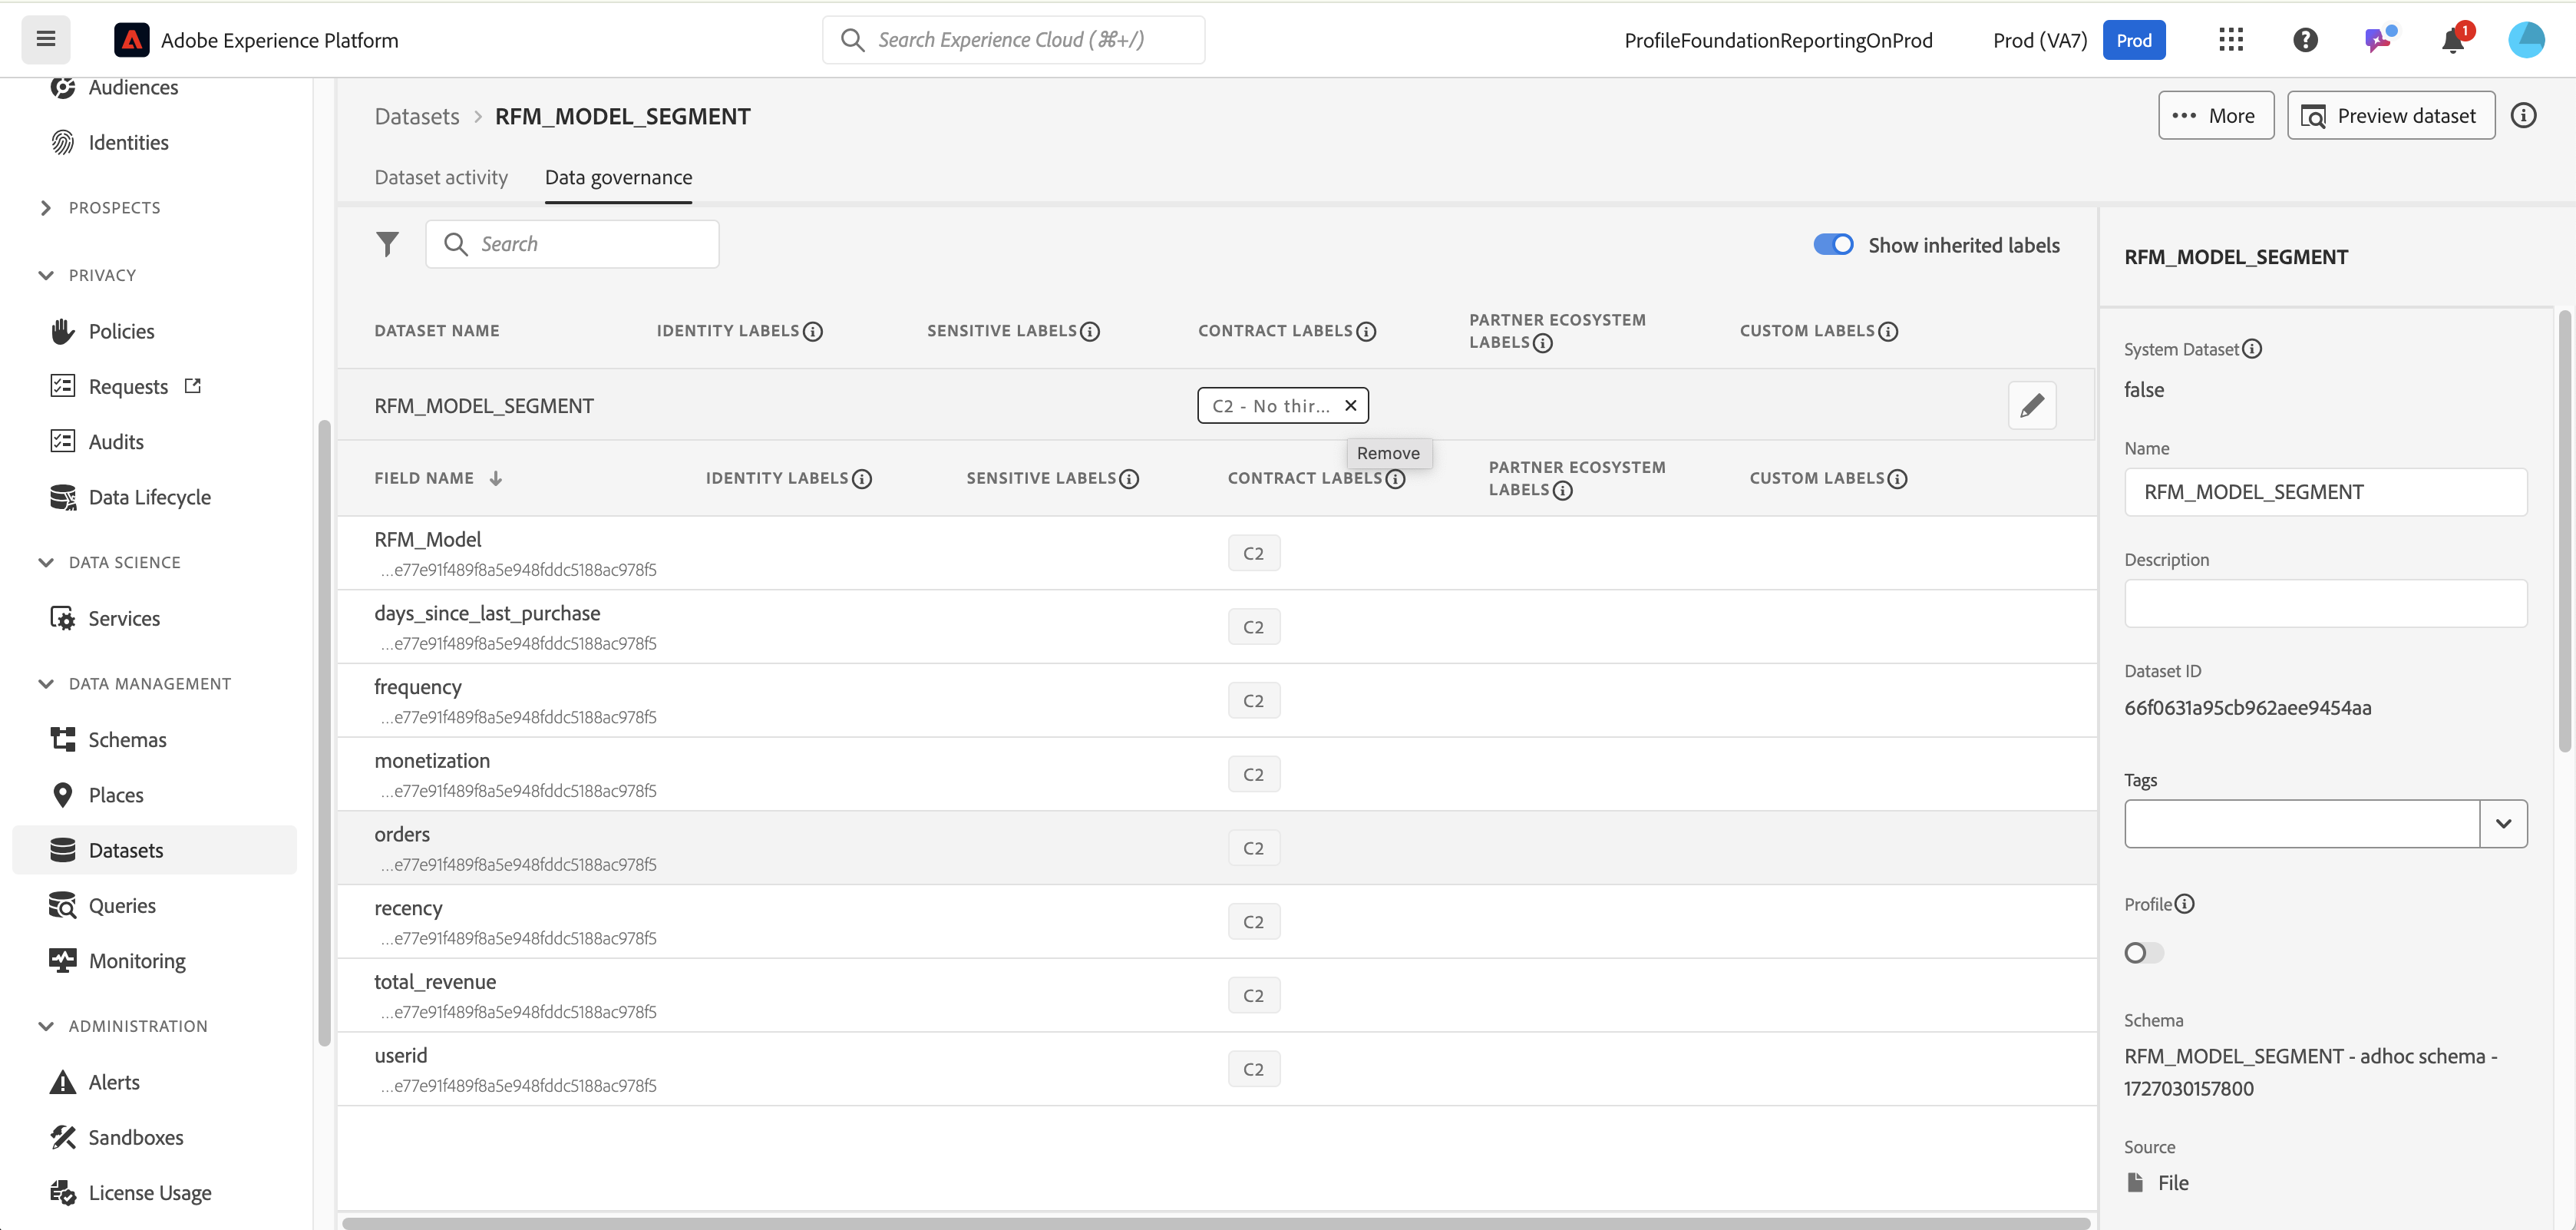
C2 contract labels are now applied to all of the fields
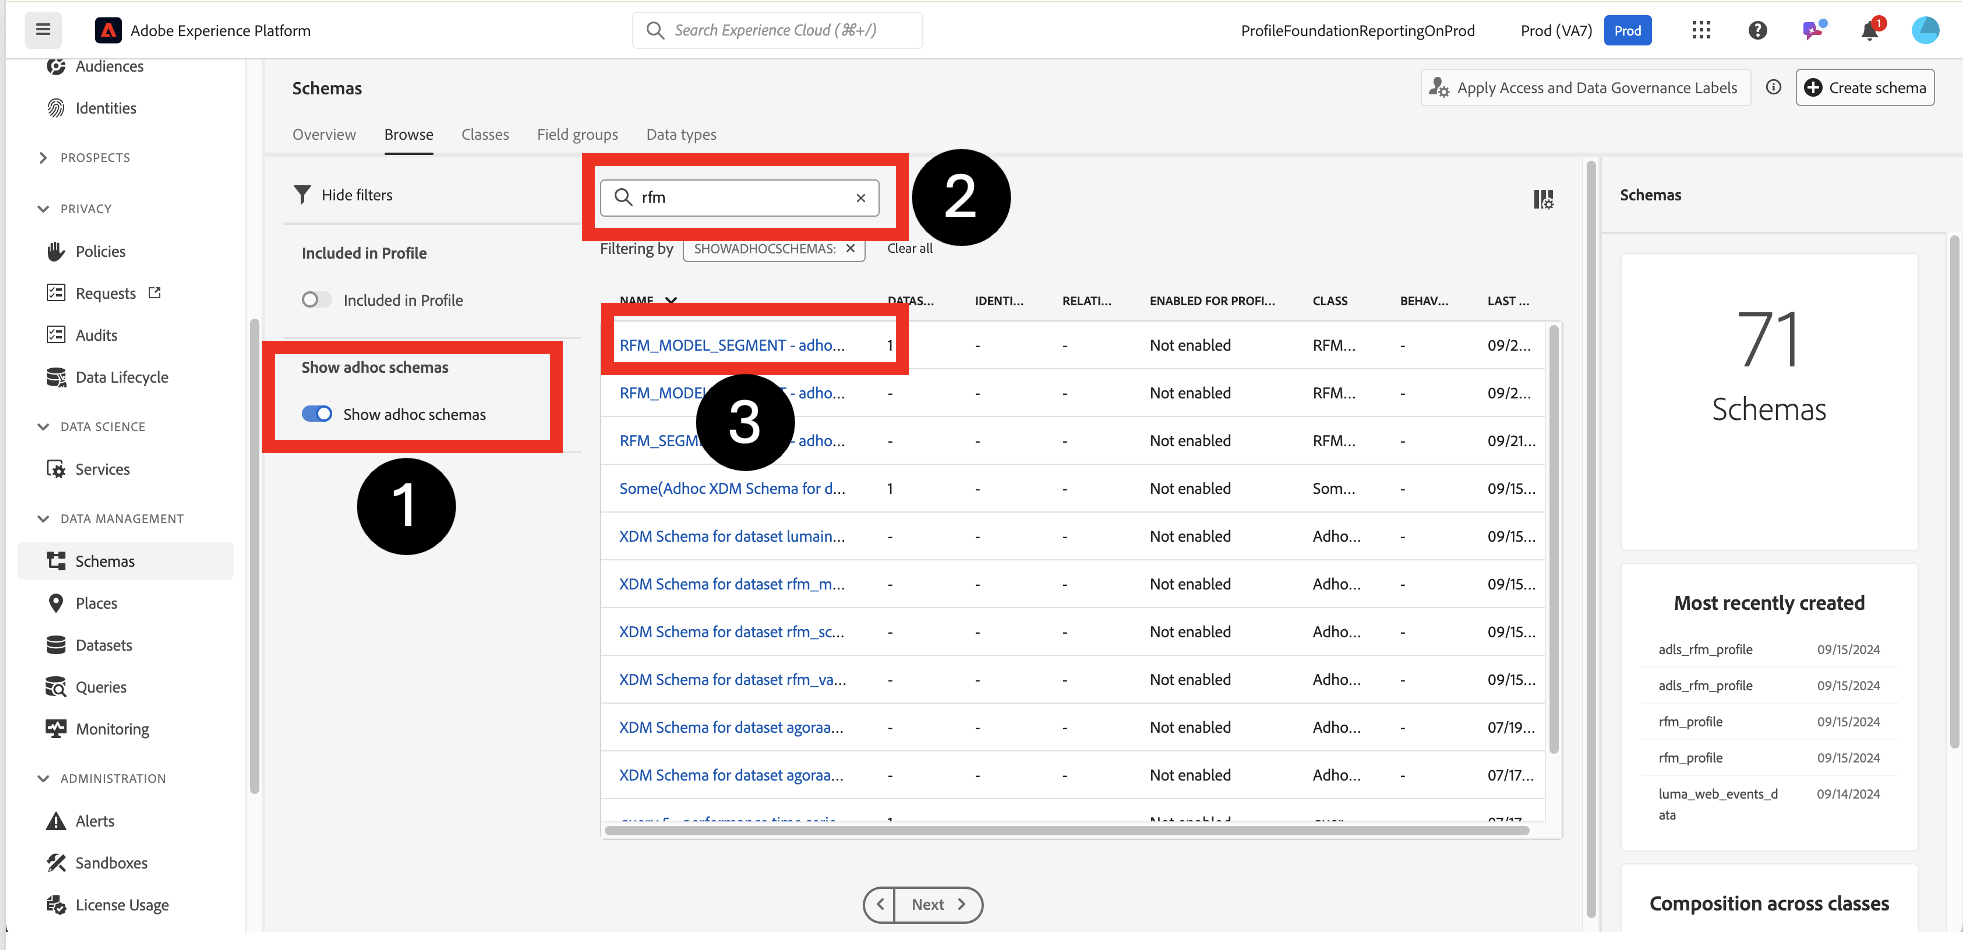
Locate the ad hoc schema to apply the DULE labels on
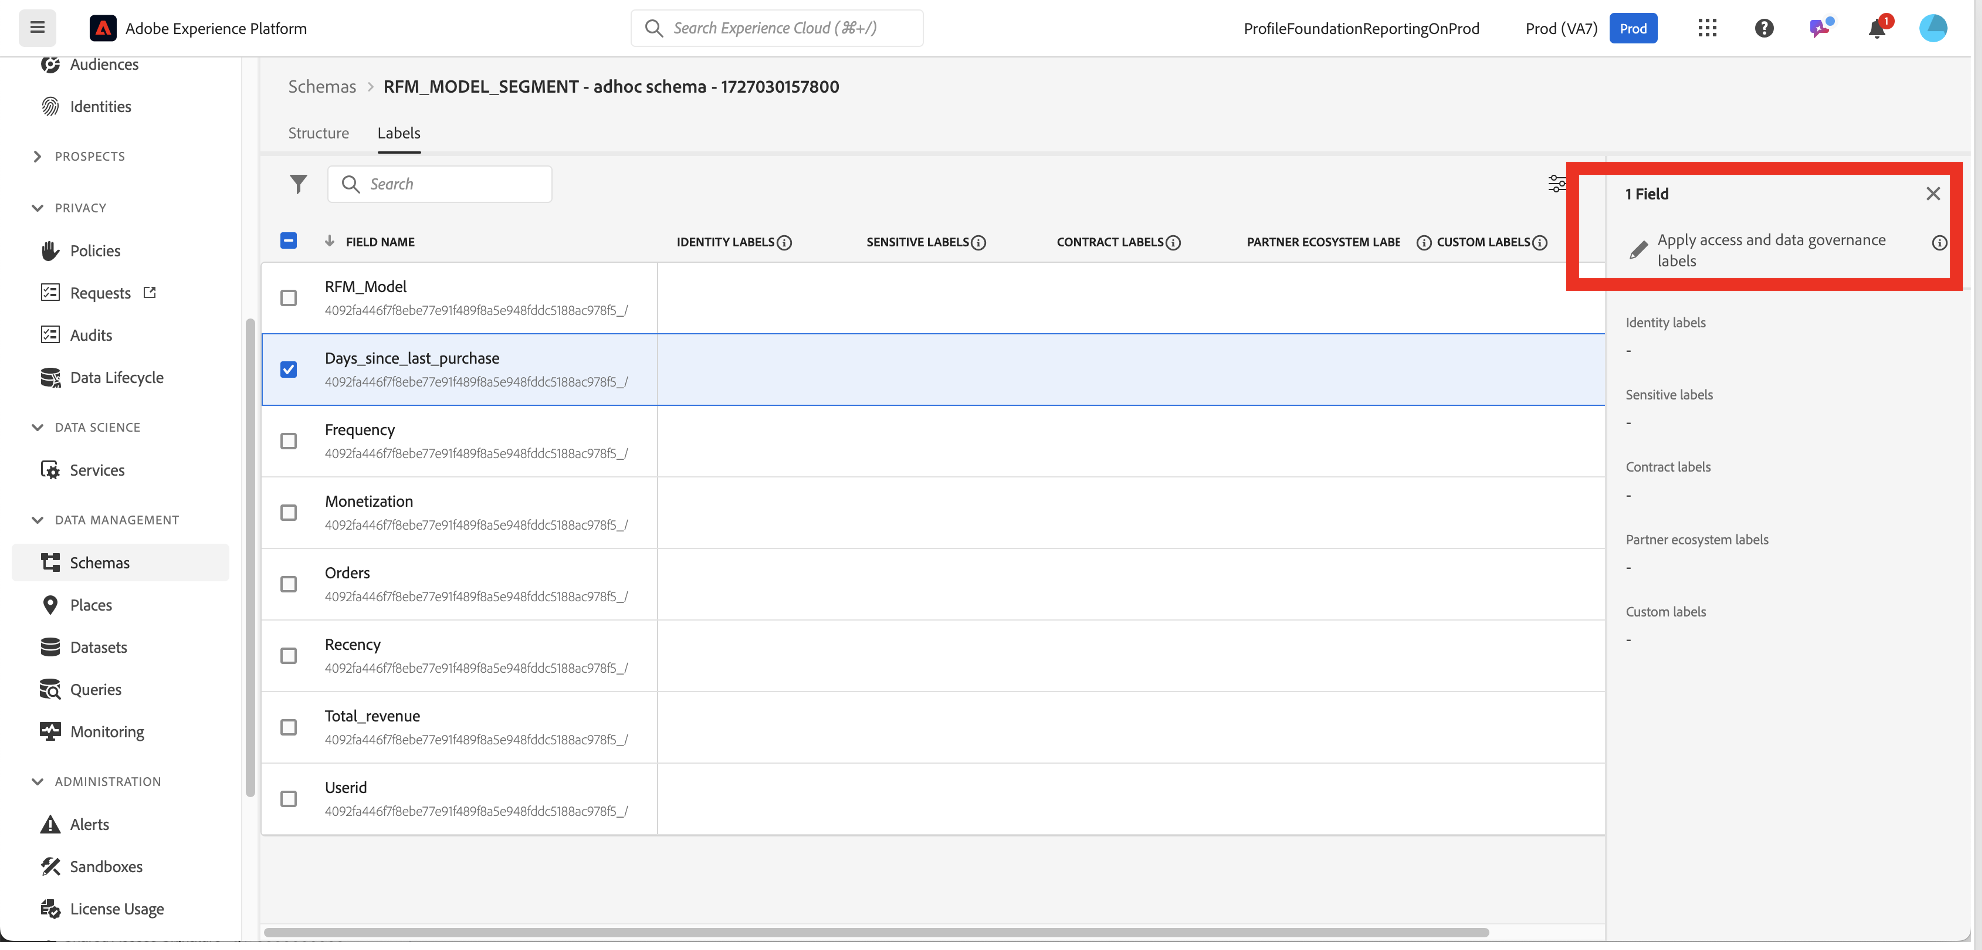
Apply the labels on a field
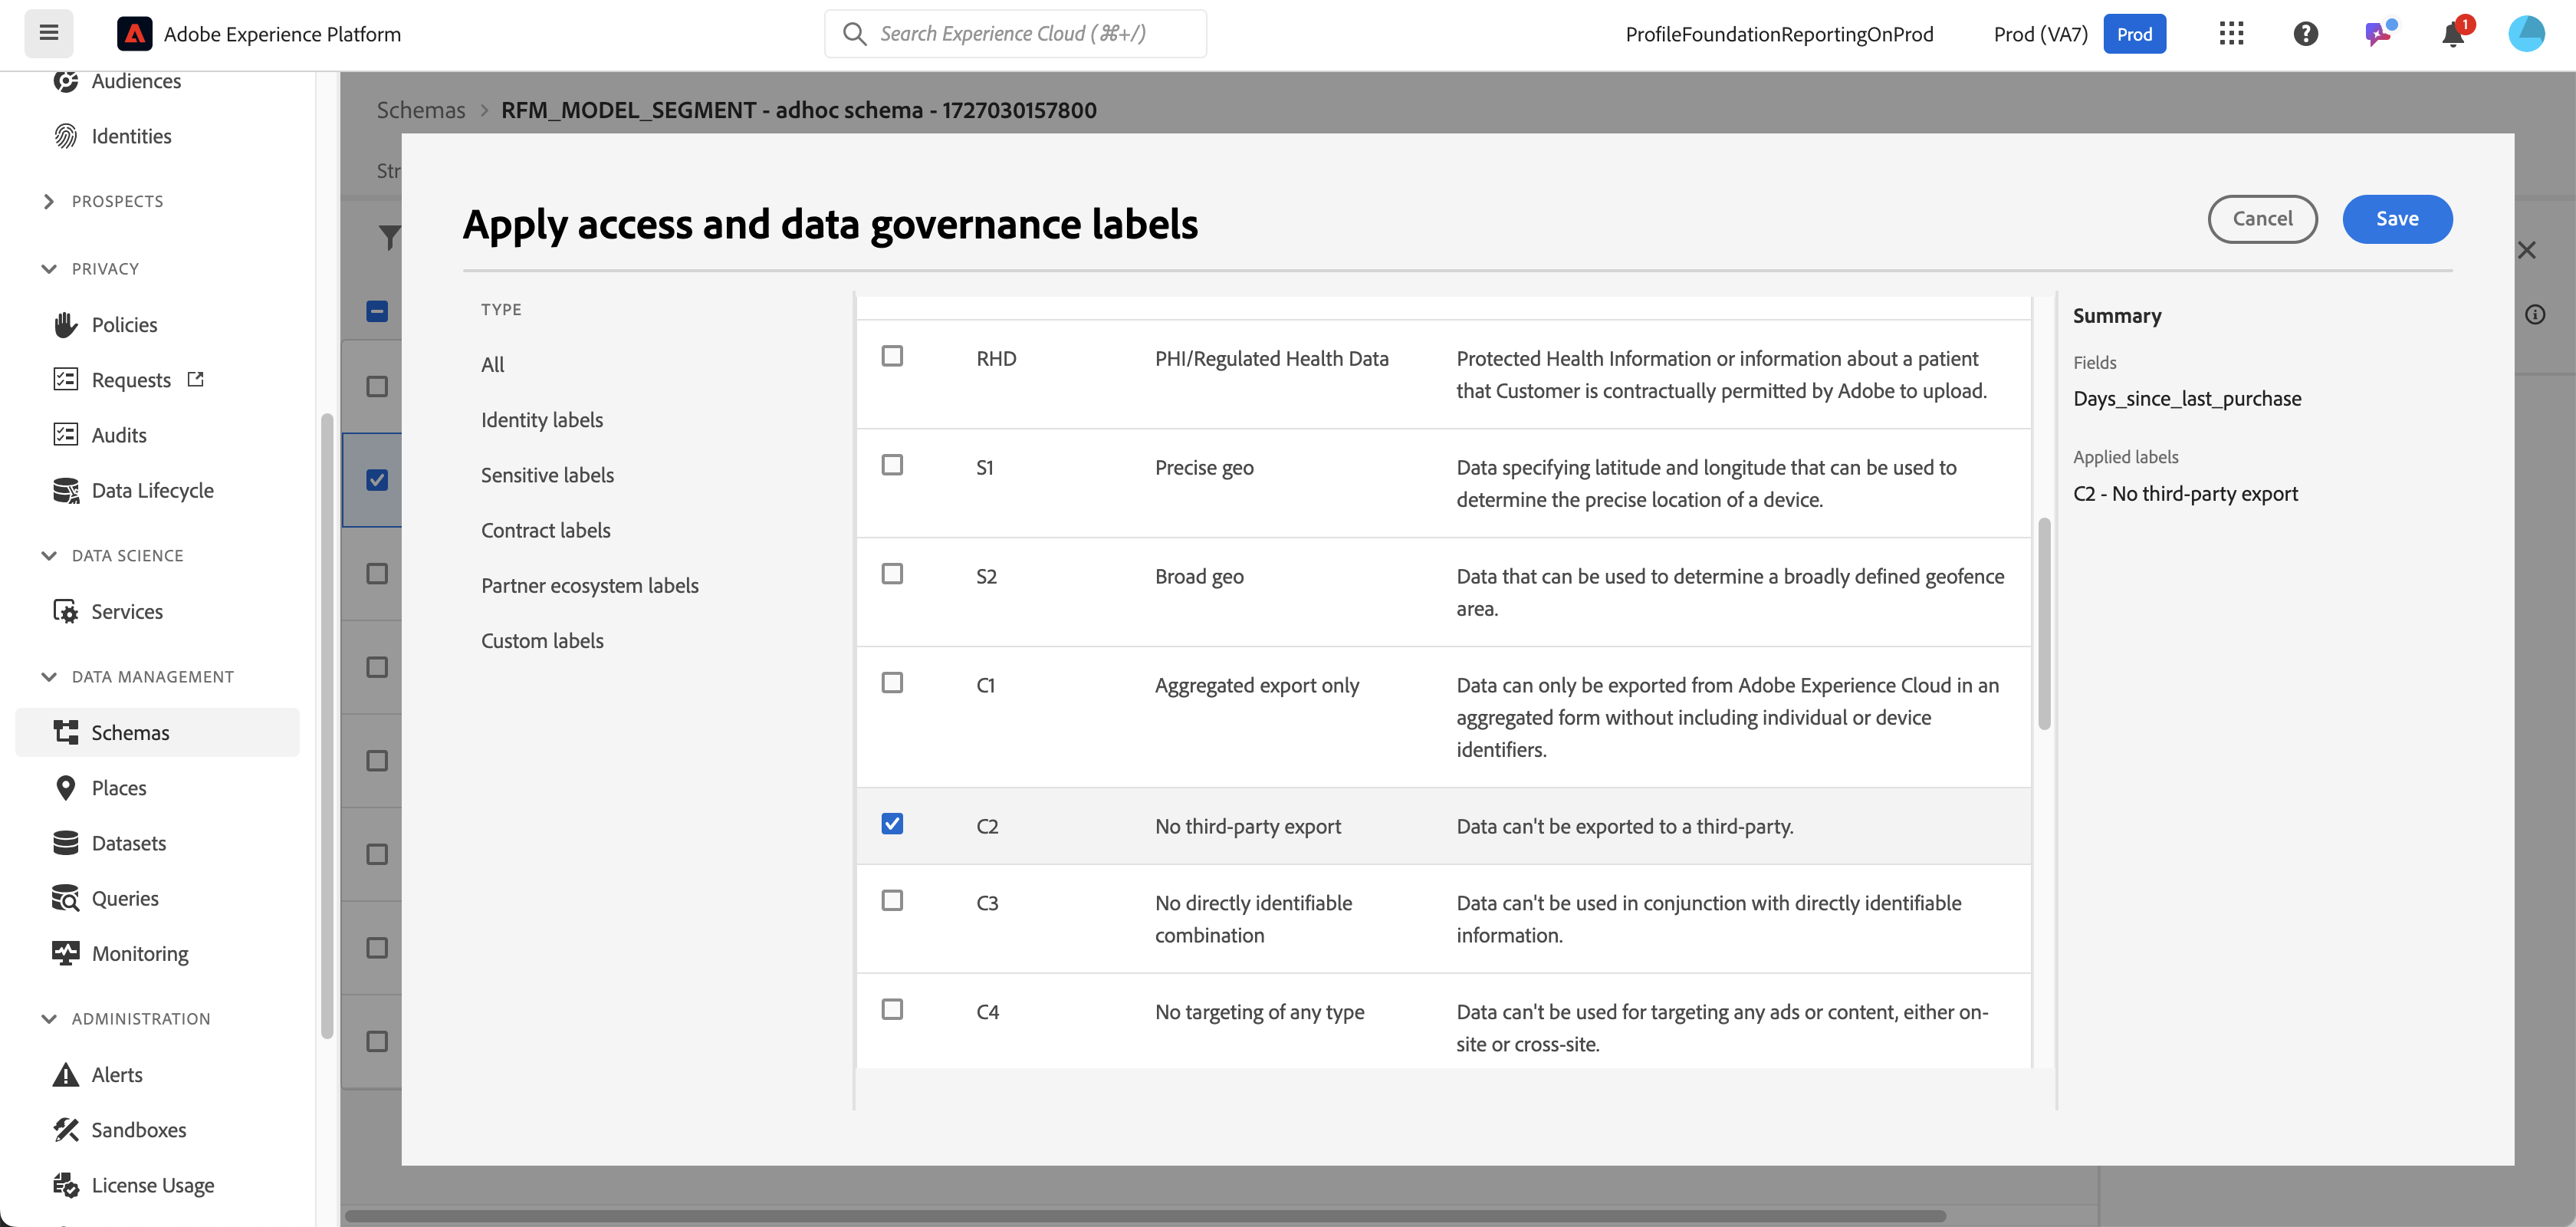
Choose the labels for the field

Label applied to an individual field